
Display Cases / Plug-in
8
www.ggmgastro.com
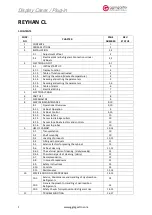
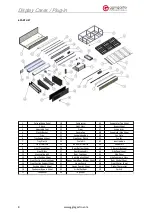
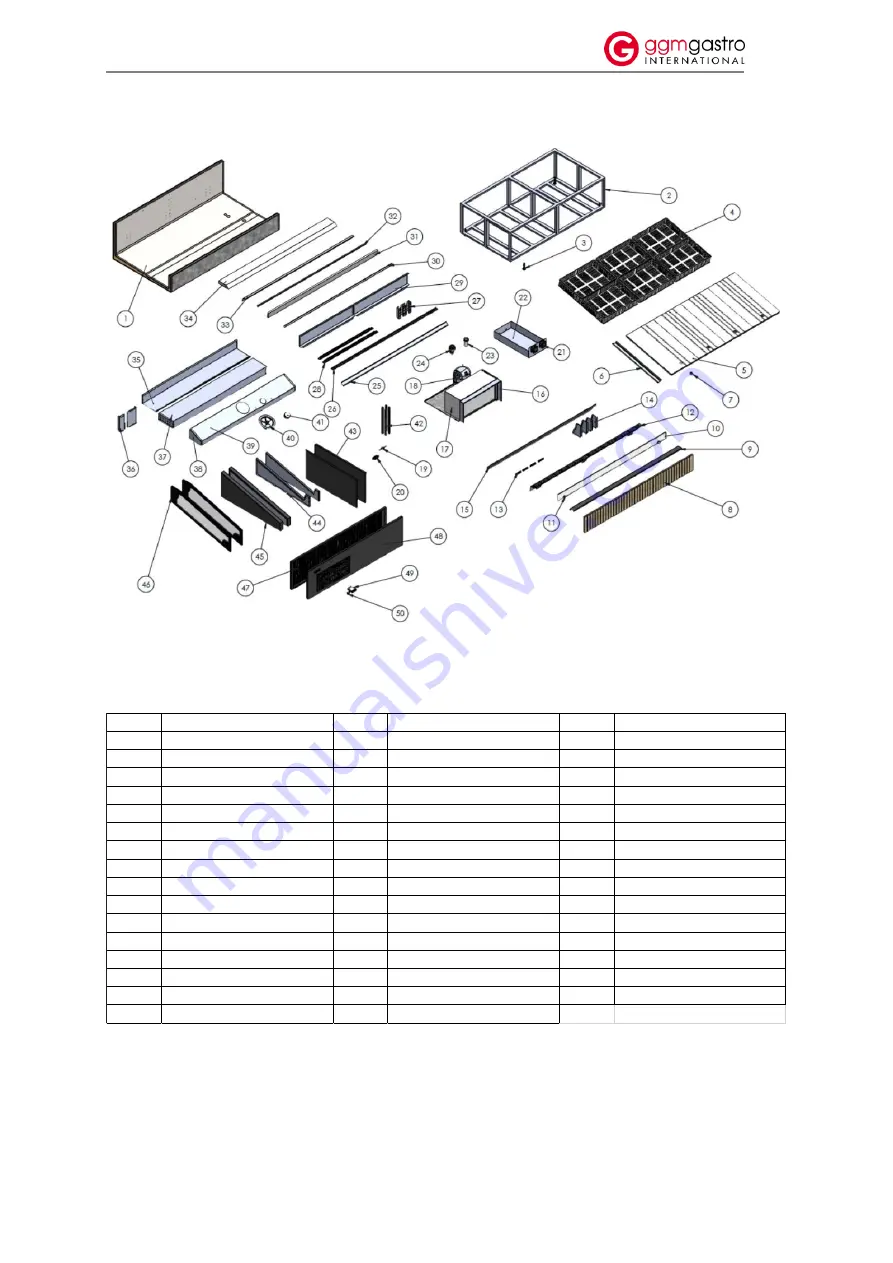
6.PART LIST
1
Polyurethane Panel
18
Compressor
35
Evaporator Top Sheet
2
Chasis
19
Sight Glass
36
Bypass Sheet
3
Adjustable Feet
20
Dryer
37
Evaporator
4
Plastic Basket
21
Square Fan
38
Evaporatör Side Sheet
5
Tray
22
Evaporating Box
39
Fan Plate
6
Tray Support Sheet
23
Pipe Cover Plastic
40
Fan Set
7
Tray Plastic
24
Drain Kit
41
Junction Box
8
Front Furniture
25
Bottom Air Baffle
42
Shutter Kit
9
Front Plating Sheet
26
Rear Bottom Sheet
43
Chassis Side Sheet
10
Front Glass
27
Rear Blowing Kit
44
Side Panel Sheet
11
Glass Holding Kit
28
Rear Top Sheet
45
Side Panel
12
Front Suction Sheet
29
Rear Blowing Sheet
46
Side Panoramic Glass
13
Front Suction Locking Sheet
30
Honey Comb Rear Bottom Sheet
47
Rear Shutter Sheet
14
Front Suction Support Sheet
31
Honey Comb
48
Front Shutter Sheet
15
Suction Under Z Sheet
32
Honey Comb L Sheet
49
Digital Thermostat
16
Condenser Bypass Sheet
33
Air Baffle Sheet
50
Switch
17
Condenser
34
Top Sheet