background image

RIDER R 65 
OPERATING MANUAL

 V02_2016


GHIBLI & WIRBEL S.p.A. 

Via Circonvallazione 5 - 27020 Dorno -PV- Italy 

Tel +39.0382.848811 - Fax +39.0382.84668 

www.ghibliwirbel.com


17 

When recharging the batteries, keep the recovery tank lifted and blocked. Make sure that the battery charger 
fits  the  installed  batteries  both  for  capacity  as  for  type.  Use  ONLY  TRACTION  batteries  OPEN/PURE 
LEAD/ACID  or  GEL.  Never  charge  a  GEL  battery  with  an  unsuitable  battery  charger.  Carefully  follow  the 
instructions given by the manufacturer of batteries and battery charger. 


Danger of gas exhalations and emission of corrosive liquids 
Fire danger: do not approach with free flames. 


6.6 

Battery charge level gauge 

When the key is in position 1, the digital display (Nr. 4 of CONTROLS AND INSTRUMENTS table) indicates: 
1.  The charge level of the battery; 
2.  The level of minimum expected voltage / acceptable to the batteries (adjustable in function of used batteries); 
3.  Working hours. 

 
The  brush  and  vacuum  motors  automatically  turns  off  when  the  battery  level  is  at  minimum.  The  remaining 
charge can be used to bring the machine to the recharging point 


6.7 

Installing the brushes 


Turn the key switch off (O) and remove the key, before changing the brushes, and before opening any access 
panels. 


1.  Check if scrubber group is lifted up. Turn off key interruptor; 
2.  Insert the brush in its place, trying to center the hexagonal hub (Fig. 1A); 
3.  Push up the brush using your hands until its locking; 
4.  Put down scrubber group. 

 
To  avoid  floor  damages,  choose  with  care  the  type  of  brushes  and  of  disks,  more  suitable  for  the  treated 
surface. 


6.8 

Recuperation tank 

1. 

Connect squeegee hose to left plastic cover hole (Fig. 2); 

2. 

Assemble drain hose on tank coupling and tighten the clamp (Fig. 2); 

3. 

Check that drain hose cap is screwed. 


6.1 

Filling solution tank 

Fill  with  clean  water  at  a  temperature  that  does  not  exceed  50°C.  Add  liquid  detergent  in  the  amounts  and  using  the 
procedures  recommended  by  the  detergent  manufacturer.  Use  only  a  minimal  percentage  of  detergent  to  prevent 
formation of an excess quantity of foam since too much foam may damage the aspiration motor. 
 

Always use low foam detergent. Introduce a small amount of anti-foam detergent in the recuperation tank before 
starting to work to be sure to prevent foam from being generated. Never use pure acids. Put the refill opening 
cover back in place after filling the tank. 

Summary of Contents for RIDER R 65

Page 1: ...RIDER R 65 OPERATING MANUAL V02_2016...

Page 2: ...ne type RIDE ON SCRUBBER DRYER Machine name RIDER R 65 Model RIDER R 65 RD 55 RIDER R 65 FD 65 RIDER R 65 FD 80 Net weight without with batteries 130 210 Kg 140 220 Kg 163 240 Kg Gross weight without...

Page 3: ...tank closing lever 3 Steering column 14 Scrubber group lifting lever 4 Accelerator 15 Battery connector 5 Footboard 16 Water regulation lever 6 Scrubber group 17 Driving wheel 7 Squeegee 18 Brush 8 C...

Page 4: ...that all the materials indicated on delivery documents have been received and also that the machine has not been damaged in transit If it has been damaged this damage must be immediately reported to...

Page 5: ...al brushes Aspiration motor symbol Used to indicate the aspiration motor switch Forward reverse speed selector symbol Main switch symbol On Off key operated switch 5 SYMBOLS USED IN THE MANUAL Warning...

Page 6: ...ns must be carried in well aired places far from heat sources When you manipolate batteries always wear safety cloth according to the currently laws In particular before manipulating batteries take of...

Page 7: ...the recharging point 6 7 Installing the brushes Turn the key switch off O and remove the key before changing the brushes and before opening any access panels 1 Check if scrubber group is lifted up Tu...

Page 8: ...nt ordinary maintenance If this is not the case then enquire with your nearest GHIBLI WIRBEL S P A service center 26 When replacing machine parts always ask for ORIGINAL spare parts from your Authoriz...

Page 9: ...ow the operator and leave pedal accelerator These procedures will block all machine movements To start working again after you have solved the problem reconnect connector turn On Off key to 1 and rele...

Page 10: ...ecovery and cleaning tanks Fig 7 3 4 Unlock the plastic cover placed on the top of the machine Fig 9A 5 Turn the back part of the cover and take away the complete cover 6 Unscrew the filter from the p...

Page 11: ...over or replace it as necessary 5 Reassemble by performing these procedures in reverse order 11 3 Cleaning the vacuum hose If aspiration is insufficient check that the aspiration tube is not clogged...

Page 12: ...hes that are supplied on request and according to your specific needs 12 4 Too much foam is generated Check that low foam detergent is used Add if necessary a small quantity of anti foam liquid to the...

Page 13: ...mento Check the status of squeegeerubberblades and wheels V rifier l tat deslames de racletteen caoutchouc etroues Statusvon Rakelgummis Klingenund R der berpr fen Controlo consumo gomasraspadoras y r...

Page 14: ...IBLI WIRBEL S p A Via Circonvallazione 5 27020 Dorno PV Italy Tel 39 0382 848811 Fax 39 0382 84668 www ghibliwirbel com 57 GALLERIA IMMAGINI IMAGE GALLERY GALERIE D IMAGES BILDERGALERIE GALER A IM GEN...

Page 15: ...65 OPERATING MANUALV02_2016 GHIBLI WIRBEL S p A Via Circonvallazione 5 27020 Dorno PV Italy Tel 39 0382 848811 Fax 39 0382 84668 www ghibliwirbel com 58 Fig 7 Fig 8 Fig 9A Fig 9B Fig 12 Fig 13 Fig 10...

Page 16: ...RIDER R 65 OPERATING MANUALV02_2016 GHIBLI WIRBEL S p A Via Circonvallazione 5 27020 Dorno PV Italy Tel 39 0382 848811 Fax 39 0382 84668 www ghibliwirbel com 59...

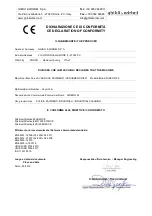
Page 17: ...IA PAVIMENTI INDUSTRIALI INDUSTRIAL CLEANING CONFORME ALLE DIRETTIVE CONFORMS TO Direttiva Directive 2006 42 CE Direttiva Directive EMC 2004 108 CE Direttiva Directive LVD 2006 95 CE Riferimento norme...

Page 18: ......

Page 19: ......

Page 20: ...Ghibli Wirbel S p A...

Reviews: