
EN
EN-8
- Remove the cap (46) from the hose (12)
and drain all the water contained in the
tank.
N.B.:
The amount of water that comes out can be
modulated by pressing on the end of the tube
(12).
- Screw the cap (46) back on the tube (12)
and put it back on its support.
9.1 MAINTENANCE AND
CLEANING
WARNING:
All maintenance operations must be per-
formed with the machine off and tanks
empty.
OPERATIONS TO
PERFORM DAILY
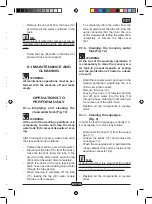
9.1.a - Emptying and cleaning the
clean water tank (Fig. 13)
WARNING:
At the end of the washing operations, it is
compulsory to drain and clean the clean
water tank (5) to prevent deposits or scal-
ing.
After draining the recovery water tank, drain
the clean water tank as follows:
- Position the machine over a drain outlet.
- Disconnect the tube (15) from the hooks,
close the tap (40), lower the tube to the
ground on the drain outlet, open the tap
(40) and let the water drain completely.
- Wash the inside of the tank, leaving the
drain hose open and adding clean water
through the top opening.
- When cleaning is complete, lift the tube
(15), leaving the tap (40) open; couple
the tube in its recesses.
- If necessary, adjust the quantity of wash-
ing water using the tap (4 Fig. 1).
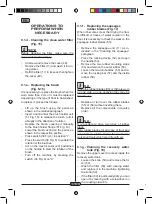
7.1.e - Adjusting the movement direc-
tion (Fig. 10)
If during the cleaning operation (rotating
brushes) we notice that the machine is not
moving in a straight line, but tends to go left
or right, you can adjust the direction of the
wheels (44).
- Start the machine and begin the rotation
of the brushes.
If the car tends to go to the right, gently
turn the wheel button (44) to “S” until the
direction is right;
If the car tends to go to the left, gently
rotate the wheel button (44) to “D” until
the direction is right.
7.1.f - Adjusting traction help
(Fig. 10)
The function of the hand wheel (45) is to in-
crease / decrease the ground pressure of the
brush in order to facilitate thrusting forward
the machine.
- Turning the hand wheel (45) clockwise
will decrease traction adjustment and
conversely it will increase it.
7.1.g - End of use and switching off
(Figg. 6-11)
- Once the cleaning operations have been
completed, do not shut off the machine
immediately: use switches (39) and (38)
to deactivate water dispensing and brush
rotation.
- Lift up the brush by pressing the pedal
(19 Fig. 11) as far as it will go, fitting it in
the designated slot.
- Continue with the aspirator inserted to
aspirate all the liquid on the floor, then
turn off the aspirator by pressing the
switch (35 Fig. 6).
- Lift the squeegee (11 Fig. 11) by lifting
the lever (3 Fig. 11).
WARNING:
Always lift the wiper and the end piece
after finishing the cleaning operations be-
cause this avoids the deformation of the
rubber blades and of the brush hairs.
- Press the switch (34 Fig. 6) on “0” to turn
off the machine.
- Disconnect the plug from the socket.
7.1.h - Maximum recovery tank water
level alarm
If during use of the machine, the vacuum
cleaner turns off, it means that the level of
liquid in the recovery tank has reached the
maximum level.
Go to the water drainage station and drain
the recovery tank as shown in the relative
paragraph.
NOTE:
For the proper operation of the level sensors
it is required to properly clean the inside of
the tank (14 Fig. 14).
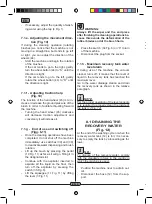
8.1 DRAINING THE
RECOVERY WATER
(Fig. 12)
At the end of the washing cycle or when the
recovery water tank (14) is full, it is neces-
sary to empty the tank by proceeding as fol-
lows:
N.B.:
To dispose of the recovery water, comply
with the standards in force in the country in
which the machine is used.
- Position the machine near to a drain out-
let.
- Disconnect the hose (12) from the sup-
port.


