background image

EN

EN-10

OPERATIONS TO 

PERFORM WHEN 

NECESSARY

9.1.d - Cleaning the clean water filter 

(Fig. 15)

NOTE:


Before  cleaning  the  filter,  make  sure  the 

clean water tank is empty.

-  Unscrew and remove the cover (49).

-  Remove the filter (17) and wash it in run-

ning water.

-  Refit the filter (17) in its seat, then tighten 

the cover (49). 

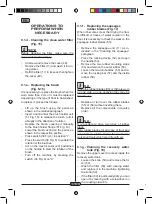
9.1.e -  Replacing the brush 


(Fig. 6-16)

It is necessary to replace the brush when it is 

worn more than 2 cm or it must be replaced 

depending on the type of floor to be washed; 

to replace it proceed as follows:

-  Lift up the brush using the pedal as 

shown in the relative paragraph.

-  Insert a hand under the brush holder unit 

(51 Fig. 16); to release the brush, turn it 

abruptly in the direction of rotation.

-  Replace the brush, coupling it manually 

to the brush holder flange (51 Fig. 16).

-  Lower the brush, acting on the pedal, as 

shown in the respective section.

-  Press switch (34 Fig. 6) to position “I”.

-  Press the switch (38 Fig. 6) to enable the 

rotation of the brushes.

-  Act on the touch sensor (20) positioned 

on the handle to start the rotation of the 

brush.

-  Turn off the machine by pressing the 

switch  (34 Fig. 6) on “0”.

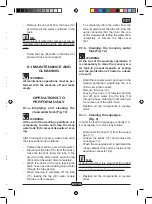
9.1.f -  Replacing the squeegee 


rubber blades (Fig. 17)

When it becomes clear that drying the floor 

is difficult or traces of water remain on the 

floor, it is necessary to check the wear on the 

squeegee rubber blades (50):

-  Remove the squeegee unit (11) as in-

dicated in the “Cleaning the squeegee” 

paragraph.

-  Press the locking device (52) and open 

the handle (53).

-  Remove the two rubber mounting strips 

(54) and remove the outer rubber (55).

-  Loosen the two turnbuckles  (56) and re-

move the locking bar (57) and the inside 

rubber (58).

N.B.:

When the rubber blades (55) or (58) are worn 

on one side, on one occasion they may be 

turned over.

-  Replace or turn over the rubber blades 

(55) or (58) without inverting them.

-  Replace all the components in reverse 

order.

N.B.:

It is possible to have two types of rubber 

blade.

Para rubber blades for all types of floor and 

polyurethane rubber blades for mechanical 

workshop floors which are dirty with oil.

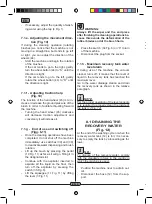
9.1.g - Cleaning the recovery water 

tank (Fig. 18)

Remove the upper cover to access inside the 

recovery water tank.

-  Loosen the knob (59) and remove the fil-

ter (60).

-  Wash the filter (60) with running water 

and replace it in the machine, tightening 

the knob (59).

-  If the filter (60) is particularly dirty you can 

open it by levering with a screwdriver on 

the coupling claw (61).

9.1.h - Cleaning the suction filter (Fig. 

18)

-  Lift the filter with its cover (62).

-  Loosen the screw (63) and remove the 

filter (64).

-  Wash the filter (64) in running water and 

reassemble it in reverse order.

9.1.i -  Replacing the fuses 


(Figg. 8-19)

 WARNING:

Replace the blown fuse with one with the 

same amperage.

-  Remove the plug (16 Fig. 8) from the 

socket (43 Fig. 8).

-  Remove the cover (65 Fig. 19) unscrew-

ing the screws (66 Fig. 19) to access the 

fuse.

-  Remove the cover sheet and replace the 

fuse. Put the cover (65 Fig. 19) back.

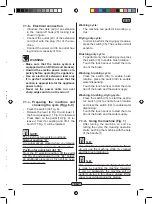
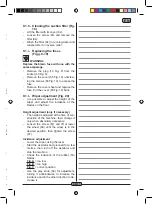
9.1.l -  Wiper adjustment (Fig. 20)

-  It is possible to adjust the height of the 

wiper and adjust the incidence of the 

blades on the floor.

Height adjustment (only if necessary)

-  The height is adjusted at the time of con-

struction of the machine, then change it 

only when absolutely necessary.

-  Loosen the screw (67) and lift or lower 

the wheel (68) until the wiper is in the 

desired position, then tighten the screw 

(67).

Incidence adjustment

-  Lower the wiper, using the lever.

-  Start the aspirator and proceed for a few 

metres, then turn off the aspirator and 

stop the machine.

-  Check the incidence of the rubber (50) 

blades. 


Fig. A

 = too low


Fig. B

 = too high


Fig. C

 = correct position

-  Use the grey knob (69) for adjustment, 

turning it anticlockwise to increase the 

incidence and in the other direction to de-

crease it.

Summary of Contents for ROUND 45 E 55 TOUCH

Page 1: ...IT Uso e Manutenzione EN Use and Maintenance FR Utilisation et Entretien DE Gebrauch und wartung ES Uso y Mantenimiento PT Uso e manuten o NL Gebruik en Onderhoud NO Bruk og vedlikehold DK Brug og ved...

Page 2: ...0 2 Year Art Mod Scrubber Dryer V W Hz Nr IPX4 GVW Kg MADE IN ITALY 1 8 5 7 2 3 4 6 1 2 3 4 5 6 7 8...

Page 3: ...l ES Fabricante Caracter sticas el ctricas N Matr cola Grado de protecci n Peso en orden de marcha A o de fabricaci n C digo del art culo Modelo PT Produtor Caracter sticas el tricas N mero de s rie G...

Page 4: ...ability over time We are aware that in order for a good product to stay that way over time it requires continuous updates aimed at meeting the expectations of those who use it on a daily basis For thi...

Page 5: ...the cycle EN 7 7 1 d Using the machine EN 8 7 1 e Adjusting the movement direction EN 8 7 1 f Adjusting traction help EN 8 7 1 g End of use and switching off EN 8 7 1 h Maximum recovery tank water le...

Page 6: ...tical hourly efficiency 2120 m2 h Brushes Pad Diameter Number 530 mm 21 x1 Motor power number 750 Wx1 Motor speed 170 rpm Specific pressure 18 8 22 gr cm2 Carter weight 29 34 Kg Aspiration Motor power...

Page 7: ...sories 0 7 PPL brush 40 0003 00 POLY 0 7 Brush spray guard 24 0265 00 40 4003 00 Front rubber wiper element 39 0110 00 Rear rubber wiper element 39 0111 00 Water loading tube 30 0024 00 Cable extensio...

Page 8: ...and the carrier within 3 days of receipt Remove the bag 21 containing the ac cessories Cut the strap 22 Remove the wooden blocks 23 and 24 Lift the brush flange 9 by pressing down on the pedal 19 see...

Page 9: ...tap 4 counter clockwise to increase the quantity of water or turn it clockwise to decrease it 6 1 FILLING THE TANK Fig 7 WARNING Only add clean mains water to the tank at a temperature no greater than...

Page 10: ...g and drying of the floor is done by pushing the machine forwards if you go backwards the machine will not perform drying in this phase always lift the wiper to avoid damaging the blades 7 1 b Electri...

Page 11: ...nsing and brush rotation Lift up the brush by pressing the pedal 19 Fig 11 as far as it will go fitting it in the designated slot Continue with the aspirator inserted to aspirate all the liquid on the...

Page 12: ...m vel of d the drain lative nsors de of en the eces as fol omply ntry in n out sup To completely drain the water from the tank 5 disconnect the tube 47 from the quick connector 48 then turn the con ne...

Page 13: ...it becomes clear that drying the floor is difficult or traces of water remain on the floor it is necessary to check the wear on the squeegee rubber blades 50 Remove the squeegee unit 11 as in dicated...

Page 14: ...fuse Put the cover 65 Fig 19 back 9 1 l Wiper adjustment Fig 20 It is possible to adjust the height of the wiper and adjust the incidence of the blades on the floor Height adjustment only if necessar...

Page 15: ...otor damaged Switch failure Suction unit switch not pressed Recovery tank full Replace Replace Replace the switch Press the switch Drain flush and clean the tank The machine does not dry well leaving...

Page 16: ...ing Unsuitable brushes or deter gent Use brushes or detergents which are suitable for the type of floor or dirt to be cleaned The brush does not rotate Aspirator does not work No water comes out Fault...

Page 17: ...or board 6 pole connector CN 2 circuit board 4 pole connector CN 3 EV circuit board 2 pole connector F1 Fuse MA Vacuum motor MS Brush motor EV Solenoid P1 230V Bipolar switc P2 EV Switch P3 Brush swit...

Page 18: ...DEALER Ghibli S p a via Circonvallazione 5 27020 Dorno PV Italy Tel 39 0382 848811 Fax 39 0382 84668 http www ghibli it e mail info ghibli it Cod 49 0187 00 1 ed 06 2015 ISO 9001 2008...

Reviews: