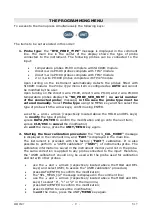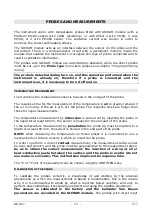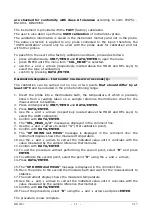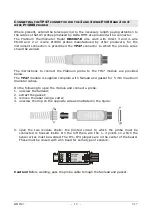
background image


HD2307

- 12 -

V1.7

C

ONNECTING THE 

TP47

CONNECTOR FOR THE 

3

AND 

4

WIRE 

P

T

100

AND 

2

OR 

4-

WIRE 

P

T

1000

 PROBES

Where present, extend the telescopic rod to the necessary length paying attention to 

the cable so that All probes produced by Delta OHM are provided with a connector. 

The Platinum Thermometer Model HD2307.0  also work with direct 3 and 4-wire 

Pt100 and 2  or 4-wire Pt1000 probes manufactured by other producers; for the 

instrument connection is prescribed the TP47  connector to which the probe's wires 

should be welded. 


The instructions to connect the Platinum probe to the TP47 module are provided 

below.  

The TP47 module is supplied complete with fairlead and gasket for 5 mm maximum 

diameter cables. 


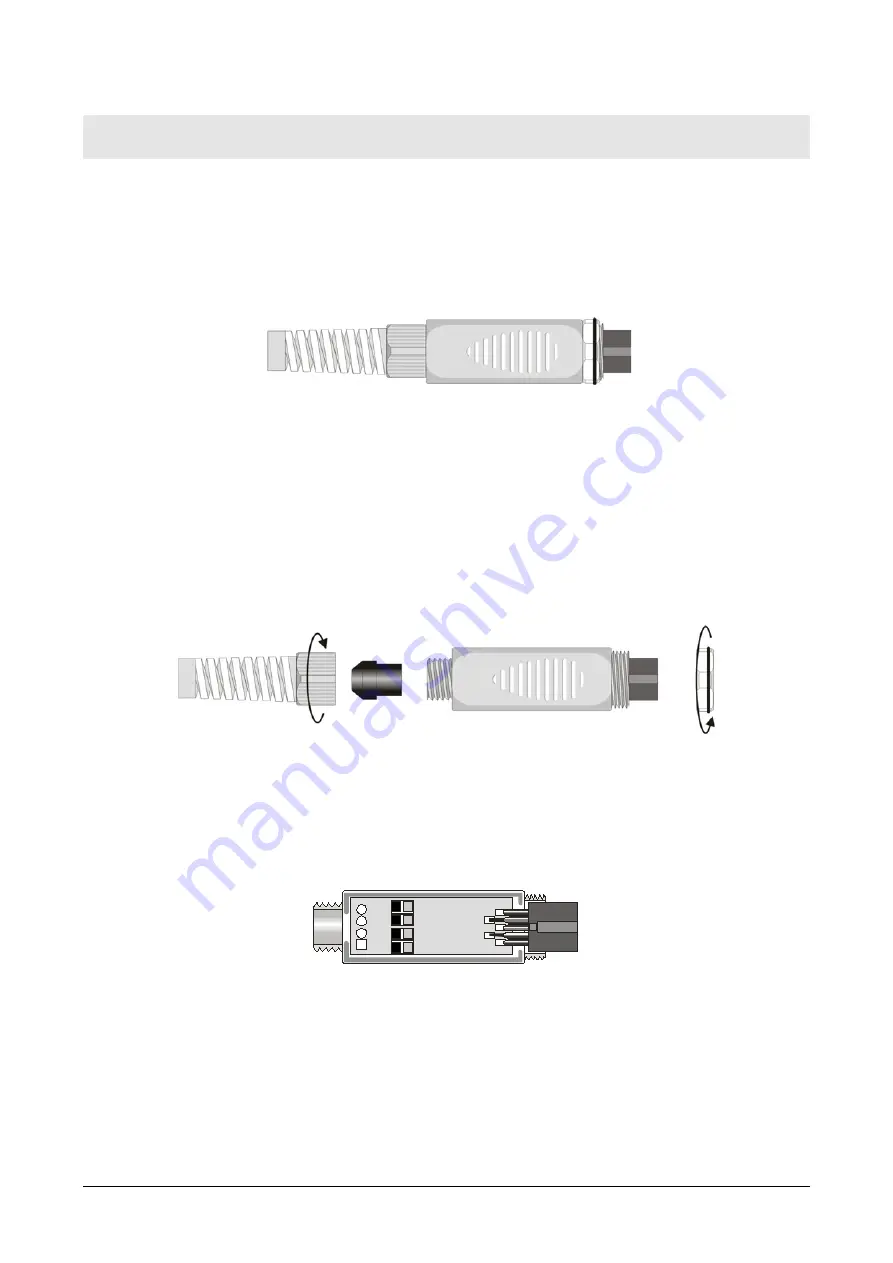
Do the following to open the module and connect a probe: 

1.


unscrew the fairlead; 

2.


extract the gasket; 

3.


remove the label using a cutter; 

4.


unscrew the ring on the opposite side as illustrated in the figure: 


5.


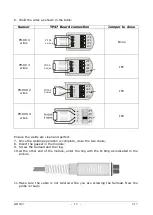
open the two module shells: the printed circuit to which the probe must be 

connected is housed inside. On the left there are the 1…4 points on which the 

sensor wires must be welded. The JP1…JP4 jumpers are in the center of the board. 

These must be closed with a tin bead for some type of sensors: 


1

2

3

4

Pt100 3 wires

Pt1000

Ni1000

Not Used


Caution! Before welding, pass the probe cable through the fairlead and gasket.  


Summary of Contents for Delta OHM HD2307.0

Page 1: ...Operating manual RTD Thermometer HD2307 0 www deltaohm com Companies Brands of GHM English Keep for future reference ...

Page 2: ...ONNECTION OF 4 WIRE PT100 SENSORS 14 WARNINGS AND OPERATING INSTRUCTIONS 15 INSTRUMENT SIGNALS AND FAULTS 16 INSTRUMENT STORAGE 16 LOW BATTERY WARNING AND BATTERY REPLACEMENT 17 WARNING ABOUT BATTERY USE 17 NOTES ABOUT WORKING AND OPERATIVE SAFETY 18 INSTRUMENT TECHNICAL CHARACTERISTICS 19 TECHNICAL INFORMATION ON THE RTD THERMOMETER 19 TECHNICAL DATA OF PROBES AND MODULES IN LINE WITH THE INSTRUM...

Page 3: ...n this case the sensor can be a 3 or 4 wire Pt100 or 2 or 4 wire Pt1000 The probes are fitted with the automatic detection module with the factory calibration settings already being memorized inside The units of measurement are the following 1 C Celsius degrees 2 F Fahrenheit degrees Using the Max Min and Avg function of this instrument respectively obtains the maximum minimum or average values Ot...

Page 4: ...HD2307 4 V1 7 RTD Thermometer HD2307 0 ...

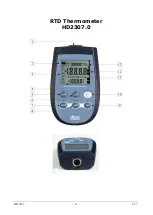
Page 5: ...arrows 7 HOLD key freezes the measurement during normal operation in the menu increases the current value 8 UNIT MENU key it allows selection of the unit of measurement when pressed together with the DATA key it allows to open the menu 9 REL key during normal operation enables the relative measurement displays the difference between the current value and the logged value when the key is pressed in...

Page 6: ... on and off The turning on enables all display segments for a few seconds starts an Auto test including the detection of the probe connected to the input and sets the instrument ready for normal measurement AUTO OFF the AutoPowerOff function can be disabled by simultaneously pressing this key and the HOLD key when turning the instrument on During turning on should no probes be connected the NO_PRB...

Page 7: ...rument is on even after exiting the DATA display function When the instrument is off the previously memorized data are cleared Upon turning on the instrument automatically starts memorizing the MAX MIN and AVG values To reset the previous values and start with a new measurement session press CLR until the FUNC_CLRD message appears ENTER once the MENU has been opened with the DATA UNIT keys the DAT...

Page 8: ... the menu two items can be set 1 Probe type 2 User calibration procedure for the temperature probe connected to the instrument the menu is opened by pressing simultaneously DATA UNIT the first item of the instrument programming menu will appear use the and arrows respectively located above the HOLD and REL keys to modify the displayed value press DATA ENTER to confirm the modification and go onto ...

Page 9: ...m using ENTER use the and arrows respectively located above the HOLD and REL keys to modify the type of probe press DATA ENTER to confirm the modification and go onto the next item press CLR ESC to cancel the modification to exit the menu press the UNIT MENU key again 2 Starting the User calibration procedure the _CAL_MODE message is displayed in the comment line and FACt is displayed in the main ...

Page 10: ...han those for liquid measurements The temperature measurement by immersion is carried out by inserting the probe in the liquid for at least 60 mm the sensor is housed in the end part of the probe In the temperature measurement by penetration the probe tip must be inserted to a depth of at least 60 mm the sensor is housed in the end part of the probe NOTE when measuring the temperature on frozen bl...

Page 11: ... a sample reference thermometer Wait for the measurement to stabilize 2 Press contemporarily UNIT MENU and DATA ENTER 3 Press DATA ENTER 4 Use the and arrows respectively located above the HOLD and REL keys to select the USER calibration 5 Confirm with DATA ENTER 6 The SEL_MEAS_1 2 message is displayed in the comment line 7 Use the and arrows to select 1 first calibration point 8 Confirm with DATA...

Page 12: ...m probe to the TP47 module are provided below The TP47 module is supplied complete with fairlead and gasket for 5 mm maximum diameter cables Do the following to open the module and connect a probe 1 unscrew the fairlead 2 extract the gasket 3 remove the label using a cutter 4 unscrew the ring on the opposite side as illustrated in the figure 5 open the two module shells the printed circuit to whic...

Page 13: ...res JP4 4 JP3 3 JP1 1 JP2 2 Pt1000 2 wires JP2 Pt1000 4 wires JP2 Ensure the welds are clean and perfect 7 Once the welding operation is complete close the two shells 8 Insert the gasket in the module 9 Screw the fairlead and the ring 10 At the other end of the module enter the ring with the O Ring as indicated in the picture 11 Make sure the cable is not twisted while you are screwing the fairlea...

Page 14: ...t100 sensors have to be soldered as indicated in the figure on the left In order to use this type of probe it is necessary to set up the menu item Probe Type The P100 probe is recognized upon turning on the instrument connect the probe when the instrument is switched off and then turn it on Sensor Direct soldering to the connector Pt100 4 wires View of the soldering side of the flying female conne...

Page 15: ...e probes for surface measurements contact probes must be held perpendicular against the surface Apply oil or heat conductive paste between the surface and the probe in order to improve contact and reduce reading time Whatever you do do not use water or solvent for this purpose A contact measurement is always very hard to perform It has high levels of uncertainty and depends on the ability of the o...

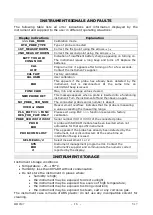
Page 16: ...again NO_PRBE_ SER_NUM The connected probe s serial number is absent OVER or UNDR Measurement overflow indicates that the probe is measuring a value exceeding the measuring range PLS_EXIT FUNC RES_FOR_FACT ONLY Please exit using ESC function reserved to factory calibration PRBE_SER Serial number of the connected probe PROB ERR A probe with SICRAM module has been inserted when not admissible for th...

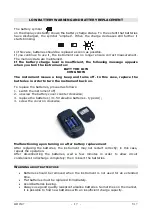
Page 17: ...n the instrument back on To replace the batteries proceed as follows 1 switch the instrument off 2 unscrew the battery cover counter clockwise 3 replace the batteries 3 1 5V alkaline batteries type AA 4 screw the cover on clockwise Malfunctioning upon turning on after battery replacement After replacing the batteries the instrument may not restart correctly in this case repeat the operation After ...

Page 18: ...ional safety of the instrument can only be guaranteed under the environmental and electrical operating conditions that are in specified in chapter TECHNICAL CHARACTERISTICS Do not use or store the product in places such as listed below Rapid changes in ambient temperature which may cause condensation Corrosive or inflammable gases Direct vibration or shock to the instrument Excessive induction noi...

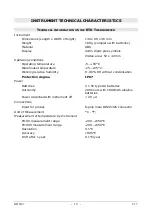
Page 19: ...re 5 50 C Warehouse temperature 25 65 C Working relative humidity 0 90 RH without condensation Protection degree IP67 Power Batteries 3 1 5V type AA batteries Autonomy 200 hours with 1800mAh alkaline batteries Power absorbed with instrument off 20 µA Connections Input for probes 8 pole male DIN45326 connector Unit of Measurement C F Measurement of temperature by Instrument Pt100 measurement range ...

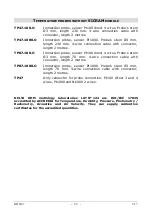
Page 20: ...t 70 C 250 C TP49AP I Penetration 70 C 250 C TP875 I Globe thermometer Ø 150 mm 30 C 120 C TP876 I Globe thermometer Ø 50 mm 30 C 120 C TP87 O Immersion 50 C 200 C Common characteristics Resolution 0 01 C in the range 199 99 C 0 1 C in the remaining field Temperature drift 20 C 0 003 C Pt100 Pt1000 probes with TP47 connector without SICRAM module Model Type Application range Accuracy TP47 100 O Pt...

Page 21: ...230 mm contact surface Ø 5 mm Cable length 2 metres TP475A O Air probe sensor Pt100 Stem Ø4 mm length 230 mm Cable length 2 metres TP472I 5 Immersion probe sensor Pt100 Stem Ø6 mm length 500 mm Cable length 2 metres TP472I 10 Immersion probe sensor Pt100 Stem Ø6 mm length 1000 mm Cable length 2 metres TP49A I Immersion probe sensor Pt100 Stem Ø2 7 mm length 150 mm Cable length 2 metres Aluminium h...

Page 22: ...100 direct 4 wires Probe s stem Ø3 mm length 70 mm 4 wire connection cable with connector length 2 metres TP87 1000 O Immersion probe sensor Pt1000 Probe s stem Ø3 mm length 70 mm 4 wire connection cable with connector length 2 metres TP47 Only connector for probe connection Pt100 direct 3 and 4 wires Pt1000 and Ni1000 2 wires DELTA OHM metrology laboratories LAT N 124 are ISO IEC 17025 accredited...

Page 23: ......
Page 24: ...warranty included in the manual of the product For any dispute the competent court is the Court of Padua The Italian law and the Convention on Contracts for the International Sales of Goods apply TECHNICAL INFORMATION The quality level of our instruments is the result of the continuous product development This may lead to differences between the information reported in the manual and the instrumen...

Reviews: