13
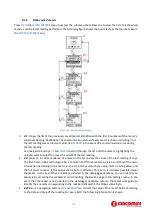
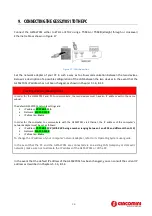
To connect the device directly or via the LAN network of a PC, follow the instructions below:
•
Use a standard
T568A
or
T568B
Ethernet cable (straight through or crossover) to connect the
ETH1 or ETH2 port of the GE552Y051 to the Ethernet port of the computer or to an existing
LAN socket. If you use an existing LAN, connect the computer to another LAN socket
•
Verify the GE552Y051 IP address from the display by accessing the GE552Y051 INFO menu
(Chapter 8.1.4) and ensure that that the ETH icon corresponding to the Ethernet connection
indicates that the cable is connected properly
Figure 6 - LAN configuration
•
Configure the PC network interface with an IP address that belongs to the same subnet as the
GE552Y051. The example in the figure shows that, in order for the computer to communicate via
Ethernet with the GE552Y051, you must configure the IP address of the computer network adapter
to which the GE552Y051 is connected:
•
IP address:
192.168.1.XXX (With XXX being a number ranging between 1 and 254 and different
than 110)
•
Netmask:
255.255.255.0
•
IP allocation:
Static
•
To change the IP address of the computer network adapter, refer to the user manual of the
Operating System of your PC
•
In the event that the PC and the GE552Y051 are connected via an existing LAN (company or
domestic network), make sure not to allocate the IP address of the GE552Y051 or of the PC
•
For instructions on how to change the IP address of your PC, refer to your current OS
5.1.5
Connection to a GPRS-UMTS modem/router
A data connection to access the Internet ensures remote consultation of the webserver, sending of
consumption reports, and monitoring of the system. Should a LAN/ADSL connection not be available, you
must use a modem/router supplied as an option of the GE552Y051.
The default settings of the GE552Y051 and GE552Y055 router allow the connection of the two devices
without having to change their network parameters. The router is configured to use a TIM (Telecom Italia
Mobile) SIM. In this case, the user must carry out the following operations:
•
Power off the router.
•
Remove the front panel where the place to insert the SIM is indicated
•
Ensure that the SIM PIN is disabled
•
Insert the data SIM in the right direction
•
Close the front panel
•
Fasten the two GSM MAIN and AUX antennas to ensure sufficient transmission signal
LCD OFF


