22
8.1.5
M-Bus wired meters
Press
OK
in the
WIRED
METERS
menu to access the submenu that allows you to view the list of all the wired
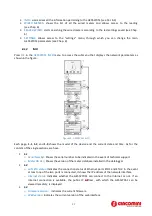
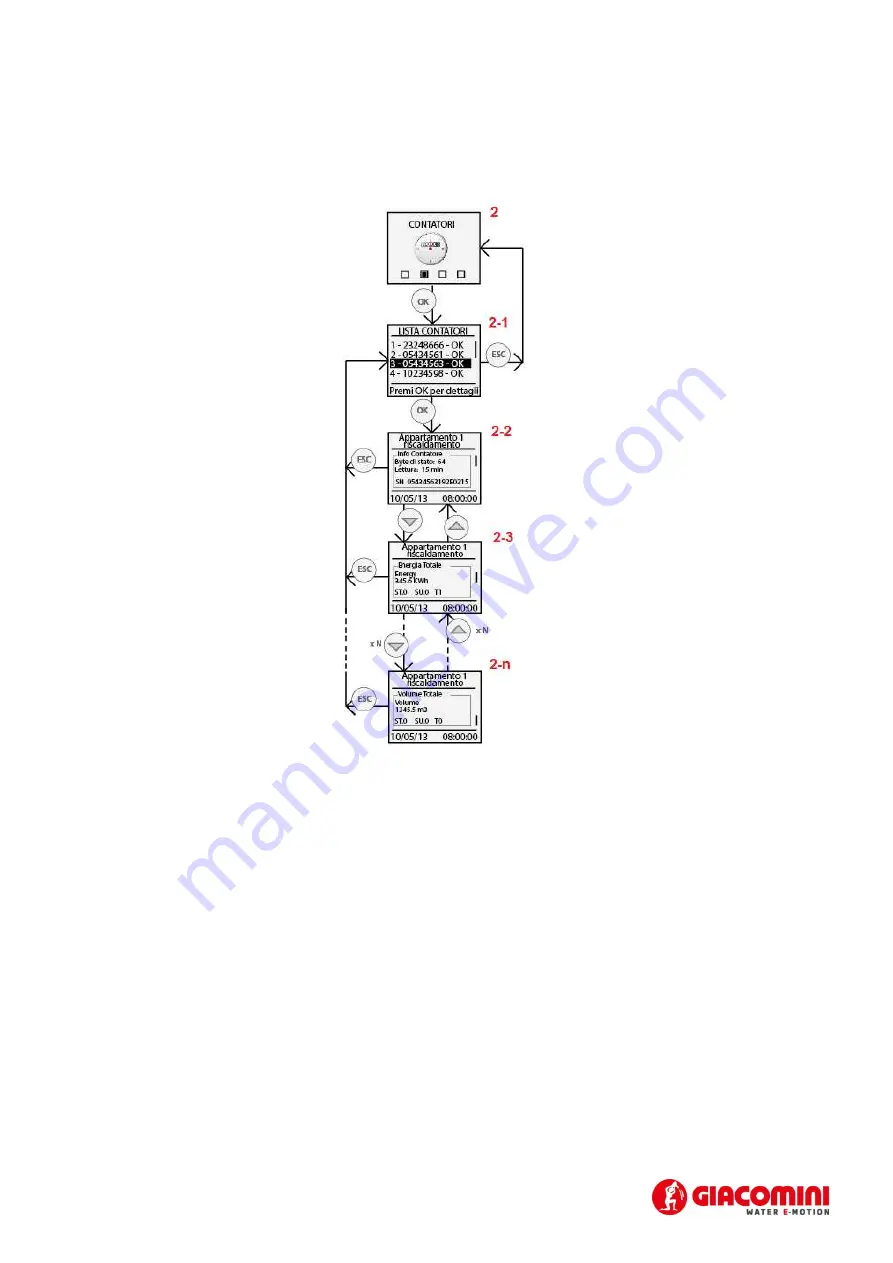
meters and the latest reading performed. The following figure shows the possible steps that can be taken in
the
WIRED
METERS
menu:
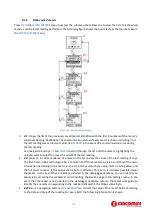
Figure 13 – Wired meters display
•
2-1
: shows the list of the previously saved meters identified with the first 8 numbers of the meter’s
serial number (e.g. 05434563). The communication status of every meter is shown indicating
OK
if
the last reading was carried out correctly or
ERROR
in the event of a communication error during
the last reading
Use navigation buttons
UP
and
DOWN
to scroll through the list of all the meters, highlighting the
one you want to select to access the values of the last reading
•
2-2
: press
OK
in correspondence of a meter in the list to view the values of the last reading (if any).
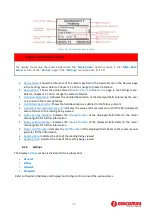
The first frame, indicated in Figure 14, is common to all three meters, as it is a summary of the main
information pertaining to the meter, such as the M-bus status byte value, meter reading value, and
the full serial number. If the M-Bus status byte is different from zero, it indicates possible meter
anomalies. In the event that a meter is included in the datalogger database, you can identify an
anomaly by accessing the webserver and consulting the Devices page in the Settings menu. In the
event that the meter is not included in the datalogger database, refer to the meter user guide to
identify the anomaly corresponding to the number indicated in the M-Bus status Byte
•
2-3/2-n
: use navigation buttons
UP
and
DOWN
to consult the value of the meter fields pertaining
to the date and time of the reading. For every field, the following information is shown:


