background image

rocket shall determine its stability before flight, 
providing documentation of the location of the 
center  of  pressure  and  center  of  gravity  of  the 
high  power  rocket  to  the  Safety  Monitor,  if  re-
quested.   8. Weight and Power Limits.   8.1 En-
sure that the rocket weighs less than the rocket 
motor  manufacturer's  recommended  maximum 
liftoff  weight  for  the  rocket  motor(s)  used  for 
the  flight.    During  pre-flight  inspection,  The 
Safety Monitor may request documentary proof 
of compliance.   8.2 Do not install a rocket mo-
tor  or  combination  of  rocket  motors  that  will 
produce  more  than  40,960  newton-seconds  of 
total  impulse  (4.448  newtons  equals  1.0 
pound).    9.  Recovery.    9.1  Fly  a  high  power 
rocket only if it contains a recovery system that 
will return all parts of it safely to the ground so 
that  it  may  be  flown  again.    9.2  Install  only 
flame resistant recovery wadding if wadding is 
required by the design of the rocket.  9.3 Do not 
attempt  to  catch  a  high  power  rocket  as  it  ap-
proaches the ground.   9.4 Do not attempt to re-
trieve a high power rocket from a place that is 
hazardous  to  people.    10.  Payloads.    10.1  Do 
not install or incorporate in a high power rocket 
a payload that is intended to be flammable, ex-
plosive, or cause harm.  10.2 Do not fly a verte-
brate  animal  in  a  high  power  rocker.    11. 
Launching Devices   11.1 Launch from a stable 
device  that  provides  rigid  guidance  until  the 
rocket has reached a speed adequate to ensure a 
safe flight path.  11.2 Incorporate a jet deflector 
device if necessary to prevent the rocket motor 

exhaust from impinging directly on flammable 
materials.  11.3 A launching device shall not be 
capable of launching a rocket at an angle more 
than  20  degrees  front  vertical.    11.4  Place  the 
end of the launch rod or rail above eye level or 
cap  it  to  prevent  accidental  eye  injury.    Store 
the launch rod or rail so it is capped, cased, or 
left in a condition where it cannot cause injury.  
12.  Ignition Systems.  12.1 Use an ignition sys-
tem  that  is  remotely  controlled,  electrically  op-
erated,  and  contains  a  launching  switch  that 
will return to "off when released.

12.2 The ignition system shall contain a remov-
able  safety  interlock  device  in  series  with  the 
launch switch.   12.3 The launch system and ig-
niter  combination  shall  be  designed,  installed, 
and operated so the liftoff of the rocket shall oc-
cur within three (3) seconds of actuation of the 
launch  system.  If  the  rocket  is  propelled  by  a 
cluster of rocket motors designed to be ignited 
simultaneously,  install  an  ignition  scheme  that 
has either been previously tested or has a dem-
onstrated  capability  of  igniting  all  rocket  mo-
tors intended for launch ignition within one sec-
ond following ignition system activation.   12.4 
Install an ignition device in a high power rocket 
motor only at the launch site and at the last prac-
tical moment before the rocket is placed on the 
launcher.  13. Launch Site.  13.1 Launch a high 
power rocket only in an outdoor area where tall 
trees,  power  lines,  and  buildings  will  not  pre-
sent  a  hazard  to  the  safe  flight  operation  of  a 

15

Summary of Contents for T-BOLT

Page 1: ...INSTRUCTION MANUAL T BOLT GIANT LEAP ROCKETRY LLC Copyright 2006 2019 Giant Leap Rocketry LLC 2831 SE Cornelius Pass Road Hillsboro Oregon 97123 ...

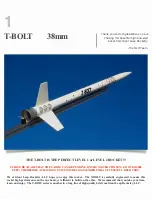
Page 2: ...N THE MOTER CHOSEN GO OVER 6000 FEET THEREFORE A TRACKING SYSTEM IS RECOMMENDED FOR A SUCCESSFUL RECOVERY We at Giant Leap Rocketry LLC hope you enjoy this rocket The T BOLT is carefully engineered to make this rocket high performance on the one hand yet efficient to build on the other We recommend that you take your time learn and enjoy The T BOLT series is another in a long line of high quality ...

Page 3: ...be flown on a variety of motors to extremely high altitudes Be certain your center of gravity CG is at least 1 5 body diameters or more forward of the center of pressure CP when the rocket is fully loaded and ready for flight This is critically important or the rocket will not be stable in flight For example if your rocket is 1 5 in diameter then the CG should be at least 3 forward of the center o...

Page 4: ...cifications This rocket comes in both Fiberglass and Mag naframe Fiberglass Specs are listed first and Ma gaframe listed second Fiberglass Dry Wt Mass no motor load 38 15 oz Length 42 with Nozzle retainer the length is 43 Outside Diameter O D 1 65 Inside Diameter I D 1 36 CP 36 7 aft from GLR Pinnacle Nosecone tip CG should be less than 33 aft of GLR Pinna cle Nosecone tip Motor Mount 38mm 29mm wi...

Page 5: ...CK ETRY WHOSE ORGANIZERS HAVE SE CURED AN APPROPRIATE WAIVER FROM THE FEDERAL AVIATION ADMIN ISTRATION FAILURE TO DO SO CAN RESULT IN SUBSTANTIAL FINES AND OR IMPRISONMENT DO NOT EVEN THINK OF FLYING THIS ROCKET ANY WHERE EXCEPT AT CERTIFIED LAUNCHES IF YOU HAVE ANY QUESTIONS OR ARE UNCLEAR REGARDING THE ASSEM BLY OR USE OF THIS PRODUCT PLEASE CALL GIANT LEAP ROCK ETRY LLC YOU ARE TOTALLY RE SPONS...

Page 6: ...ly Instruction One Swivel STYLE OPTIONS A Slimline Nozzle retainer Pictured on Cover and GLR Rail Guide Stand offs are available as an option Disposable Supplies Needed by the Builder to Assemble This Kit 5 15 or 30 Minute Epoxy or Aeropoxy Can Be Ordered Separately From GLR Mixing Cups and Mixing Sticks Can Be Ordered Separately From GLR J B Weld Can Be Ordered Separately From GLR Masking Tape Ta...

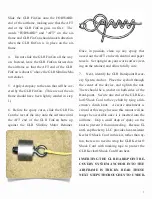
Page 7: ...You could lose the motor if you do not use J B Weld Allow to fully cure be fore moving to the next step If during your trial fitting of the GLR Slimline Motor Re tainer the GLR Slimline Motor Retainer seems a bit too loose simply place a SMALL amount of tape on the aft end of the airframe at dis tances of about 120 degrees from each other overlapping the end of the tube This will snug up the fit a...

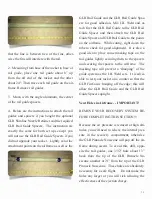
Page 8: ...epoxy that oozed out the AFT end with alcohol and paper towels Set upright on your work surface rest ing on the retainer and allow to fully cure 7 Next identify the GLR Hard point Recov ery System Anchor Place the eyebolt through the center of the device and tighten the nut There should be a washer on both sides of the Hard point Secure one end of the GLR Kev lar Shock Cord to the eye bolt by tyin...

Page 9: ...ring to the interior of the air frame The ring of epoxy should coat the inter nal circumference of the airframe from the 16 to the 15 mark from the forward end of the air frame It is important to avoid getting the J B Weld on other areas inside the airframe so do the best you can You will be able to clean up some later Repeat the procedure as necessary until you have a full solid ring of J B Weld ...

Page 10: ...rd and is not stable in the air frame place the airframe in a more horizon tal position Allow the J B Weld to fully cure 9 GLR provides a high quality Kevlar Para chute Heat Shield to protect your parachute from the heat generated that occurs as a result of the ejection charge deploying your recovery system when y o u r r o c k e t reaches apogee Slide the GLR Kevlar Para c h u t e H e a t Shield ...

Page 11: ... with your finger Side the shroud lines to gether through the free end of the swivel and open the shroud lines enough to allow the para chute to slide through and knot down onto the swivel The attachment point of the swivel is critical When the rocket descends you don t want the airframe and GLR Pinnicle Nosecone banging into each other so there needs to be adequate and appropriate spacing of the ...

Page 12: ... Slide the GLR Pinnacle Nosecone onto air frame The GLR Pinnacle Nosecone should be snug but not tight onto the airframe If the GLR Pinnacle Nosecone is too loose use a piece of masking tape on the shoulder of the GLR Pinnacle Nosecone to snug the fit If too tight sand gently with 240 grit sandpaper Re member the chute is deployed when HOT gases from ejection charge expand in the air frame popping...

Page 13: ...il Guide to the points on the airframe While curing sight down the tube to check for good alignment It is also a good idea to place some masking tape on the rail guides lightly securing them to the spacers and securing the spacers to the airframe The masking tape will prevent a drooping of the guide system as the J B Weld sets It is advis able to rest your rocket on a counter so that the GLR FinCa...

Page 14: ... of the airframe Spread the glue on the outside inside and edge of the airframe end and let it set completely Obtain from your local hardware store some DAP Plastic Wood It doesn t mat ter the color Prime the phe nolic airframe with extra thick filler spray primer With a gloved finger extrude a small amount of the DAP Plastic Wood and trace the fine grooves of the Phenolic Airframe and deposit the...

Page 15: ...nes for more info see www tripoli org The following is a con densed version of the NAR TRA HIGH POWER SAFETY CODE The complete code can be found in the handbooks of the organiza tions 1 Only a person who is a certified flyer shall operate or fly a high power rocket 2 Must comply with United States Code 1348 Airspace Control and Facilities Federal Avia tion Act of 1958 and other applicable federal ...

Page 16: ...ensure a safe flight path 11 2 Incorporate a jet deflector device if necessary to prevent the rocket motor exhaust from impinging directly on flammable materials 11 3 A launching device shall not be capable of launching a rocket at an angle more than 20 degrees front vertical 11 4 Place the end of the launch rod or rail above eye level or cap it to prevent accidental eye injury Store the launch ro...

Page 17: ... of the flying field launch site 16 2 Do not launch a high power rocket if the surface wind at the launcher is more than twenty 20 miles per hour 16 3 Do not operate a high power rocket in a manner that is hazardous to aircraft 17 Launch Con trol 17 1 Launch a high power rocket only with the immediate knowledge permission and attention of the Safety Monitor 17 2 All per sons in the launching spect...

Page 18: ...vent 3 that you must be over 18 years old for motor purchase and use GLR cannot be held respon sible for the failure of participants to abide by safety codes rules regulations etc By using the products you agree to abide by these condi tions 17 ...

Reviews: