background image


INSTRUCTION MANUAL      CENT series balances           60.50.670      3rd issue               july 2005 

Page  34  di  40 


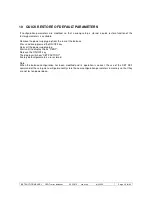
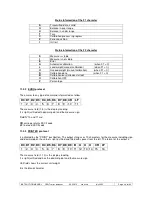
9.2.2  CALIBR 


The CENT balance may be calibrated with an external mass. 


9.2.2.1   CAL OFF 

  Both calibration are disabled 


9.2.2.2   CAL ON 

  Both calibration are enabled 


9.2.2.3   CAL AUTO 

  With this selection the calibration is enabled and a timer activates the internal 

calibration every 3 hour. The automatic calibration is delayed if, during last 10 

minutes, the balance has been operated or serial comand has been issued. 


9.2.3  A-ZERO 


If  the  Auto-Zero  function  is  active  and  when  no  weights  are  on  the  pan,  the  automatic  zero  tracking 

correction is active: the balance remains at a net value equal to zero. The function is useful to cancel small 

drift of the zero reading. 


9.2.3.1  ZERO OFF 

The zero tracking function is inactive. 


9.2.3.2  ZERO ON 

The function is active and small changes in zero reading are corrected. 


9.2.4  FILTER 


The setting of the filter menu controls the dynamic response of the balance. 

Selections are. 


9.2.4.1  SLO


slow response applicable to disturbed environments  (high accuracy weighing) 


9.2.4.2  AVG    

average value for both high accuracy and  


9.2.4.3 FAST

   fast response applicable to quickly changing weights (dosing) 


9.2.5  SET DEF 


All settings, changed by the setup menu are valid as soon as they are changed. 

However if the balance is powered off they are lost and when powered up the balance will use different 

parameters. 

To maintain a custom configuration that will be active at power-on the function SET DEF is implemented. 


9.2.5.1 STORE


current settings are stored as user default 


9.2.5.2 END


user default settings are left unchanged 


Summary of Contents for CENT 2000

Page 1: ...INSTRUCTION MANUAL ISTRUZIONI PER L USO INSTRUCTION MANUAL ISTRUZIONI PER L USO INSTRUCTION MANUAL ISTRUZIONI PER L USO Bilancia Tecnica Serie Cent INSTRUCTION MANUAL ISTRUZIONI PER L USO INSTRUCTION MANUAL ISTRUZIONI PER L USO INSTRUCTION MANUAL ISTRUZIONI PER L USO INSTRUCTION MANUAL ISTRUZIONI PER L USO INSTRUCTION MANUAL ISTRUZIONI PER L USO INSTRUCTION MANUAL ISTRUZIONI PER L USO INSTRUCTION ...

Page 2: ......

Page 3: ...nting The manufacturer reserves the right to make changes to the product at any time without notice It is advisable to verify if there are any updates Tutti i diritti riservati E vietata qualsiasi forma di stampa duplicazione riproduzione o pubblicazione di questo manuale o parte di esso senza l autorizzazione scritta da parte della GIBERTINI ELETTRONICA Srl All rights reserved Forbidden any form ...

Page 4: ...CIA FUNZIONE CALCOLO PERCENTUALE Pag 13 9 2 SET UP Pag 14 9 2 1 SERIAL Pag 15 9 2 1 1 BAUD Pag 15 9 2 1 2 BYTE FOR Pag 15 9 2 1 3 PROTOC Pag 15 9 2 1 4 TRANS OPT Pag 15 9 2 2 CALIBR Pag 16 9 2 2 1 CAL OFF Pag 16 9 2 2 2 CAL ON Pag 16 9 2 2 3 CAL AUTO Pag 16 9 2 3 A ZERO Pag 16 9 2 3 1 ZERO OFF Pag 16 9 2 3 2 ZERO ON Pag 16 9 2 4 FILTER Pag 16 9 2 4 1 SLO Pag 16 9 2 4 2 AVG Pag 16 9 2 4 3 FAST Pag ...

Page 5: ...ERE INSTALLATA IN ZONE A RISCHIO D ESPLOSIONE NOTA In caso d impostazioni utente non valide la bilancia potrebbe non funzionare correttamente Al fine di evitare suddette condizioni è possibile ripristinare i parametri di default impostazioni predefinite dalla fabbrica nel seguente modo Sfilare il connettore d alimentazione bilancia posto sul retro della stessa Premere e mantenere premuto il tasto ...

Page 6: ...adro Dimensioni del piatto mm 160 x 160 Peso netto 5 3 Kg Senza meccanismo interno di calibrazione 6 1 Kg Comprensiva del meccanismo interno di calibrazione Calibrazione Interna NO SI NO SI NO SI Scegliere una posizione adatta considerando i seguenti criteri Lontano da vibrazioni e da correnti d aria Il basamento del supporto deve essere rigido La tensione della rete deve essere stabile Non è cons...

Page 7: ...sa a quella sopra indicata Avvitare il piatto con la vite centrale Cilindro imballo Livellare la bilancia ruotando i piedini regolabili sotto la parte anteriore del basamento FIG 2 Inserire il cavo d alimentazione nel connettore che si trova sul pannello posteriore FIG 2 Inserire la spina del gruppo d alimentazione nella presa di corrente controllando che il valore di tensione rete sia quello indi...

Page 8: ...ER L USO Bilancia Tecnica CENT 60 50 670 3 Edizione luglio 2005 Pagina 8 di 40 ITALIANO FIG 3 1 Piatto di pesata 2 Display 3 Tasto Print 4 Tasto Mode 5 Tasto Tare 6 Tasto ON OFF 5 COMANDI D UTILIZZO DELLA BILANCIA ...

Page 9: ...ione attendere almeno quindici minuti prima di effettuare qualsiasi operazione di pesatura È consigliabile lasciare la bilancia sempre accesa collegata alla rete elettrica Con il tasto ON OFF premuto per più di un secondo la bilancia spegne l illuminazione del display ed appare la scritta OFF 6 MODALITÀ D IMPIEGO ...

Page 10: ... Funzionamento normale NOME TASTO ATTIVAZIONE DEL TASTO PER MENO D UN SECONDO ATTIVAZIONE DEL TASTO PER UN SECONDO O PIÙ On OFF Illuminazione LCD On OFF Bilancia On OFF Mode Vedi funzioni aggiuntive Vedi funzioni aggiuntive Tare Funzione tara Funzione tara Print Funzione stampa Nessuna funzione Menù principale e configurazione NOME TASTO ATTIVAZIONE DEL TASTO PER MENO D UN SECONDO ATTIVAZIONE DEL ...

Page 11: ...r meno di un secondo Cosi facendo si scorre tutto il primo livello di menù Il display mostrerà in sequenza le scritte SETUP CAL E Il tasto ON OFF attiva il sotto menù selezionato mentre il tasto TARA fa uscire dal menù precedentemente selezionato Quando si entra in un sotto menù i tasti funzionano come sopra premendo ON OFF la selezione è confermata premendo TARE la selezione rimane immutata NOTA ...

Page 12: ...amente lo stesso peso con due unità di misure differenti Tale funzione agisce su tutte le seconde unità di misura presenti in CENT Quando una seconda unità di misura è stata selezionata sarà automaticamente memorizzata In questo modo anche togliendo il cavetto d alimentazione l impostazione della seconda unità resterà valida 9 1 2 BILANCIA CON FUNZIONE CONTA PEZZI Selezionare come precedentemente ...

Page 13: ...nto con valori troppo bassi sarà segnalato un errore d acquisizione ed il display mostrerà la scritta PERC ERROR Premere il tasto TARE per uscire dalla condizione d errore e ripetere l acquisizione Esempio di calcolo percentuale Se è acquisito un valore di peso pari a 180 g ed in seguito è posto sul piatto un peso di 35 g il display mostrerà 19 44 Se è aggiunto altro materiale raggiungendo un peso...

Page 14: ...na 14 di 40 ITALIANO 9 2 SETUP SERIAL BAUD PROTOC BYTE FOR TRANS 1200 2400 4800 9600 8 E 1 7 E 1 7 O 1 7 N 2 7 E 2 7 O 2 8 N 1 8 N 2 8 O 1 CRYSTAL PRINTER EURO REQUIEST CONTINUE CAL OFF CALIB SET DEF FILTER A ZERO ZERO OFF ZERO ON SLO END STORE AVG FAST CAL ON DATA STABLE CAL AUTO ...

Page 15: ...OPE Tipo CRYSTAL Tipo PRINTER Fare riferimento alla sezione TRASMISSIONI DATI per maggiori informazioni 9 2 1 4 TRANS OPT 9 2 1 4 1 REQUIEST Il dato è trasmesso solo se vi è stata una richiesta inviata alla porta seriale 9 2 1 4 2 CONTINUE Il dato è trasmesso continuamente ad ogni ciclo anche se non vi è stata alcuna richiesta da porta seriale E utile quando la bilancia deve trasmettere dati ad un...

Page 16: ...atto non è presente una massa l algoritmo d inseguimento dello zero mantiene il valore misurato a zero La funzione è utile per annullare piccole derive di zero 9 2 4 FILTER L impostazione del filtro controlla il comportamento dinamico della bilancia Le selezioni sono 9 2 4 1 SLOW risposta lenta Adatta ad ambienti disturbati con correnti d aria e o vibrazioni 9 2 4 2 AVG media tra slow e fast 9 2 4...

Page 17: ... INTERNA Se la bilancia è dotata del meccanismo di calibrazione interno sarà possibile avviare la calibrazione interna automatica con questa selezione Con questa funzione attiva non vi è alcuna necessità di intervenire durante la calibrazione Infatti CENT utilizza una massa di calibrazione interna in modo autonomo e automatico Il display per tutta la durata del processo mostra la scritta CAL AUTO ...

Page 18: ...nere premuto il tasto ON OFF Inserire nuovamente il connettore d alimentazione Sul display appare la scritta CENT A questo punto rilasciare il tasto precedentemente premuto Il display in queste condizioni mostrerà la scritta SET FACTORY In questa fase la bilancia ripristina automaticamente i parametri di fabbrica Nota Quando una configurazione è stata modificata ed è corretta è consigliabile utili...

Page 19: ...mpanti esterne TIPO DI PROTOCOLLI DISPONIBILI 11 2 1 Protocollo CRYSTAL La risposta in questo protocollo a qualunque tipo di comando accettato è formattata con un campo misura un campo unità campo di stato D0 D1 D2 D3 D4 D5 D6 D7 D8 D9 B U U U B F1 F2 CR LF 1 2 3 4 5 6 7 8 9 10 11 12 13 14 15 16 17 18 19 Il campo di misura 1 10 fornisce il peso applicato al piatto E giustificato a destra e contemp...

Page 20: ... da menu OFF P Percentuale 11 2 2 Protocollo EURO La risposta in questo protocollo a qualunque tipo di comando accettato è formattata con un campo misura D0 D1 D2 D3 D4 D5 D6 D7 D8 CR LF 1 2 3 4 5 6 7 8 9 10 11 Il campo di misura 1 9 fornisce il peso applicato al piatto E giustificato a destra e contempla sia il punto decimale sia il segno della misura un carattere di spazio nel caso di misure pos...

Page 21: ...sta compiendo la misura Il campi 15 16 sono in ordine CR Codice ASCII di carriage return LF Codice ASCII di line feed Nota Se è richiesta una stampa ma il peso sul piatto non è stabile la bilancia prenota la richiesta ma non stampa immediatamente Non appena il dato è stabile allora sarà emesso lo scontrino 11 3 COMANDI SERIALI Nei protocolli CRYSTAL ed EURO la bilancia risponde ai seguenti comandi...

Page 22: ...ION Pag 31 9 2 SET UP Pag 32 9 2 1SERIAL Pag 33 9 2 1 1 BAUD Pag 33 9 2 1 2 BYTE FOR Pag 33 9 2 1 3 PROTOC Pag 33 9 2 1 4 TRANS OPT Pag 33 9 2 2 CALIBR Pag 34 9 2 2 1 CAL OFF Pag 34 9 2 2 2 CAL ON Pag 34 9 2 2 3 CAL AUTO Pag 34 9 2 3 A ZERO Pag 34 9 2 3 1 ZERO OFF Pag 34 9 2 3 2 ZERO ON Pag 34 9 2 4 FILTER Pag 34 9 2 4 1 SLO Pag 34 9 2 4 2 AVG Pag 34 9 2 4 3 FAST Pag 34 9 2 5 SET DEF Pag 34 9 2 5 ...

Page 23: ...K THE BALANCE MUST BE OPERATED ONLY IN DRY CLEAN AND IF POSSIBLE VIBRATION FREE ENVIRONMENT THE BALANCE MUST NOT BE OPERATED IN AREAS WHERE THERE ARE EXPLOSION RISKS NOTE In case of improper setting of the balance parameters during setup the balance may power up in an incorrect configuration The user can restore the Factory configuration to avoid the malfunction as follows Disconnect the balance s...

Page 24: ... Balance weight 5 3 Kg without internal calibration mechanism 6 1 Kg with internal calibration mechanism Internal calibration NO YES NO YES NO YES Choose an appropriate location taking into account these criteria Vibrations and air drafts in the ambient must be avoided The supporting stand must be rigid The main line must be stable It is not advisable to use the same electric line of the fluoresce...

Page 25: ...he supplier This bracket can be refastened to the balance by reolacing the knob Screw the pan with the central screw Cilindro imballo Level the balance using the spirit level on the rear and rotating the levelling feet under the front part of the basement Fig 2 Insert the power supply cable located on the rear panel Fig 2 Insert the power supply in the main line plug checking the supply voltage pr...

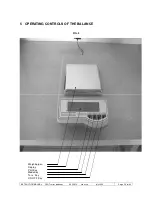
Page 26: ...INSTRUCTION MANUAL CENT series balances 60 50 670 3rd issue july 2005 Page 26 di 40 FIG 3 Weighing pan Display Print Key Mode Key Tare Key ON OFF Key 5 OPERATING CONTROLS OF THE BALANCE ...

Page 27: ...or about 15 minutes after power up before performing any weighing operation It s advisable to leave the balance permanently connected to the Ac line Press the ON OFF key more than one second The LCD backlight will be turned off and on the display will appear the message OFF 6 OPERATING INSTRUCTIONS ...

Page 28: ...wn the all keyboard functions Normal Use KEY NAME KEY ACTIVATED FOR LESS THAN ONE SECOND short function KEY ACTIVATED FOR MORE THAN ONE SECOND long function On OFF Display illumination ON OFF Balance ON OFF Mode See additional details See additional details Tare Tare function Tare function Print Print function No function Main menu and configuration details KEY NAME KEY ACTIVATED FOR LESS THAN ONE...

Page 29: ...y shows UNIT 2 release the key Pressing key MODE short time it is possible to select the functions UNIT 2 SETUP CAL E wrapping around at the end of the list The ON OFF key activates the selected submenu while the TARE key exits the main menu When the submenu is entered the keys operate as above pressing ON OFF the selection is confirmed while pressing TARE the selection is left unchanged NOTE If n...

Page 30: ...t the last digit always exhibits a 1 count increment When a second unit is selected the balance automatically stores the information so that even if the power is removed the selection is retained and when the balance is switched on the selected unit will be active 9 1 2 PIECE COUNTING FUNCTION The function is selected as above with the menu item PCS Press the key mode more than one second Display ...

Page 31: ...ition is inhibited and the message PERC ERROR appears until the TARE key is activated The balance can measure percentages up to 500 of the reference if the full scale is not exceeded Example for percentage calculation If a reference weight of 180 g is acquired the display shows 100 00 Now if a weight of 35 g is placed on the pan the display shows 19 44 If the weight is increased up to 95 g the dis...

Page 32: ...ge 32 di 40 9 2 SET UP SERIAL BAUD PROTOC BYTE FOR TRANS 1200 2400 4800 9600 8 E 1 7 E 1 7 O 1 7 N 2 7 E 2 7 O 2 8 N 1 8 N 2 8 O 1 CRYSTAL PRINTER EURO REQUIEST CONTINUE CAL OFF CALIB SET DEF FILTER A ZERO ZERO OFF ZERO ON SLO END STORE AVG FAST CAL ON DATA STABLE CAL AUTO ...

Page 33: ...TY 2 7 E 2 7 EVEN 2 7 O 2 7 ODD 2 8 N 1 8 NO PARITY 1 8 E 1 8 EVEN 1 8 O 1 8 ODD 1 8 N 2 8 NO PARITY 2 9 2 1 3 PROTOC It is the protocol of the serial data output and may be EUROPE CRYSTAL PRINTER For further details refer to DATA TRANSMISSION section 9 2 1 4 TRANS OPT 9 2 1 4 1 REQUIEST Data is transmitted on demand data transmission 9 2 1 4 2 CONTINUE Data is transmitted every balance conversion...

Page 34: ... small drift of the zero reading 9 2 3 1 ZERO OFF The zero tracking function is inactive 9 2 3 2 ZERO ON The function is active and small changes in zero reading are corrected 9 2 4 FILTER The setting of the filter menu controls the dynamic response of the balance Selections are 9 2 4 1 SLO slow response applicable to disturbed environments high accuracy weighing 9 2 4 2 AVG average value for both...

Page 35: ...ass the message CAL INT appears as a choice of the main menu and the internal automatic calibration is available Once this function is activated the automatic calibration process begins The display shows CAL AUTO during the calibration process while the functions of reference and zero weight acquisition are performed automatically by the balance During the calibration the process is monitored for ...

Page 36: ...e Press and keep pressed the ON OFF key Reinsert the power supply plug Wait until the display shows CENT Release the ON OFF key The display will show SET FACTORY Factory default parameters are restored Note When the balance configuration has been modified and its operation is correct the use of the SET DEF command of the setup menu will permanently store the new configuration parameters in memory ...

Page 37: ...and CRYSTAL protocols are suitable for computer interfacing PRINTER protocol may be used to drive external printers 11 2 1 CRYSTAL protocol The answer to any type of command is formatted with a data field a unit field and a status field as follows a measure field a unit field a status field D0 D1 D2 D3 D4 D5 D6 D7 D8 D9 B U U U B F1 F2 CR LF 1 2 3 4 5 6 7 8 9 10 11 12 13 14 15 16 17 18 19 The meas...

Page 38: ...The answer to any type of command is formatted as follow D0 D1 D2 D3 D4 D5 D6 D7 D8 CR LF 1 2 3 4 5 6 7 8 9 10 11 The measure field 1 9 is the display reading It is right justified with decimal point and the measure sign Field N 10 and 11 are CR carriage returns ASCII code LF line feed ASCII code 11 2 3 PRINTER protocol Is activated by the PRINT pushbutton The output string uses 10 characters for ...

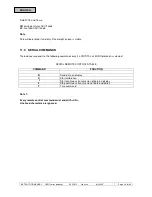
Page 39: ...on pan is stable 11 3 SERIAL COMMANDS The balance responds to the following commands only if a CRYSTAL or EURO protocol is selected SERIAL REMOTE CONTROLS TABLE COMMAND FUNCTION B Send data on display C Start calibration I Start continuous transmission of data on display F Stop continuous transmission of data on display T Tare command Note 1 Every remote control command must end with CR Line feed ...

Page 40: ...INSTRUCTION MANUAL CENT series balances 60 50 670 3rd issue july 2005 Page 40 di 40 ...

Reviews: