background image

C.6. Using the TR40xx as an Access Control Terminal 

We receive a lot of questions regarding whether or not the TR40xx can be used as an Access Control 

Terminal. Some Users take the fact that the TR40xx has an electric lock control relay (see 

Bell and Lock 

control relays

as an indication of the Terminal’s ability to perform an Access Control Function. This Section 

will attempt to clarify this point. 

The TR40xx is not an Access Control Terminal. It doesn’t have an internal User database and, by 

default, accepts and activates the door lock on any ID-card read. The Lock relay was originally built into the 
Terminal for a different reason: some of our customers wanted to use the Time Recorder in conjunction with 
a turnstiles. This is normally done to enforce the “clocking” i.e. make sure that the person won’t be able to 
access or exit the facility without registering first. 

Later, we have extended the TR40xx firmware to provide a limited Access Control functionality. This 

was done by implementing a new 

Prefix to match

 Setting. When the prefix is set, the TR40xx will only accept 

(add the record and activate the lock) the User ID-cards with an ID-code that starts from a matching 
sequence of digits. 

Basically, this allows you to choose a single prefix combination for your facility (organization) and issue 

ID-cards that have a common part (prefix), and a User ID. For example, you might choose the prefix to be 
“1234” and issue sequential User IDs like “001”, “002”, etc. Then you will have ID-cards with codes like 
“1234001”, “1234002”, etc. If you pre-program the TR40xx’s 

Prefix to match

 to “1234”, then the Terminal will 

only accept the cards with the ID-codes starting from ”1234”. All other cards will be rejected- and that means 
that access won’t be granted too. 

Further, you can hide the prefix from appearing in the Time and Attendance database by Using the 

From character

 and 

Number of characters

 Settings. This way you can keep the prefix confidential. 

This Access Control implementation is very simple, of course, and is only fit for low-security 

applications. Plus, you cannot control User access rights individually. On the positive side, you don’t have to 
maintain the User database- all you need to do is issue the Cards with the correct prefix. 

Summary of Contents for TR4020

Page 1: ... How to print out this Manual Help Reference Programming Mode Menu Reference Online Items Settings Reference Onscreen message reference ProxData on the web Check for updates Register to stay informed Tell us what you think Document TR4020 TR4030 V3 30b Copyright Giga TMS 1999 2001 ...

Page 2: ...ain Menu and onscreen messages to be introduced in the TR4030 These are described in All Main Menu Items and All Onscreen messages respectively Whenever the Main Menu Item or an Onscreen message can be found on the TR4030 only this will be marked with a TR4030 only sign A 1 2 How to use this Manual This Manual was created more like a reference rather then for continuous reading While you are by no...

Page 3: ...y updated basing on the questions most often asked by our Customers You are also welcome to e mail us Use support proxdata com for all your technical problems feeback proxdata com to send us your suggestions info proxdata com for all other inquiries A 1 4 How to print out this Manual This Manual is supplied in two forms screen optimized and print optimized Use the screen optimized document TR4020 ...

Page 4: ...de processing 27 C 6 Using the TR40xx as an Access Control Terminal 28 C 7 Controlling external Bell Ring 29 C 8 Using Online communications 30 C 9 Viewing data on the PC 32 C 10 UPS battery 33 D Reference 34 D 1 All Main Menu Items 35 D 2 All Online Items 71 D 3 All Onscreen messages 96 D 4 Performing a System Reset 150 D 5 Downloading new application firmware 151 D 6 Time and Attendance data fil...

Page 5: ...B Getting started Click on one of the links below Introduction Working in the Normal Mode Powering up for the first time Saving Time and Attendance data to the Floppy Disk ...

Page 6: ... registration Users register by selecting an appropriate Event IN OUT etc entering Shift then reading their ID card The Time and Attendance data is accumulated in the TR40xx s internal non volatile memory Later you can save the data to the Floppy Disk or upload it to the PC via RS232 network Programming Mode is used to save the Terminal s database contents to the Floppy Disk manage the Time and At...

Page 7: ...battery This battery is getting charged even when the TR40xx s Power switch is in off position but the power is supplied from the adaptor For more information on the TR40xx online communications capabilities see Using Online communications and I O Connector pin assignment Optionally you can program the TR40xx to control an external Bell Ring and Electric Lock For more information see the following...

Page 8: ...r work Working in the Normal Mode how to add Time Attendance records Saving Time and Attendance data to the Floppy Disk how to get your Time Attendance data After the above introduction you probably won t need any further assistance Note however that there is still a lot of useful information in the Advanced topics Section In addition the Reference can be used to find answers to your specific ques...

Page 9: ...Terminal s functioning parameters save the Time and Attendance data to the Floppy Disk etc The reason Master Card exists is to protect the Terminal s data from unauthorized observation or editing It serves as a kind of supervisor key to the Terminal s data The Master Card is not some kind of a special card you can choose any working ID card to become the Master Card The TR40xx comes with two ID ca...

Page 10: ...screen that informs you about the F key functions in the Programming Mode Press F4 key the TR40xx will enter the Programming Mode and you will see a Main Menu At this point you can either choose to take a look around the Programming Mode or exit it right away Complete information about the Programming Mode is provided in Working in the Programming Mode Section To exit the Programming Mode press th...

Page 11: ...to event icons displayed on the LCD screen directly above the keys Currently selected Event is indicated by a thick bar displayed under the Event icon Events available left to right are IN OUT BREAK IN BREAK OUT Most organizations only use IN and OUT events some separate on and off duty IN and OUT and breaks BREAK IN and BREAK OUT events On the sample screenshot above the OUT event is selected F2 ...

Page 12: ...t before reading the User Card There are ways to speed up the User registration by automating the Event and Shift Selection see Speeding up User registration for details The LCD screen in the Normal Mode also displays a Power and a Database status The Battery icon when displayed indicates that the TR40xx is running on battery power See UPS battery for more details The Database Icon displays the da...

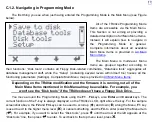
Page 13: ...he TR40xx displays any message that you don t understand look this message up in the All Onscreen messages Section of this Manual To enter the Programming Mode read the Master ID card that you have already set when powering up for the first time The Terminal will go into the Programming Mode and you will see the Main Menu like the one shown on Figure above The first Item in the Main Menu is Save t...

Page 14: ...R40xx will start saving the data to the Floppy Disk The progress bar is displayed on the LCD screen while the TR40xx is saving the data Depending on the amount of data to be saved the operation may take up to three minutes When the data saving is finished the TR40xx will ask you if you want to Delete saved data from the database Choose No F4 recommended to preserve the data you ve just saved in th...

Page 15: ...ng Mode Using the TR40xx as an Access Control Terminal Database organization and management Controlling external Bell Ring Speeding up User registration Using Online communications Working with external scanner Viewing data on the PC Fine tuning ID code processing UPS battery ...

Page 16: ...time To enter the Programming Mode Read current Master Card If the Card you read is not a Master Card then the TR40xx will simply register an event i e process this card as a regular User ID card If this is a Master Card then the TR40xx will either o Enter Programming Mode immediately you will see the Main Menu like the one shown in Navigating in Programming Mode o Ask you to input the Master pass...

Page 17: ...within itself too houses all the functioning parameters Settings Complete Main Menu map is provided in All Main Menu Items Depending on the TR40xx modification and the firmware it is running not all of the Main Menu Items mentioned in this Manual may be available For example you won t see the Disk tools if the TR40xx doesn t have a Floppy Disk Drive You move around the Programming Mode using the F...

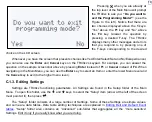
Page 18: ...wer the question on the sample screenshot above by pressing Enter instead of F1 or Cancel instead of F4 When navigating in the Main Menu you can use the Enter key to select an Item or enter the lower Menu level and the Cancel key to exit to the higher menu level C 1 3 Editing Settings Settings are TR40xx functioning parameters All Settings are found in the Setup folder of the Main Menu To open thi...

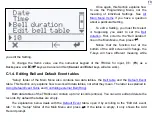
Page 19: ...input F3 as a Backspace and keys as Cancel and Set Cancel and Enter keys will also work C 1 4 Editing Bell and Default Event tables Setup folder of the Main Menu also contains two data tables the Bell table and the Default Event table This Section only explains how to work with data tables not what they mean The latter is explained in Using Default Event Table and Controlling external Bell Ring Bo...

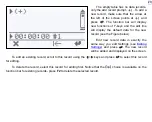
Page 20: ...e new record see the Figure below Edit new record data in exactly the same way you edit Settings see Editing Settings and press The new record will be added and displayed on the screen To edit an existing record scroll to this record using the keys and press to select this record for editing To delete the record select this record for editing first Notice that the choice is available on the functi...

Page 21: ...e old data is never saved or uploaded twice it is just kept in the Terminal s memory for backup purposes just in case you will need it again If you want to receive the old data again use the Mark all as new command first this will make all the data appear as if it was never saved or uploaded before C 2 2 Database management commands All database management commands are grouped into the Database to...

Page 22: ...ta command Use the latter command with some caution you will permanently delete all the data and this includes the data that was probably never saved before C 2 5 Repairing the database In the unlikely event of the database malfunction you can repair the database either by initializing it using the Delete all data command or you can recover the database using the Recover data command After the rec...

Page 23: ... default event for each timezone Within a given timezone the TR40xx will automatically keep the default event key pre selected so the majority of Users will not have to push any key while registering For example you may program the TR40xx to pre select the IN key between the hours of 8a m and 10a m when most employees are starting to work Employees will only have to read their ID cards to register...

Page 24: ...will work from 13 15 00 of one day to 13 15 00 of the next day and so on Therefore it doesn t matter what time you will specify for a single entry in the Default Event table it still will work around the clock Setting it to 13 15 00 will be no different from setting it to 18 00 00 This can be use to make the TR40xx always return the selection to the desired event Event field value corresponds to t...

Page 25: ...tion that allows you to define a default shift that will be automatically restored after every ID card read or several seconds of inactivity Default shift is not a table it can only be defined for the entire day Setting the default shift to 00 disables the function ...

Page 26: ...V power is provided on pin 9 of the Scanner Port see I O Connector pin assignment Cable wiring Maximum power that the TR40xx can supply is 100mA The TR40xx has several Settings to fine tune the external reader data processing You can set the Baudrate The data from external reader is encapsulated You can set the Start character and the End character of each data packet from the external scanner For...

Page 27: ...ters Settings allow you to extract and store into the database a portion of every ID code You can also limit the range of ID codes accepted by the system by specifying a Prefix to match This Setting defines what combination of digits must be found at the beginning of every valid ID card Together these three Settings allow you to Adjust the ID code format for the Time and Attendance database This w...

Page 28: ...o match Setting When the prefix is set the TR40xx will only accept add the record and activate the lock the User ID cards with an ID code that starts from a matching sequence of digits Basically this allows you to choose a single prefix combination for your facility organization and issue ID cards that have a common part prefix and a User ID For example you might choose the prefix to be 1234 and i...

Page 29: ...he Bell relay at pre determine times of day This is done through a Bell table The Bell table may consist of up to 32 time entries Each entry specifies one time at which the Bell relay will be activated Each time the Bell relay is triggered it remains active for a period of time specified by the Bell duration Setting Editing Bell and Default Event tables provides complete information on table editi...

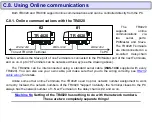
Page 30: ...ing above The TR4020s can be interconnected using a standard serial cable WAS 1404 supplied with every TR4020 You can also use your own cable just make sure that you do the wiring correctly see RS232 cable wiring for details Unlike some other online Terminals the TR4020 need no prior network number assignment to work correctly Instead the network numbers of the TR4020 happen naturally the Terminal...

Page 31: ...ort can be used to daisy chain more TR4020 Terminals cable WAS 1404 see RS232 cable wiring for details In this case the TR4030 can be viewed as a gateway connecting the RS232 daisy chain network to the LAN By using this TR4030 TR4020 combination you can place multiple TR40xx clusters onto a single IP address C 8 3 Sample software ProxData provides a free software tool TR4020 4030 Control Center fo...

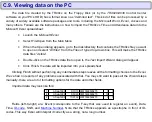
Page 32: ... the TR40xx data files visible Double click on the TR40xx data file to open it the Text Import Wizard dialog will appear Click Finish the data will be imported into your spreadsheet Clicking Finish without performing any intermediate steps leaves all the formatting choices to the Excel We ve had no reports of any problems associated with that You may still want to pass all the Wizard steps manuall...

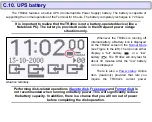
Page 33: ...ery a Battery icon is displayed on the TR40xx screen in the Normal Mode see Figure to the left The icon can either display a full battery or a low battery The TR40xx will only last for about 30 minutes after the low battery icon is displayed There is also a Power status Online Item read only provided that lets you inquire the TR40xx s current power situation remotely Performing disk related operat...

Page 34: ...Items Time and Attendance data file format All Online Items Bell and Lock control relays All Onscreen messages I O Connector pin assignment Performing a System Reset Rotating base cover for desktop operation Downloading new application firmware Specifications ...

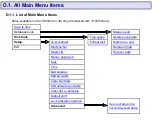
Page 35: ...report Disk tools Free space Delete saved data Setup LCD contrast Format disk Mark all as new Exit Machine No Delete all data Master ID Recover data Master password Date Time Bell duration Edit bell table Clear bell table Edit default event table Clear def event table Default shift Lock activation duration Advanced See next page for a list of Advanced Items ...

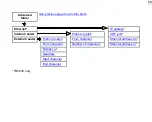
Page 36: ...r Items Ethernet IP address Internal reader Prefix to match UDP port External reader Prefix to match From character Ethernet address h From character Number of characters Ethernet address l Number of Baudrate Start character End character TR4030 only ...

Page 37: ...file The TR40xx verifies if the file you have specified already exists If the file already exists you are offered to change the filename or append the data to the existing file Append function allows you to save the data from multiple TR4020s into a single data file The Save to disk operation may be safely aborted by pressing and holding Abort until Abort this operation is displayed then choosing ...

Page 38: ...al database capacity Total amount of new data in bytes deserves some explanation The database itself keeps the data in records Each record occupies a pre defined amount of memory space which does not depend on variable length fields like ID code When you save the data to the disk or upload it to the PC the size of each record will depend on its content Total new data size in bytes tells you the ex...

Page 39: ...database Old data is the data that has been saved to the disk or uploaded to the PC at least once in the past Normally the old data is kept in the database for backup purposes You can safely erase it when you are sure that you don t need it anymore This will free up some database space Complete coverage of the TR40xx database organization and related issues can be found in Database organization an...

Page 40: ...d to disk or uploaded to the PC at least once in the past By default old data is just kept in the database memory is not saved again and again together with the new data Using this command makes all of the TR40xx database data look as new You will get entire database contents next time you save the data to the Floppy Disk or upload it to the PC Complete coverage of the TR40xx database organization...

Page 41: ...ta Delete all data also repairs the database so you can use it in case of some database malfunction It is noteworthy that this command does not actually delete the data it just initializes some internal database housekeeping If you initialize the database by mistake you can still partially recover its contents by using the Recover data command Complete coverage of the TR40xx database organization ...

Page 42: ...ternal database appears to be 100 full with new records Hence saving the data to disk or uploading it to the PC after this will fetch entire database memory contents Naturally some of the recovered data will be invalid newer records may overlap older ones etc Nevertheless Recover data command may be you last chance to recover lost data Note do not forget to use the Delete all data command after ha...

Page 43: ...nt of free space on a currently inserted Floppy Disk Normally you use it to determine if you have enough free disk space to save the Terminal s Time and Attendance data You do this by comparing the number displayed by the Free space command and the total amount of new data in bytes displayed by the Status report ...

Page 44: ...sable because of some data error Formatting is a long operation It can be aborted by pressing and holding Abort until Abort this operation Question is displayed then choosing Yes Warning Aborting the formatting will make the Floppy Disk unusable You ll need to complete the formatting to make the disk readable again For the above reason aborting should be used to interrupt the formatting that takes...

Page 45: ...45 LCD contrast Main Menu Setup See also This Setting allows you to adjust the contrast ratio of the TR40xx LCD screen Use Lighter F2 and Darker F3 keys to adjust the contrast ...

Page 46: ...n the data generated by individual TR40xx Terminals Firstly Machine Number is used to form a default filename during the Save to disk operation Second it is a part of every Time and Attendance record generated by the TR40xx Machine Number can be in the 00 99 range Note Machine Number is NOT the Terminal s network number Default value for this Setting is 1 ...

Page 47: ...ngs and data from unauthorized viewing or editing Initially you choose the Master ID when you switch the TR40xx on for the first time see Powering up for the first time This Setting allows you to set a new change Master ID When the Read the card you wish to use as the Master Card message appears read the card of your choice to set a new card or press Abort to exit New Master ID Setting is effectiv...

Page 48: ...ypo when entering a new password you ll need to input it twice first time when the TR40xx displays Input new Master Password second time when the TR40xx requests you to Re type Master Password You must enter an exact same password both times or the password will not be set The password may be from 0 to 6 digits long To disable Master password enter the password of 0 length when the TR40xx asks you...

Page 49: ...49 Date Main Menu Setup See also Time This Menu Item allows you to set the TR40xx s current date Note that the date must be added in the dd mm yyyy format or the Terminal won t accept it ...

Page 50: ...50 Time Main Menu Setup See also Date This Menu Item allows you to set the TR40xx s current date ...

Page 51: ... used to activate an external Bell Ring at certain predefined daytimes Bell activation schedule is defined by be the Bell table see Edit bell table Controlling external Bell Ring The Bell duration Setting defines for how long the bell will be activated each time it is triggered The value may be in the 00 99 seconds range Setting the Bell duration to 00 effectively disables the Bell function Defaul...

Page 52: ...hich the bell control relay will be switched on The Bell table consists of entries each of which has a single field the activation time The amount of time that relay will remain activated once triggered is defined by the Bell duration Setting together for all entries It is not possible to set a define durations separately for individual Bell table entries Edit bell table allows you to add edit and...

Page 53: ... Clear bell table Main Menu Setup See also Bell duration Edit bell table Controlling external Bell Ring Bell and Lock control relays This command allows you to quickly erase the contents of the Bell table ...

Page 54: ...ng the appropriate event key IN OUT etc depending on the time of day This way User registration can be made more efficient see Speeding up User registration The Default Event table consists of entries each of which contains two fields beginning time of a timezone and a default event for this timezone Details on how to use the table may be found in Using Default Event Table You can quickly erase en...

Page 55: ...55 Clear default event table Main Menu Setup See also Edit default event table Speeding up User registration This command allows you to quickly erase the contents of the Default Event table ...

Page 56: ...way the User registration can be made more efficient see Speeding up User registration Default shift sets a shift number that the TR40xx will return to after then User reads his her ID card or after several seconds of inactivity Setting 00 disables the function the TR40xx will always keep the last shift number entered by the User Default setting value is 0 i e the function is disabled ...

Page 57: ... is read This can be used to enforce User Registration process by denying User access to the facility without registration and even for a simple access control function implementation see Using the TR40xx as an Access Control Terminal Lock activation duration setting defines for how long the lock control relay will remain activated once triggered Valid value range is 00 99 seconds Selecting 0 effe...

Page 58: ...a common convention to write the IP address in a so called dot notation i e 192 168 100 40 Consult with your Network Administrator to determine the suitable IP address for each TR4030 you are planning to install on the network Note that the matching IP address must also be set in the PC software you are using to control the TR4030 Default value for this setting is 192 168 100 40 ProxData s TR4020 ...

Page 59: ... your Local Area Network LAN has a complicated firewall arrangement you won t need to change this Setting Consult your Network Administrator for a suitable UDP port number if necessary Default value for this Setting is 1001 ProxData s TR4020 4030 Control Center for Windows software selects this UDP port by default as well ...

Page 60: ... 3 4 5 use this Menu Item to set the three leftmost digits i e 000 001 002 and the Ethernet address l to set the three rightmost digits i e 003 004 005 Please note that according to the Ethernet address specifications the leftmost digit of the Ethernet address must always be even Example 0 1 2 3 4 5 is a correct address 21 17 135 255 is invalid address because 21 is an odd number It is highly unli...

Page 61: ... 3 4 5 use the Ethernet address h to set the three leftmost digits i e 000 001 002 and this Menu Item to set the three rightmost digits i e 003 004 005 Please note that according to the Ethernet address specifications the leftmost digit of the Ethernet address must always be even Example 0 1 2 3 4 5 is a correct address 21 17 135 255 is invalid address because 21 is an odd number It is highly unli...

Page 62: ...ou can setup the System to accept only certain ID cards see Fine tuning ID code processing You can even implement a simple access control function Using the TR40xx as an Access Control Terminal The prefix string can be from 0 to 16 digits long Entering a string with 0 characters disables prefix checking any readable User card will be accepted If the prefix string is set the TR40xx will compare eac...

Page 63: ...o the requirements of some specific PC software see Fine tuning ID code processing You can also use this Setting to hide a certain portion of the ID cards code This is useful for a simple access control function implementation see Using the TR40xx as an Access Control Terminal From character defines a character position in the ID code counting from 1 starting from which the portion of an ID code w...

Page 64: ...uirements of some specific PC software see Fine tuning ID code processing You can also use this Setting to hide a certain portion of the ID cards code This is useful for a simple access control function implementation see Using the TR40xx as an Access Control Terminal Number of characters defines the length of the portion of code that will be extracted from the ID code starting from the From chara...

Page 65: ...setup the System to accept only certain ID cards see Fine tuning ID code processing You can even implement a simple access control function Using the TR40xx as an Access Control Terminal The prefix string can be from 0 to 16 digits long Entering a string with 0 characters disables prefix checking any readable User card will be accepted If the prefix string is set the TR40xx will compare each User ...

Page 66: ...quirements of some specific PC software see Fine tuning ID code processing You can also use this Setting to hide a certain portion of the ID cards code This is useful for a simple access control function implementation see Using the TR40xx as an Access Control Terminal From character defines a character position in the ID code counting from 1 starting from which the portion of an ID code will be e...

Page 67: ...s of some specific PC software see Fine tuning ID code processing You can also use this Setting to hide a certain portion of the ID cards code This is useful for a simple access control function implementation see Using the TR40xx as an Access Control Terminal Number of characters defines the length of the portion of code that will be extracted from the ID code starting from the From character pos...

Page 68: ...Reading the card on the external device generates a Time and Attendance record in exactly the same manner as with the internal built in reader Baudrate defines the speed setting for the external reader scanner port Possible values for this Setting and their corresponding baud rates are listed below 0 1200 bps 1 2400 bps 2 4800 bps 3 9600 bps 4 19200 bps All other serial port parameters are fixed a...

Page 69: ...o be the ID code itself there is a limitation on the maximum length of data that the TR40xx will accept see Working with external scanner Start character Setting defines the ASCII code of the start character Once the TR40xx encounters the Start character it starts receiving the data that follows until the End character code is encountered If the Start character code is received again then all the ...

Page 70: ...n reader The TR40xx expects the data from an external reader to arrive enclosed in a Start character and End character All characters between these two are considered to be the ID code itself there is a limitation on the maximum length of data that the TR40xx will accept see Working with external scanner End character Setting defines the ASCII code of the end character Examples If the Start charac...

Page 71: ...rnal reader Internal reader extract from character From character Internal reader Internal reader num of chars to extract Number of character Internal reader External scanner prefix Prefix to match External reader External scanner extract from character From character External reader External scanner num of chars to extract Number of character External reader External scanner start character Start...

Page 72: ...72 Machine Number See Machine Number Programming Mode Menu Item ...

Page 73: ...ts for your convenience only to make it easier for you to select a Terminal from the list of all available Terminals Machine name does not go into the Time and Attendance database records only Machine Number does Machine name can be from 0 to 16 characters long Default value for this Item is empty string ...

Page 74: ...74 Time See Time Programming Mode Menu Item ...

Page 75: ...75 Date See Date Programming Mode Menu Item ...

Page 76: ...nto the Terminal using the Login Password first Only then he will be able to edit the TR40xx s Items or upload the Time and Attendance database Login Password can be from 0 to 8 characters long The User needs to perform a login even when the password is not set i e it has zero characters Default value for this Item is empty string ...

Page 77: ...77 Bell duration See Bell duration Programming Mode Menu Item ...

Page 78: ...78 Bell Table See Edit bell table Clear bell table Programming Mode Menu Items ...

Page 79: ...79 Default Event Table See Edit default event table and Clear default event table Programming Mode Menu Items ...

Page 80: ...80 Default shift See Default shift Programming Mode Menu Item ...

Page 81: ...81 Lock activation duration See Lock activation duration Programming Mode Menu Item ...

Page 82: ...82 Internal reader prefix See Prefix to match Programming Mode Menu Item ...

Page 83: ...83 Internal reader extract from character See From character Programming Mode Menu Item ...

Page 84: ...84 Internal reader number of characters to extract See Number of characters Programming Mode Menu Item ...

Page 85: ...85 External scanner prefix See Prefix to match Programming Mode Menu Item ...

Page 86: ...86 External scanner extract from character See From character Programming Mode Menu Item ...

Page 87: ...87 External scanner number of characters to extract See Number of character Programming Mode Menu Item ...

Page 88: ...88 External scanner start character See Start character Programming Mode Menu Item ...

Page 89: ...89 External scanner end character See End character Programming Mode Menu Item ...

Page 90: ...90 External scanner baudrate See Baudrate Programming Mode Menu Item ...

Page 91: ...ad only It returns the total number of records old new currently found in the TR40xx s database This is the same value that is displayed by the Status report screen s Total rec s Complete coverage of the TR40xx database organization and related issues can be found in Database organization and management ...

Page 92: ...read only It returns the total number of new records currently found in the TR40xx s database This is the same value that is displayed by the Status report screen s New rec s Complete coverage of the TR40xx database organization and related issues can be found in Database organization and management ...

Page 93: ... only It returns the total number of free unused records currently found in the TR40xx s database This is the same value that is displayed by the Status report screen s Free rec s Complete coverage of the TR40xx database organization and related issues can be found in Database organization and management ...

Page 94: ...r status See also UPS battery This Item is read only It reports current TR40xx power situation Possible returned values are 0 Wall power 1 Battery power battery level is OK 2 Battery power battery level is low ...

Page 95: ...cation firmware This Item is read only It returns currently loaded firmware version This is the same string that is displayed at the TR40xx startup see Checking currently loaded firmware version of Downloading new application firmware for more details ...

Page 96: ...o you wish to exit programming mode Do you wish to proceed with this operation Edit filename press Enter when finished Filename cannot contain blank spaces File already exists F2 Edit filename F3 Append data to existing file Firmware error Machine is halted Flash memory failure or Flash is not installed Machine is halted Formatting failed Formatting Free disk space byte s XXX I O board communicati...

Page 97: ...t Read a card you wish to use as the Master Card Read error Please try again Reader failure Machine is halted Real Time Clock failure Machine is halted Re type Master Password Root directory is full Cannot create new file Saving data The data you have entered is invalid The disk is write protected The menu is empty There is no new data to be saved This disk is not PC AT compatible Time date is not...

Page 98: ... Aborting Save to disk operation will preserve both the Terminal s internal database and the disk data intact a file of zero size may appear on the disk however Format disk operation once started destroys the disk data irreversibly aborting it won t save your files and at the same time will make the disk unusable unless you perform Format disk again to its completion For this reason you should use...

Page 99: ...tion Machine is halted See also This message indicates that the application firmware you have downloaded needs more FLASH memory then you have on your TR40xx It is highly unlikely that you ll ever see this message If this happens please contact us as support proxdata com ...

Page 100: ...message is displayed when you switch the TR40xx on for the first time ever or after having performed a System reset The Master ID card is used to access a Programming Mode Setting it is a required step which cannot be skipped Read the card of your choice this Card will be recognized as the Master Card from now on You can always change the Master Card by using the Master ID command ...

Page 101: ...ning and the User attempts to register read User ID card New records cannot be added to the database until it is repaired You can repair the database either by initializing it Delete all data command or recovering it Recover data command Please refer to the Database organization and management Section for complete coverage of the database organization and related issues ...

Page 102: ...nd Attendance database is malfunctioning and the operation you ve attempted to perform cannot be finished You can repair the database either by initializing it Delete all data command or recovering it Recover data command Please refer to the Database organization and management Section for complete coverage of the database organization and related issues ...

Page 103: ...the User attempts to register read User ID card New records cannot be added unless the database is partially emptied You can do this either by deleting the old saved database data Delete saved data command or by delete all database data Delete all data Please refer to the Database organization and management Section for complete coverage of the database organization and related issues ...

Page 104: ...u ve just saved in the Terminal s memory Choosing Yes will permanently delete the saved data Already saved data is kept in the database for backup purposes by default it won t be saved to the disk next time you use the Save to disk command again unless you specifically request to do so Complete coverage of the TR40xx database organization and related issues can be found in Database organization an...

Page 105: ...ve to disk operation There may be two reasons for this The disk may have a data formatting problem Attempt to reformat it using the Format disk command then try to save the data again Warning Formatting the disk will permanently delete all disk data The disk may be physically damaged Replace the disk with a new one and try to save the data again ...

Page 106: ...This message is displayed when you input a 0 length password for the Master password Setting The TR40xx double checks with you by asking you to confirm if you really want to disable the password Choosing Yes will disable the Master password choosing No will preserve the password intact ...

Page 107: ... Do you wish to exit programming mode See also Programming Mode This question is asked when you are about to leave the Programming Mode Press No to return to the Main Menu Yes to exit the Programming Mode ...

Page 108: ...cover data Format disk This confirmation screen is displayed whenever you are about to execute a command that will irreversibly alter or delete the data in the Terminal s memory or on the Floppy Disk Make sure you really know what you are doing and press Yes to continue or No to safely abort command execution ...

Page 109: ...e data file By default the filename represents this Terminal s Machine Number and a current month and date nn_mm dd dat You can type in another name if necessary There are some naming limitations the name cannot contain blank spaces hyphens cannot be deleted and the extension file type cannot be changed When you are satisfied with the filename press OK the TR40xx will attempt to create the data fi...

Page 110: ...returned to the Edit filename press Enter when finished screen You can Append the data to the end of the existing file This option allows you to aggregate the data from several TR4020s into a single data file Change the Floppy Disk and press Retry Note that there is no overwrite option i e you cannot write over the existing file contents The only way to delete the file that already exists on the F...

Page 111: ...111 Firmware error Machine is halted See also In an unlikely event that you ever face this message please contact us at feedback proxdata com ...

Page 112: ...112 Flash memory failure or Flash is not installed Machine is halted See also This is a severe error that indicates some internal hardware malfunction Please return your TR40xx for service repair ...

Page 113: ...format is physically damaged or when the disk is not inserted properly Problems with tracks other then Track 0 are not so severe the disk will simply yield less usable space if it has some physical damages However Track 0 must be in good condition or the disk will be rejected The only solution in this situation is to try another disk ...

Page 114: ...y pressing and holding Abort until Abort this operation question is displayed then choosing Yes Warning Aborting the formatting will make the Floppy Disk unusable You ll need to complete the formatting to make the disk readable again For the above reason aborting should be used to interrupt the formatting that takes too long usually the case with Floppy Disks that have severe physical damage ...

Page 115: ...115 Free disk space byte s XXX Close See also Free space This screen is displayed when you choose the Free space command It shows the amount of free space in bytes on a currently inserted Floppy Disk ...

Page 116: ...ere is something wrong with the I O board Ethernet adaptor of the TR4030 The problem may be with the board s hardware or internal firmware Since the firmware of the I O board is re loaded each time you perform a System Reset doing so may solve the problem If System Reset doesn t help send the TR4030 for repairing ...

Page 117: ...117 I O board failure Machine is halted TR4030 only This message indicates that I O board Ethernet adaptor of the TR4030 is malfunctioning Send the TR4030 for repairing ...

Page 118: ... one other character then it is considered to be alphanumerical Example 12F9B is numerical it can be up to 40 characters long 12F9b is alphanumerical because of b character so it must be limited to 20 characters only The TR40xx provides several Settings that allow you to process the ID code from external reader You can extract a smaller code portion by using From character and Number of characters...

Page 119: ...119 Incorrect Password See also Entering Programming Mode Master password This message is displayed when you have entered an incorrect Master password ...

Page 120: ...120 Initializing The System Reset is in progress Please wait for a while ...

Page 121: ...Input Master Password See also Entering Programming Mode Master password This message is displayed after you read the Master ID card in case the Master password is set Input correct password and press Enter ...

Page 122: ...put new Master Password See also Entering Programming Mode Master password This message is displayed when you choose to input new Master password Input any password of up to 6 characters long and press Enter ...

Page 123: ...ernal and external readers This message is displayed when the User ID card is rejected by the TR40xx This can be because of two reasons The ID code on the card does not match the Prefix The ID code on the card is shorter then the value set in the From character Setting so processing the card produces an ID code of zero length which is not allowed ...

Page 124: ...Reset This message indicates that some TR40xx s Setting contains an invalid value Normally this situation can be solved by performing a System Reset You can do this safely since reset will preserve the database data of the TR40xx intact If the problem persists contact us at feedback proxdata com ...

Page 125: ...125 Machine has been reset You may now switch it off See also Performing a System Reset This message is displayed when the System Reset is over Simply switch the TR40xx off and back on again to continue ...

Page 126: ...command is displayed whenever you attempt to perform some disk operation while the TR40xx is running on battery power Doing this is not recommended because the Floppy Disk Drive consumes very high power Therefore remaining battery charge will be depleted faster Also there is a change that the battery will run out of power before the disk operation completes ...

Page 127: ...e TR40xx cannot make sure whether the disk is damaged or simply not inserted Check the following Make sure that the disk is properly inserted into the Floppy Disk Drive If after pressing Retry the problem persists attempt to format the disk using the Format disk command Warning formatting permanently deletes all disk data If the problem is still not solved use another Floppy Disk ...

Page 128: ...mount of free space on the currently inserted Floppy Disk You can inquire the total data size by using the Status report command Free space command reports the amount of free space on the Floppy Disk You possible solutions in this situation are either use another disk insert it and hit Retry or format current disk using the Format disk command Warning formatting permanently deletes all disk data ...

Page 129: ...de Using Online communications This message is displayed when you are about to enter the Programming Mode while there is an Online User logged onto the TR40xx If you choose Yes then the Online User will be disconnected from the Terminal kicked out Choosing No will abort your attempt to enter the Programming Mode ...

Page 130: ...ogramming Mode When you attempt to set a new Master password you are requested to input the same password twice This is to make sure that you haven t made any typo This message is displayed when password you have entered first does not match the password you have entered the second time ...

Page 131: ...131 Please wait Just wait for a while ...
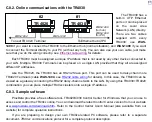
Page 132: ...Master Card See also Master ID This message is displayed when you are about to set new Master ID Card Simply read the card of your choice or press Cancel to abort this operation This screen will also timeout automatically in about 20 seconds ...

Page 133: ...r happen with an RFID version of the TR40xx Try to read the card again make sure you swipe it correctly try to keep the constant speed do not swipe the card too fast If the problem persists chances are that the card itself is damaged This happens quite often especially to Magnetic Cards that have a limited life cycle due to surface wear ...

Page 134: ...134 Reader failure Machine is halted See also This is a severe error that indicates some internal hardware malfunction Please return your TR40xx for service repair ...

Page 135: ...135 Real Time Clock failure Machine is halted See also This is a severe error that indicates some internal hardware malfunction Please return your TR40xx for service repair ...

Page 136: ...word Entering Programming Mode This message is displayed when you are setting a new Master password To make sure that you haven t made any typo you are required to input the same password string twice Just input the same string again and press Enter ...

Page 137: ...or It happens when the Floppy Disk already holds the maximum allowable number of files in its root directory In this case a new file cannot be created Either use another disk insert it and press Retry or Format the current one using the Format disk command Warning formatting permanently deletes all disk data ...

Page 138: ... minutes depending on the amount of data to be saved You can safely abort the saving by pressing and holding Abort until Abort this operation question is displayed then choosing Yes Aborting the Save to disk leaves both the TR40xx s internal data and the disk data intact a file of 0 size may appear on the disk as a result however ...

Page 139: ...139 The data you have entered is invalid See also Programming Mode This message is displayed when you input an invalid new setting value for example 13 10 65 for the Time Setting ...

Page 140: ...essage is displayed when you try to perform a Save to disk or Format disk operation on a write protected disk The Floppy Disk write protector is a plastic lever at the corner of the disk Simply eject the disk switch the lever put the disk back into the Drive and press Retry ...

Page 141: ...141 The menu is empty See also In an unlikely event that you ever face this message please contact us at feedback proxdata com To continue working simply press Close ...

Page 142: ... memory New data is the data that has never been saved to the disk or uploaded to the PC before You can always check the amount of new data by using the Status report command If saving entire TR40xx memory contents is what you want then you need to use the Mark all as new command first then try Save to disk again Complete coverage of the TR40xx database organization and related issues can be found...

Page 143: ...message means that the disk is not formatted properly formatted on a system other then PC AT compatible for example Mac or physically damaged The Format disk command applies a standard PC AT compatible formatting Warning formatting permanently deletes all disk data ...

Page 144: ...de This error is displayed when the User reads his her ID card and the TR40xx doesn t have its internal Real Time Clock set to a correct value Enter the Programming Mode and use the Time and Date Settings to set the Real Time Clock Only then the TR40xx will allow the Users to register ...

Page 145: ...Edit default event table Editing Bell and Default Event tables The Bell and Default Event tables of the TR40xx can both contain not more then 32 entries records each This message is displayed when you attempt to add the 33 rd record to either table ...

Page 146: ...so Status report Database organization and management This screen is displayed when you execute the Status report command Complete coverage of database related issues as well as explanation for the data displayed by this screen can be found in Database organization and management ...

Page 147: ... This message indicates that your TR40xx terminal s current firmware cannot support the installed I O board Please go to the ProxData website at www proxdata com to obtain the latest version of the firmware that will be recognize your I O board ...

Page 148: ...nly The I O board Ethernet adaptor of the TR4030 has an additional processor running its own firmware The firmware is re loaded into this processor during the System Reset This message is displayed while this task is being performed ...

Page 149: ...rogramming Mode Performing a System Reset This screen is displayed after you choose the Master Card on the first time you switch the TR40xx on or after the System Reset This is just an information screen read it and press F4 to continue you will find yourself in the Programming Mode ...

Page 150: ...000 displays any message that says Machine is halted To perform the System Reset Switch the TR40xx off Press and hold INIT button with any sharp object location shown on Figure above Switch the TR40xx back on and wait till the TR40xx beeps and displays Please wait Release the button and wait for Machine has been reset You may now switch it off Switch the TR40xx off and then back on again See Power...

Page 151: ...ntly loaded firmware version Before attempting to install a new firmware always check the firmware that is currently loaded into your TR40xx All firmware versions developed by the ProxData are assigned ascending version numbers The TR40xx displays the version number of the currently loaded firmware at the startup The Monitor screen displayed for a couple of seconds after the power up looks somewha...

Page 152: ...Windows 95 98 2000 distribution Procedures below assume the use of HyperTerminal for Windows 98 The HyperTerminal is normally found in Start Programs Accessories Communications HyperTerminal folder If it is not there then you must have opted it out when installing Windows on your PC Follow the instructions below to add HyperTerminal to your system be sure to have your Windows distribution CD handy...

Page 153: ...l is installed follows the procedures below to download new firmware file into the TR40xx Switch the TR40xx off Plug the Download Cable into the TR40xx as shown on the figure with the cable going outwards Application Download Port and the PC Master Port of the TR40xx share the same hardware internally When downloading the firmware make sure that no cable is attached to the PC Master Port Plug the ...

Page 154: ...send for a dialog will be displayed Switch the TR40xx on The Terminal s screen will display MONITOR v2 0 Loading Simultaneously the file transfer will begin When the transfer is finished the TR4020s LCD will show OK Switch the TR40xx off and disconnect the Download Cable from the Application Download Port ADP Switch the TR40xx back on again the Terminal should display the MONITOR screen for couple...

Page 155: ...for service repair File is too big or Invalid boot code This means that you are trying to download an invalid file CHECKSUM error No code loaded or code is damaged This means that currently loaded firmware is invalid Most probably the last firmware download process was not completed i e the code was not fully loaded Try downloading the firmware file again If the problem persists then something mus...

Page 156: ...Feed ASCII 0A Hex characters Fields are guaranteed to contain ASCII characters in the 20 7F Hex only All numerical values are represented by their string equivalents Each TR40xx s record consists of the following fields Field Length Format Event 1 E can be 1 2 3 or 4 Date 10 DD MM YYYY Time 8 hh mm ss ID code Variable xx x apostrophe is added to make sure that this field is treated as a string by ...

Page 157: ...each time a valid User ID card is read The Lock is activated for a period of time specified by the Lock activation duration Setting See Using the TR40xx as an Access Control Terminal for more information Both external Bell and Lock are wired to the TR40xx s terminal block connector located on the TR40xx s base cover There are 3 contacts provided for each relay common normally closed and normally o...

Page 158: ...Ethernet port of the TR4030 will NOT work properly when the Download cable is attached To avoid common confusion all pins are designated as inputs and outputs with respect to the Terminal Slave TR4020 4030 PC Master TR4020 PC Master TR4030 Scanner TR4020 4030 1 5 6 9 1 5 6 9 1 8 1 5 6 9 1 No connection 1 No connection 1 TX 1 No connection 2 RX Input 2 TX Output 2 TX 2 RX Input 3 TX Output 3 RX Inp...

Page 159: ...ine communications with the TR4030 This is done via Ethernet hub Use the direct wiring scheme in this case Direct wiring will not work if you want to connect the TR4030 to the PC bypassing the Ethernet hub Use Cross wiring scheme instead Always use a standard UTP Category III or IV cable for wiring Our part number for direct hub to Terminal cable is WAS 1499 for cross PC to Terminal WAS 1498 Direc...

Page 160: ...ft the base cover Note that there is a flat cable running between the base cover and the rest of the unit Plus there are 2 wires black and red running from the battery Make sure that both the flat cable and the wires don t get unplugged while you are rotating the cover Rotate the cover 180 degrees counter clockwise and press gently back into its position clearly visible as a slight recess in plast...

Page 161: ...rts Slave Scanner Floppy Disk Drive 3 5 1 44MB PC AT compatible Bell and Lock relays Max 24V 2A continuous 10A peak Mounting Wall mount or desktop rotating back cover Power supply DC 12V 500mA UPS battery capacity 8 hours completely recharges in 72 hours Operation Temperature 0 55 C o Operating relative humidity 10 90 Unit dimensions 187mm L x 147mm W x 95mm H Packaging dimensions 260mm L x 235mm ...

Reviews: