Appendix
- 108 -
5-2 Configuring Audio Input and Output
High Definition Audio (HD Audio)
HD Audio includes multiple high quality digital-to-analog converters (DACs). HD Audio features multistreaming
capabilities that allow multiple audio streams (in and out) to be simultaneously processed. For example, users can
listen to MP3 music, have an Internet chat, make a telephone call over the Internet, and etc. all at the same time.
A. Configuring Speakers
(The following instructions use Windows 7 as the example operating system.)
5-2-1 Configuring 2/4/5.1/7.1-Channel Audio
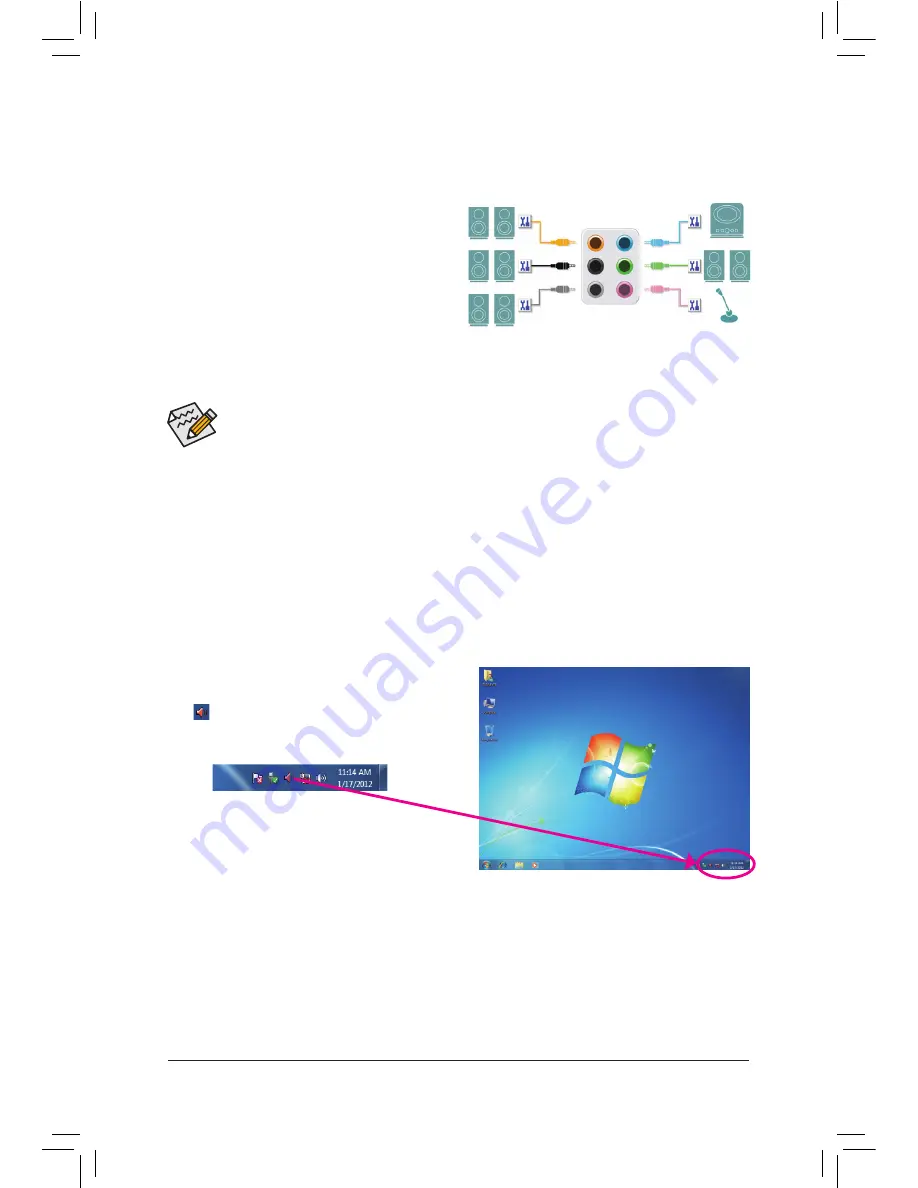
The motherboard provides six audio jacks on the back
panel which support 2/4/5.1/7.1-channel
(Note)
audio.
The picture to the right shows the default audio jack
assignments.
The integrated HD (High Definition) audio provides jack
retasking capability that allows the user to change the
function for each jack through the audio driver.
For example, in a 4-channel audio configuration, if
a Rear speaker is plugged into the default Center/Subwoofer speaker out jack, you can retask the Center/
Subwoofer speaker out jack to be Rear speaker out.
•
To install a microphone, connect your microphone to the Mic in jack and manually configure the
jack for microphone functionality.
•
Audio signals will be present on both of the front and back panel audio connections simultaneously.
If you want to mute the back panel audio (only supported when using an HD front panel audio
module), refer to instructions on the next page.
Center/Subwoofer
Speaker Out
Line In
Rear Speaker Out
Front Speaker Out
Mic In
Side
Speaker Out
(Note) 2/4/5.1/7.1-Channel Audio Configurations:
Refer to the following for multi-channel speaker configurations.
•
2-channel audio: Headphone or Line out.
•
4-channel audio: Front speaker out and Rear speaker out.
•
5.1-channel audio: Front speaker out, Rear speaker out, and Center/Subwoofer speaker out.
•
7.1-channel audio: Front speaker out, Rear speaker out, Center/Subwoofer speaker out, and Side speaker out.
Step 1:
After installing the audio driver, the
HD Audio Manager
icon
will appear in the notification area. Double-click
the icon to access the
HD Audio Manager
.
Summary of Contents for GA-Z77X-UP7
Page 1: ...GA Z77X UP7 User s Manual Rev 1001 12ME Z77XUP7 1001R ...
Page 2: ...Motherboard GA Z77X UP7 Aug 31 2012 Aug 31 2012 Motherboard GA Z77X UP7 ...
Page 84: ...Unique Features 84 ...
Page 123: ... 123 Appendix ...
Page 124: ...Appendix 124 ...
Page 125: ... 125 Appendix ...
Page 126: ...Appendix 126 ...


