23
Description of items in
Figure 3-3
is as follows:
Profile Name:
Users can save different profiles names for different configurations.
SSID:
Select the AP detected by the system from the drop-down list or input a SSID.
Power Saving mode:
Transceivers consume a lot of power in WLAN. Select “Power
Saving Mode” (PSM) to turn off transceivers when no data is transmitted or select CAM to
continuously turn on transceivers.
Network Type
: “Infrastructure” and “802.11 Ad Hoc”. When the network type is
“Infrastructure”, PSM will function but not Preamble. On the contrary, when the network
type is “802.11 Ad Hoc”, Preamble will function but not PSM. Besides, Channel option will
appear
(see
Figure 3-4
)
and 802.1X Authentication will not function.
Figure 3-4
TX Power:
Select percentage of transmitted power.
RTS Threshold:
This is a mechanism implemented to prevent the “Hidden Node” problem,
“Hidden Note” is a situation in which two stations are within range of the same Access
Point, but are not within range of each other. Therefore, they are hidden nodes for each
other and can not detect each other. This mechanism is a way to prevent data collision
when WLAN equipments require transmission.
Fragment Threshold
: Fragmentation mechanism is used for improving the efficiency
when high traffic flows along in the wireless network.
3-1-2. Authentication and Security:
If an authentication or security setting is configured in your Access Point or router, you
must enable this function to ensure successful connection. Use the following tab to
configure data security and ID authentication (see
Figure 3-5
). You may configure
different settings in the profile, including 802.11 Protocol Authentication and Security and
802.1X Protocol.
Summary of Contents for GN-WS30N-RH
Page 9: ...5 Step 4 Click Next Step 5 Click Next ...
Page 13: ...9 Step 4 Click Next Step 5 Click Next ...
Page 17: ...13 Step 4 Click Next Step 5 Click Next ...
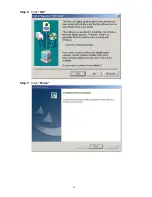
Page 18: ...14 Step 6 Click OK Step 7 Click Finish ...
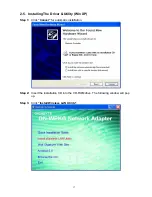
Page 19: ...15 Step 8 Click Yes Step 9 To install 802 1X authentication function click Browse the CD ...
Page 22: ...18 Step 4 Click Next Step 5 Click Next ...
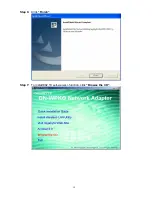
Page 23: ...19 Step 6 Click Finish Step 7 To install 802 1X authentication function click Browse the CD ...


