31
3-5.“Advance” Setting
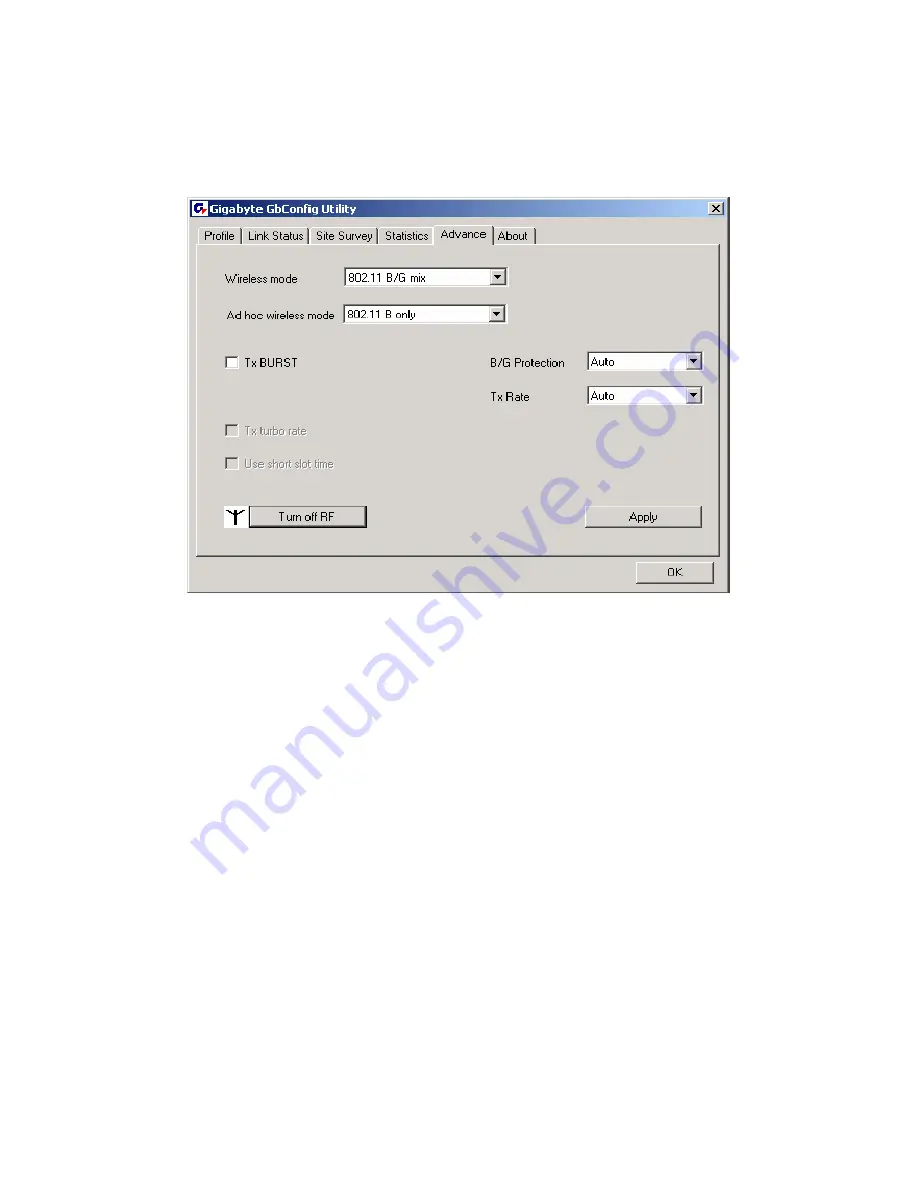
“Advance”
tab includes fields of various parameters to review or change drivers. Just
click “Apply” button to apply any parameter change to the driver in the tab. A reboot is not
needed for the WLAN card
(see
Figure 3-12
)
Figure 3-12.
Advance
Description of items in
Figure 3-12
is as follows:
Wireless Mode:
Sets infrastructure Protocols, including 802.11 B/G mix and 802.11 B
Only.
Ad Hoc Wireless Mode:
Sets Ad Hoc Wireless Protocols, including 802.11 B/G mix,
802.11 B Only and 802.11 G Only.
TX Burst:
The longest interval between frames is normally one DIFS while frames are
transmitted. When this setting is open, the longest interval between frames is one SIFS
that means the system is allowed to transmit higher capacity of data in one interval.
B/G Protection:
802.11b uses CCK modulation. 802.11g uses OFDM while CCK
modulation for 802.11b is compatible. To prevent data collision between two stations with
802.11b and 802.11g within range of the same Access Point, it is necessary to set 11B/G
Protection. This setting only functions when 802.11 B/G mix is selected as Wireless Mode.
Three setting are available: AUTO, EABLE and DISABLE.
This is a mechanism implemented to prevent the “Hidden Node” problem, “Hidden Note” is
a situation in which two stations are within range of the same Access Point, but are not
within range of each other. Therefore, they are hidden nodes for each other and can not
detect each other. This mechanism is a way to prevent data collision when WLAN
equipments require transmission.
TX Rate
: This option adjusts settings of TX Rate according to the setting of “Infrastructure
Wireless Mode”.
Signal Control:
To turn off transferring signals, click on
“Turn Off RF”
icon on the bottom
right corner of the screen. Click
“Turn On RF”
to transfer signal again.
TX Turbo rate and Use short slot time:
currently does not support.
Summary of Contents for GN-WS30N-RH
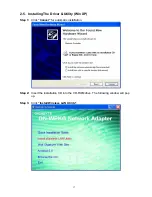
Page 9: ...5 Step 4 Click Next Step 5 Click Next ...
Page 13: ...9 Step 4 Click Next Step 5 Click Next ...
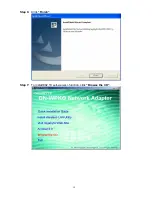
Page 17: ...13 Step 4 Click Next Step 5 Click Next ...
Page 18: ...14 Step 6 Click OK Step 7 Click Finish ...
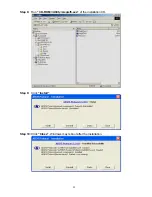
Page 19: ...15 Step 8 Click Yes Step 9 To install 802 1X authentication function click Browse the CD ...
Page 22: ...18 Step 4 Click Next Step 5 Click Next ...
Page 23: ...19 Step 6 Click Finish Step 7 To install 802 1X authentication function click Browse the CD ...


