background image

BIOS Setup

- 60 -

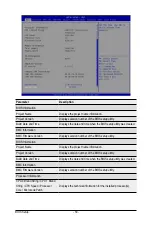
Parameter

Description

COM1/SOL / COM2 Console 
Redirection Settings 
(continued)


Š

Bits per second


– Selects the transfer rate for console redirection.


– Options available: 9600/19200/38400/57600/115200. Default setting 

is 

115200

.


Š

Data Bits


– Selects the number of data bits used for console redirection.


– Options available: 7/8. Default setting is 

8

.


Š

Parity


– A parity bit can be sent with the data bits to detect some 

transmission errors.


– Even: parity bit is 0 if the num of 1's in the data bits is even.


– Odd: parity bit is 0 if num of 1's in the data bits is odd.


– Mark: parity bit is always 1. Space: Parity bit is always 0.


– Mark and Space Parity do not allow for error detection.


– Options available: None/Even/Odd/Mark/Space. Default setting is 

None

.


Š

Stop Bits


– Stop bits indicate the end of a serial data packet. (A start bit 

indicates the beginning). The standard setting is 1 stop bit. 
Communication with slow devices may require more than 1 stop bit.


– Options available: 1/2. Default setting is 

1

.


Š

Flow Control


Flow control can prevent data loss from buffer overflow. When 

sending data, if the receiving buffers are full, a 'stop' signal can 

be sent to stop the data flow. Once the buffers are empty, a 'start' 
signal can be sent to re-start the flow. Hardware flow control uses 

two wires to send start/stop signals.


– Options available: None/Hardware RTS/CTS. Default setting is 

None

.


Š

VT-UTF8 Combo Key Support


– Enable/Disable the VT-UTF8 Combo Key Support.


– Options available: Enabled/Disabled. Default setting is 

Enabled

.


Š

Recorder Mode

(Note)


– When this mode enabled, only texts will be send. This is to capture 

Terminal data.


– Options available: Enabled/Disabled. Default setting is 

Disabled

.


Š

Resolution 100x31

(Note)


– Enable/Disable extended terminal resolution.


– Options available: Enabled/Disabled. Default setting is 

Enabled

.


Š

Putty KeyPad

(Note)


– Selects FunctionKey and KeyPad on Putty.


– Options available: T100/LINUX/XTERMR6/SCO/ESCN/VT400.


– Default setting is VT100.

(Note)  Advanced items prompt when this item is defined.

Summary of Contents for S451-Z30

Page 1: ...S451 Z30 4U 36 Bay Single Processors Storage Server AMD User Manual Rev B00...

Page 2: ...and BIOS User Guide detailed information about the installation use of an add on hardware or software component e g BMC firmware rail kit compatible with this product Quick Installation Guide a short...

Page 3: ...uide NOTE Gives bits and pieces of additional information related to the current topic CAUTION Gives precautionary measures to avoid possible hardware or software problems WARNING Alerts you to any da...

Page 4: ...cord extends from the server WARNING To reduce the risk of personal injury from hot surfaces allow the drives and the internal system components to cool before touching them WARNING This server is equ...

Page 5: ...wer telephone and communication cables Turn off the system and discon nect the cables attached to the system before servicing it Otherwise personal injury or equipment damage can result Electrostatic...

Page 6: ...ms with the function con trolled by that jumper Take care to grip with but not squeeze the pliers or other tool used to remove a jumper or the pins on the board may bend or break CAUTION Risk of explo...

Page 7: ...3 Installing the CPU and Heat Sink 28 3 4 Removing and Installing Memory 30 3 4 1 Six Channel Memory Configuration 30 3 4 2 Removing and Installing a Memory Module 31 3 4 3 Processor and Memory Module...

Page 8: ...work Configuration 78 5 2 19 MAC IPv6 Network Configuration 79 5 3 AMD CBS Menu 80 5 3 1 CPU Common Options 81 5 3 2 DF Common Options 84 5 3 3 UMC Common Options 87 5 3 4 NBIO Common Options 89 5 3 5...

Page 9: ...9 5 10 1 PEI Beep Codes 117 5 10 2 DXE Beep Codes 117...

Page 10: ...This page intentionally left blank...

Page 11: ...dry and first touch a metal object to eliminate static electricity Prior to installing the motherboard please have it on top of an antistatic pad or within an electrostatic shielding container Before...

Page 12: ...mory QVL list if running 3200 Mhz with 2DPC LAN 2 x SFP 10Gb s LAN ports Broadcom BCM 57810S 1 x 10 100 1000 management LAN Expansion Slot Slot_7 1 x PCIe x8 Gen3 x8 bus slot Slot_6 1 x PCIe x16 Gen3...

Page 13: ...S card is required to enable the drive bays Suggested 12Gb s SAS cards CRA4648 CSA4648 SAS Depends on SAS add on Card Internal I O 1 x 24 pin ATX main power connector 2 x 8 pin ATX 12V power connector...

Page 14: ...TE Management Console AMI MegaRAC SP X web interface Dashboard JAVA Based Serial Over LAN HTML5 KVM Sensor Monitor Voltage RPM Temperature CPU Status etc Sensor Reading History Data FRU Information SE...

Page 15: ...x 1000W 100 240V 12V 80 5A 12Vsb 3A Max 1200W 200 240V or 240Vdc input 12V 97A 12Vsb 3A Environment Ambient Temperature Relative Humidity Operating temperature 10 C to 35 C Operating humidity 8 80 non...

Page 16: ...ves on rear side 4 x SlimLine SAS ASPEED AST2500 RUSB2 0 RUSB3 0 FUSB3 0 USB3 0 x4 VGA COM_1 COM_2 PCIe3 0 x8 Broadcom BCM57810 2 x 10Gb s SFP LAN Front Backplane Rear Backplane SAS Card HW RAID or SW...

Page 17: ...ter 2 System Appearance 2 1 Front View No Description 1 Front Panel LEDs and buttons 2 Reset Switch 3 Front USB 3 0 ports Refer to Chapter 2 3 Front Panel LED and Buttons for a detailed description of...

Page 18: ...ton with LED 8 PCIe Card Bay x 7 Refer to Chapter 2 4 Rear System LAN LEDs for a detailed description of the function of the LEDs HDD25 HDD29 HDD33 HDD26 HDD30 HDD34 HDD_OS1 HDD_OS2 HDD27 HDD31 HDD35...

Page 19: ...rasmission or receiving is occuring N A Off Indicates no data transmission or receiving is occuring 4 LAN2 Active Link LED Green On Indicates a link between the system and the network or no access Gre...

Page 20: ...nk between system and network or no access Blink Data transmission or receiving is occurring N A Off No data transmission or receiving is occurring 3 1GbE Speed LED Yellow On 1 Gbps data rate Green On...

Page 21: ...crip on Red LED Error Green LED Ac vity Priority Hex SES Control Hex Forced Condi on Cleared Empty slot or disk unplugged Off Off 10 N A SEP internal OK Off 11 RQST OK Condi on Cleared Disk loaded or...

Page 22: ...TROL PRDFAIL ActFlash Rebuild Remap Aborted R R Abort Spare disk summoned for RAID rebuild yet aborted Dying disk detected by enclosure On 05 RQST R R ABORT ActFlash Iden fy Prompt Iden fy Locate Slow...

Page 23: ...23 System Appearance 2 5 Hard Drive OXH UHHQ 5HG OWHUQDWLYH HDD Power LED Blue When HDD Insert Active HDD Power LED Green Red When HDD Re Write Active Green When HDD Fail Active Red...

Page 24: ...old redundant mode 2Hz Blink GREEN Power supply F W updateing mode Amber AC cord unplugged or AC power lost with a second power supply in parallel still with AC input power Power supply critical event...

Page 25: ...are working inside the computer case If possible wear a grounded wrist strap when you are working inside the computer case Alternatively discharge any static electricity by touching the bare metal sy...

Page 26: ...to AC power Follow these instructions to remove the chassis covers 1 Remove the single screw securing the chassis cover 2 Push down on the indentations located on the side of the chassis cover 3 Slid...

Page 27: ...and Installing the Fan Duct Follow these instructions to remove the fan duct 1 Lift up to remove the fan duct 2 To reinstall the fan duct align the fan duct with the guiding groove Push down the fan...

Page 28: ...ese instructions to install the CPU 1 Align and install the processor on the carrier making sure to line up the triangle markers on the corner of the CPU to the triangle mark on the corner of the CPU...

Page 29: ...3 2 2 7 2 2 3 3 1 1 4 4 8 9 When installing the heat sink over the CPU use T30 Lobe driver to tighten the 4 captive nuts in sequential order 1g2g3g4 Tighten the CPU cover screws in sequential order 1...

Page 30: ...MM_P0_C1 DIMM_P0_E1 DIMM_P0_E0 DIMM_P0_H1 DIMM_P0_H0 DIMM_P0_G1 DIMM_P0_G0 DIMM_P0_F1 DIMM_P0_F0 Read the following guidelines before you begin to install the memory Make sure that the motherboard sup...

Page 31: ...se the plastic clip at both edges of the DIMM slots to lock the DIMM module 3 Reverse the installation steps when you want to remove the DIMM module 1 2 2 3 4 3 Processor and Memory Module Matrix Tabl...

Page 32: ...MM per Channel EPYC Memory Speed based on DIMM Population Two DIMM per Channel DIMM Type DIMM Population Max EPYC 7003 DDR Frequency MHz DIMM 0 DIMM 1 RDIMM 1R 3200 1R 1R 2933 2R or 2DR 3200 1R 2R or...

Page 33: ...d from the server prior to installing a PCIe card Failure to observe these warnings could result in personal injury or damage to equipment The PCI riser assembly does not include a riser card or any c...

Page 34: ...incorrectly Make sure that the HDD is connected to the HDD connector on the backplane Follow these instructions to install a 3 5 hard disk drive 1 Press the release button 2 Extend the locking lever...

Page 35: ...button 2 Extend the locking lever 3 Pull the locking lever in the direction indicated to remove the HDD tray 4 Align the hard disk drive with the positioning screw on the HDD tray 5 Secure the hard di...

Page 36: ...e instructions to replace a fan assembly For Top Compartment Fans 1 Grasp the fan assembly from the left and right side and then push the release buttons while lifting up the fan assembly from the cha...

Page 37: ...e release levers on the left and right side of the top compartment to pull the top compartment outwards 3 Grasp the fan assembly from the left and right side and then push the release buttons while li...

Page 38: ...ply unit along the direction of the arrow 3 Pull the power supply handle at the same time and pull out the power supply unit 4 Insert the replacement power supply unit firmly into the chassis Connect...

Page 39: ...39 System Hardware Installation 3 9 Cable Routing 4 Front HDD BPB to Rear HDD BPB SAS HDD Cable Bottom 3 Front USB 3 0 Cable 1 Front BPB Power cable 2 Front Panel Reset Button Cable...

Page 40: ...System Hardware Installation 40 6 Rear HDD BPB SATA Cable 5 SAS RAID Card to Front HDD BPB Cable Top 7 System Fan Power Cables Top 8 System Fan Power Cable Bottom...

Page 41: ...41 System Hardware Installation 9 PDB to BPB Power cable 11 PDB to MB Power cable 10 MB to Rear BPB SGPIO cable 12 PDB to MB PMBus cable...

Page 42: ...System Hardware Installation 42 This page intentionally left blank...

Page 43: ...18 20 19 17 10 22 21 24 25 26 27 28 31 34 33 32 30 29 35 36 37 38 39 40 41 42 43 44 23 Item Description 1 ID button with LED 2 USB 2 0 ports 3 Server managemnt LAN port top USB 3 0 port bottom 4 SFP L...

Page 44: ...6Gb s signal 22 Slimline connector 1 SATA 6Gb s signal 23 Slimline connector 2 SATA 6Gb s signal 24 Slimline connector 3 SATA 6Gb s signal 25 Front panel header 26 HDD back plane board header 27 M 2...

Page 45: ...45 Motherboard Components 4 2 Jumper Settings 1 2 3 4 5...

Page 46: ...om core chipset 2 3 Closed From BMC Default se ng S3 Power On Select Jumper 1 2 Close Stop an ini al power on when BMC is not ready 2 3 Close Keep ini al power on Default se ng Clearing Supervisor Pas...

Page 47: ...caution Inadequate BIOS flashing may result in system malfunction It is recommended that you not alter the default settings unless you need to to prevent system instability or other unexpected results...

Page 48: ...main chipset and system event logs Server Management Server additional features enabled disabled setup menus Security Change set or disable supervisor and user password Configuration supervisor passw...

Page 49: ...displayed on the bottom line of the Main Menu Submenu Help While in a submenu press F1 to display a help screen General Help of function keys available for the menu Press Esc to exit the help screen H...

Page 50: ...n number of the BIOS setup utility BIOS Information Project Name Displays the project name information Project Version Displays version number of the BIOS setup utility Build Date and Time Displays th...

Page 51: ...on information Onboard LAN Information LAN1 MAC Address Note2 Displays LAN MAC address information LAN2 MAC Address Note2 Displays LAN MAC address information System Date Sets the date following the w...

Page 52: ...Setup 52 5 2 Advanced Menu The Advanced menu display submenu options for configuring the function of various hardware components Select a submenu item then press Enter to access the related submenu sc...

Page 53: ...iguration Security Device Support Select Enable to activate TPM support feature Options available Enable Disable Default setting is Enable SPI TPM Support Options available Enabled Disabled Default se...

Page 54: ...BIOS Setup 54 5 2 2 PSP Firmware Versions The PSP Firmware Versions page displays the basic PSP firmware version information Items on this window are non configurable...

Page 55: ...55 BIOS Setup 5 2 3 Legacy Video Select Parameter Description OnBrd Ext VGA Select Select between onboard or external VGA support Options available Auto Onboard External Default setting is Onboard...

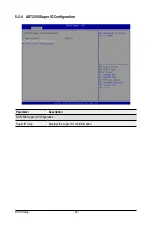
Page 56: ...BIOS Setup 56 5 2 4 AST2500 Super IO Configuration Parameter Description AST2500 Super IO Configuration Super IO Chip Displays the super IO chip information...

Page 57: ...gs Change Settings Note2 Select an optimal setting for the Super I O device Options available for Serial Port 1 Auto IO 3F8h IRQ 4 IO 3F8h IRQ 3 4 5 6 7 9 10 11 12 IO 2F8h IRQ 3 4 5 6 7 9 10 11 12 IO...

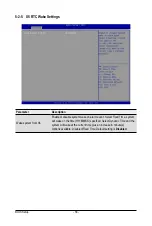
Page 58: ...om S5 Enable or disable system wake on alarm event Select Fixed Time system will wake on the time HH MM SS specified Select Dynamic Time and the system will wake at the current time plus an increase i...

Page 59: ...the available COM ports Serial Port for Out of Band Management Windows Emergency Management Services EMS Console Redirection Note Selects a COM port for EMS console redirection EMS console redirection...

Page 60: ...ith slow devices may require more than 1 stop bit Options available 1 2 Default setting is 1 Flow Control Flow control can prevent data loss from buffer overflow When sending data if the receiving buf...

Page 61: ...Console Redirection Settings Out of Band Mgmt Port Selects a serial port to remotely manage a Windows server OS Options available COM1 SOL COM2 Default setting is COM1 SOL Terminal Type Selects a ter...

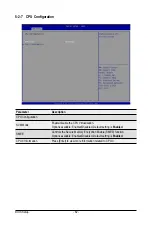
Page 62: ...e disable the CPU Virtualization Options available Enabled Disabled Default setting is Enabled SMEE Controls the Secure Memory Encryption Enable SMEE function Options available Enabled Disabled Defaul...

Page 63: ...63 BIOS Setup 5 2 8 PCI Subsystem Settings...

Page 64: ...ion ROM for the related PCI E slot Options available Enabled Disabled Default setting is Enabled Onboard LAN Controller Note2 Enable Disable the onboard LAN devices Options available Enabled Disabled...

Page 65: ...f Enable Disable the XHCI USB 3 0 Hand off support Options available Enabled Disabled Default setting is Enabled USB Mass Storage Driver Support Note Enable Disable the USB Mass Storage Driver Support...

Page 66: ...r Auto uses default value for a Root port it is 100 ms for a Hub port the delay is taken from Hub descriptor Options available Auto Manual Default setting is Auto Mass Storage Devices AMI Virtual CDRO...

Page 67: ...67 BIOS Setup 5 2 10 NVMe Configuration Parameter Description NVMe controller and Drive Information Displays the NVMe devices connected to the system...

Page 68: ...BIOS Setup 68 5 2 11 SATA Configuration...

Page 69: ...69 BIOS Setup 5 2 12 UEFI POST LOGO Configuration Parameter Description UEFI Configuration Select output device type...

Page 70: ...BIOS Setup 70 This page intentionally left blank...

Page 71: ...able Enabled Disabled Default setting is Disabled Ipv6 PXE Support Note Enable Disable the Ipv6 PXE feature Options available Enabled Disabled Default setting is Disabled Ipv6 HTTP Support Note Enable...

Page 72: ...Mem Configuration Status Parameter Description CPU 0 Press Enter for configuration of advanced items Channel A BC D E F G H DIMM0 Presence DIMM1 Presence Chipset Bank Interleave Dram EC Dram Parity Di...

Page 73: ...n Press Enter for configuration of advanced items Enroll Cert Press Enter to enroll a certificate Enroll Cert Using File Cert GUID Input digit character in 1111111 2222 3333 4444 1234567890ab format C...

Page 74: ...BIOS Setup 74 5 2 16 Intel R I350 Gigabit Network Connection...

Page 75: ...Press the numeric keys to adjust desired values UEFI Driver Displays the technical specifications for the Network Interface Controller Adapter PBA Displays the technical specifications for the Networ...

Page 76: ...BIOS Setup 76 5 2 17 VLAN Configuration...

Page 77: ...0 to 4094 Priority Sets 802 1Q Priority for a new VLAN or an existing VLAN Press the keys to increase or decrease the desired values The valid range is from 0 to 7 Add VLAN Press Enter to create a ne...

Page 78: ...Enabled Disabled Default setting is Enabled Local IP Address Note Press Enter to configure local IP address Local NetMask Note Press Enter to configure local NetMask Local Gateway Note Press Enter to...

Page 79: ...Table Gateway addresses DNS addresses Interface ID The 64 bit alternative interface ID for the device The string is colon separated e g ff dd 88 66 cc 1 2 3 DAD Transmit Count The number of consecutiv...

Page 80: ...80 5 3 AMD CBS Menu AMD CBS menu displays submenu options for configuring the CPU related information that the BIOS automatically sets Select a submenu item then press Enter to access the related subm...

Page 81: ...of CCDs to be used the number of cores to be used and whether to enable or disable symmetric multithreading Prefetcher settings Press Enter for more options L1 Stream HW Prefetcher Option to enable o...

Page 82: ...nt This field specifies the max valid ASID which affects the maximum system physical address space 16TB of physical address space is available for systems that support 253 ASIDs while 8TB of physical...

Page 83: ...expected breakpoint redirect capability compromised Silver workaround DbReq PDM and breakpoint redirect function as expected SCAN capability compromised Options available Auto No Workaround Bronze Wo...

Page 84: ...48 hours Auto Default option is Auto Poison scrubber control Allows you to enable or disable poison scrubber control Options available Disabled Enabled Auto Default option is Auto Redirect scrubber c...

Page 85: ...to remap DRAM out of the space just below the 1TB boundary The ability to remap depends on DRAM configuration NPS and interleaving selection and may not always be possible Options available Do not rem...

Page 86: ...MC downstream slaves Options avaialble Sync flood disabled Sync flood enabled Auto Default option is Auto Disable DF sync flood propagation Enable Disable DF SyncFlood Options avaialble Sync flood dis...

Page 87: ...les enforcement of POR restrictions for DDR4 frequency and voltage programming DRAM Controller Configuration Press Enter to configure DRAM controller options CAD Bus Configuration Press Enter to confi...

Page 88: ...on is Auto Address Hash Bank Enable or disable bank address hashing Options available Disabled Enabled Auto Default option is Auto Address Hash CS Enable or disable CS address hashing Options availabl...

Page 89: ...available Enable Disabled Auto Default option is Auto PCIe ARI Support Enables Alternative Routing ID Interpretation Options available Disable Enable Auto Default option is Auto PCIe Ten Bit Tag Supp...

Page 90: ...wer efficiency optimized CCLK DPM settings Options available Auto Enabled Default option is Auto Package Power Limit Control Auto Use the fused PPT Manual User can set PPT PPT will be used as the ASIC...

Page 91: ...to APML When set to FALSE that reporting will be disabled Options available Enabled Disabled Default option is Disabled Egress Poison Mask High Enter a value These set the enable mask for masking of...

Page 92: ...ted to Okay responses Options available Enabled Trigger MCOMMIT Error Log Errors in MCA Default option is Log Errors in MCA Log Poison Data from SLINK This value specifies whether poison data propogat...

Page 93: ...ble AER Cap Enables Advanced Error Reporting Capabilty Options available Enable Disabled Auto Default option is Auto Early Link Speed Sets Early Link Speed Options available Auto Gen1 Gen2 Default opt...

Page 94: ...or disable SATA RAS support Options available Disabled Enabled Auto Default setting is Auto Sata Disabled AHCI Prefetch Function Enable or disable Sata Disabled AHCI Prefetch Function Options availabl...

Page 95: ...ss Control Select AC Loss Control Method Options available Power Off Power On Last State Default setting is Last State I2C Configuration Options Press Enter for more options I2C 0 1 2 3 4 5 Enable Ena...

Page 96: ...l select MS driver for SD selections Options available AMD eMMC Driver MS Driver Auto Default setting is Auto D3 Cold Support Options available Disabled Enabled Auto Default setting is Auto eMMC Boot...

Page 97: ...97 BIOS Setup 5 3 6 NTB Common Options Parameter Description NTB Common Options NTB Enable Enable or disable OnChip SATA controller Options available Auto Enable Default setting is Auto...

Page 98: ...Parameter Description Soc Miscellaneous Control ABL Console Out Control Enable Enable ConsoleOut Function for ABL Disable Disable ConsoleOut Function for ABL Auto Keep default behavior Options availab...

Page 99: ...the function of AMD PBS Select a submenu item then press Enter to access the related submenu screen Parameter Description AMD PBS RAS Press Enter for advanced configurations SPI Locking Enable or dis...

Page 100: ...e is 1000 dec SMI Scale Unit Defines the unit of time scale Options available millisecond second minute Default option is millisecond SMI Period Enter a value Defines the polling interval in milliseco...

Page 101: ...evice UnCorr Err Mask Reg Enter a value Intialize the PCIe AER Uncorrected Error Mask register of PCIe Device PCIe Device UnCorr Error Sev Reg Enter a value Intialize the PCIe AER Uncorrected Error Se...

Page 102: ...een Parameter Description PCIe Link Training Type PCIe Link training in 1 or 2 steps Options available 1 Step 2Step Default setting is 1 Step PCIe Compliance Mode Options available On Off Default sett...

Page 103: ...Timer Enable Disable OS Watchdog Timer function Options available Enabled Disabled Default setting is Disabled OS Wtd Timer Timeout Configure OS Watchdog Timer Options available 5 minutes 10 minutes 1...

Page 104: ...rameter Description View FRU Information Press Enter to view the advanced items BMC network configuration Press Enter to configure advanced items IPv6 BMC Network Configuration Press Enter to configur...

Page 105: ...ing SEL Choose options for erasing SEL Options available No Yes On next reset Yes On every reset Default setting is No When SEL is Full Choose options for reactions to a full SEL Options available Do...

Page 106: ...Information The FRU page is a simple display page for basic system ID information as well as System product information Items on this window are non configurable Note The model name will vary depends...

Page 107: ...BMC network parameters during BIOS phase Options available Unspecified Static DynamicBmcDhcp Default setting is DynamicBmcDhcp Station IP address Displays IP Address information Subnet mask Displays S...

Page 108: ...network during BIOS phase Options available Unspecified Disable Enable Default setting is Enable IPv6 BMC Lan IP Address Source Select to configure LAN channel parameters statically or dynamically by...

Page 109: ...ll settings in the Setup Utility User Password Entering this password will restrict a user s access to the Setup menus To enable or disable this field a Administrator Password must first be set A user...

Page 110: ...being loaded before Windows loads and gets to the login screen have not been tampered with When set to Standard it will automatically load the Secure Boot keys form the BIOS databases When set to Cus...

Page 111: ...splays the current status of the Key Exchange Key Database KEK Press Enter to configure a new KEK or load additional KEK from storage devices Options available Set Update Append Authorized Signatures...

Page 112: ...ut the desired values Bootup NumLock State Enable Disable the Bootup NumLock function Options available On Off Default setting is On Quiet Boot Enable Disable showing the logo during POST Options avai...

Page 113: ...113 BIOS Setup Parameter Description UEFI Network Drive BBS Priorities Press Enter to configure the boot priority UEFI Application Boot Priorities Press Enter to configure the boot priority...

Page 114: ...ities The UEFI network drive BBS priorities submenu allows you to specify the boot device priority from the available UEFI network drives during system boot up BIOS setup will display an error message...

Page 115: ...orities The UEFI application boot priorities submenu allows you to specify the boot device priority from the available UEFI applications during system boot up BIOS setup will display an error message...

Page 116: ...o far to any of the setup options Options available Yes No Default Options Restore Defaults Loads the default settings for all BIOS setup parameters Setup Defaults are quite demanding in terms of reso...

Page 117: ...L was not found 3 DXE Core Firmware Volume was not found 4 Recovery failed 4 S3 Resume failed 7 Reset PPI is not available 5 10 2 DXE Beep Codes of Beeps Description 1 Invalid password 4 Some of the A...

Page 118: ...BIOS Setup 118 This page left intentionally blank...

Reviews: