English
12
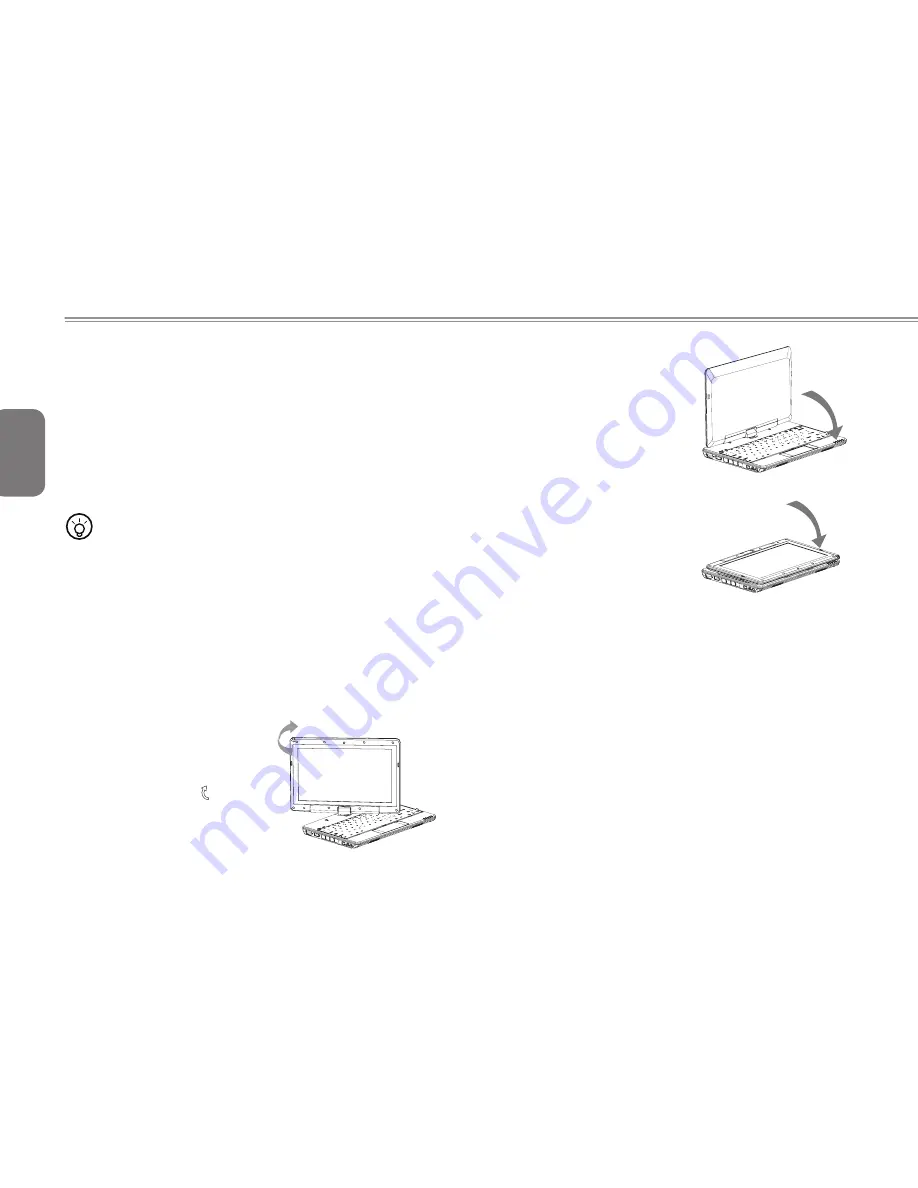
3. Follow the sign to turn the screen
clockwise up to 180 degree so that
the screen is facing out.
4. Lay the turned screen down into
the flat position. The keyboard will
be covered by the display. Use the
stylus or simply touch the screen to
operate T1000 as a Tablet PC.
5. Wh e n d o n e w i th Ta b l e t PC ,
reverse the above instruction (erect
the screen to 90 degree, turn
counterclockwise to 180 degree) to
set T1000 back to original position.
* Attention: Please note that the screen can only rotate at 180
degree clockwise. Be sure to turn the screen according to the sign.
Forcing the screen to turn at the wrong angle will cause serious
damage to the the T1000.
1.18 Operating Temperature
Operating Temperature : 10ºC to 40ºC
1.16 Touch Screen Calibration
Below are the two conditions that you need to calibrate your touch-screen.
• The first time Windows
®
is installed and boot up. The active cursor
is shifted; not exactly the same position where is tapped.
• Periodically when you find the active cursor is shifted away from
the screen position where is tapped.
To calibrate the touch-screen, please select the Calibrate function in
Smart Manager. (Please refer to Chapter 3 for more information)
•••••••••••••••••••••••
Note: You need to set screen display resolution to right
resolution 1366x768 before proceeding with the
calibration.
1.17 Use your T1000 as a Tablet PC
The screen of T1000 is convertible to simulate a Tablet PC. Follow
the steps to use this function.
1. Open the lid (the screen display) of T1000.
2. On the top center above the
keyboard is the pivot connecting
the display panel to the bottom
case. There is a sign " "
Summary of Contents for T1000 Series
Page 7: ...English T1000 SERIES USER S MANUAL VI ...
Page 10: ...English IX ...
Page 23: ...English T1000 SERIES USER S MANUAL 13 Chapter 2 Battery ...
Page 27: ...English T1000 SERIES USER S MANUAL 17 Chapter 3 GIGABYTE Smart Manager ...
Page 37: ...English T1000 SERIES USER S MANUAL 27 Appendix I Specifications ...
Page 39: ...English T1000 SERIES USER S MANUAL 29 Appendix II Smart Recovery Smart Recovery ...


