background image


25

Gigaset R630H PRO / HSG - UK-IE / A31008-M2553-R161-1-7619 / settings.fm / 8/14/13

Te

mplat

e

 B

o

rn

eo

, V

e

rs

ion 1

, 21.

06

.2

012

Adjusting the telephone settings

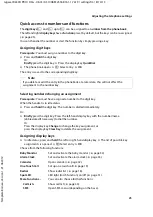
Quick access to numbers and functions

The 

digit keys 

Q

 and 

2

 up to 

O

 can be assigned to a 

number from the phonebook

The left and right 

display keys

 have a 

function

 preset by default, but the keys can be re-assigned 

(

¢

 page 25).

You can then dial the number or start the function by simply pressing a key. 

Assigning digit keys 

Prerequisite:

 You must assign a number to the digit key.

¤

Press and 

hold

 the digit key. 


Or:


Briefly

 press the digit key. 

¤


Press the display key 

QuickDial

.

¤

The phonebook opens. 

¤


q

 Select entry.


¤


OK

The entry is saved to the corresponding digit key.

Selecting numbers/changing an assignment

Prerequisite:

 You must have assigned a number to the digit key.

When the handset is in idle status 

¤

Press and 

hold

 the digit key: The number is dialled immediately.

Or: 

¤

Briefly

 press the digit key: Press the left-hand display key with the number/name 

(abbreviated if necessary) to dial the number.


Or: 


Press the display key 

Change

 to change the key assignment, or 


press the display key 

Clear Key

 to delete the assignment.

Assigning display keys

¤

In idle status, press and 

hold 

the left or right-hand display key. 

¤

 The list of possible key 

assignments is opened.


¤


q

 Select entry


¤


OK

Choose from the following functions:

Baby Monitor


Set and activate the baby monitor (

¢

 page 34).

Alarm Clock


Set and activate the alarm clock (

¢

 page 33).

Calendar

Open calendar (

¢

 page 32).

One Touch Call


Set up one touch call(

¢

 page 19).

Redial

Show redial list (

¢

 page 18).

Spot LED

:

LED light (torch function) on/off (

¢

 page 31).

More Functions...


You can also choose further functions:

Call Lists

Show call list (

¢

 page 30).

SMS

Open SMS menu (depending on the base).

Note

If you delete or edit the entry in the phonebook at a later date, this will not affect the 
assignment to the number key.

Summary of Contents for r630h pro

Page 1: ...Gigaset R630H PRO HSG UK IE A31008 M2553 R161 1 7619 Cover_front fm 8 14 13 ...

Page 2: ...Gigaset R630H PRO HSG UK IE A31008 M2553 R161 1 7619 Cover_front fm 8 14 13 ...

Page 3: ...idle status press and hold switch handset on off press and hold in idle status 7 Message key page 16 Access to the calls and message lists Flashing new message or new call 8 Profile key page 31 9 Hash key Keypad lock on off press and hold in idle status Toggles between upper lower case and digits 10 Connection socket for headset page 7 11 Microphone 12 Star key With an open connection switch from ...

Page 4: ...ing the operating steps in the user guide 13 Getting to know your phone 14 Making calls 18 Adjusting the telephone settings 21 Restoring phone to default setting 26 ECO DECT 26 Multiple handsets 27 Phonebook Address book 28 Call list 30 Sound profiles 31 Spot LED 31 Calendar 32 Alarm clock 33 Baby monitor 34 Display icons 36 Menu tree 38 Service Customer Care 39 Environment 41 Appendix 42 Index 45...

Page 5: ...ptibility of the device to external sources of high fre quency energy for the specifications of your Gigaset product see Specifications Do not hold the rear of the handset to your ear when it is ringing or when speaker mode is acti vated Otherwise you risk serious and permanent damage to your hearing Your Gigaset is compatible with the majority of digital hearing aids on the market However per fec...

Page 6: ... R630H PRO HSG UK IE A31008 M2553 R161 1 7619 security fm 8 14 13 Template Borneo Version 1 21 06 2012 Safety precautions Please note u Emergency numbers cannot be dialled if the keypad display lock is activated ...

Page 7: ...arks on surfaces However due to the multitude of different varnishes and polishes used on today s furnishings marks on the surfaces cannot be completely ruled out Connecting the charging cradle Notes u Never expose the telephone to the effects of heat sources direct sunlight or other electrical devices u Protect your Gigaset from moisture dust corrosive liquids and fumes u Pay attention to the ran...

Page 8: ...d as a result of using batteries that are not of the recommended type Insert the batteries with the polarity in the right direction for correct direction see diagram Hold the battery cover at a slight angle and insert the bottom into the casing first Then press the cover until it clicks into place Insert the locking disc as shown at an angle of approx 20 Pay attention to the arrow markings 1 2 3 1...

Page 9: ...e batteries are supplied partially charged Please charge completely before use The batteries are fully charged when the power icon disappears from the display Charge the handset in the charging cradle for 7 5 hours You can connect a headset to the underside of your telephone with the 2 5 mm jack connector For information on recommended headsets see the relevant product page at www gigaset com 1 If...

Page 10: ...urn to idle status Press right on the control key Press keys L and 5 slowly one after the other The language selection display appears The current language e g English is selected Press the down control key s until the language you wish to use is displayed e g French Press the right key directly under the display to select the language The selection is marked with Ø Deutsch English Ø Francais Deut...

Page 11: ... key Register Or v Ï OK q Registration OK Register Handset OK Display shows Searching for a base in registration mode The connection to the base will be established this may take some time Enter the system PIN if required factory setting 0000 OK When registering the display screen shows Handset is registering After registering successfully the display screen shows Handset registered Your handset c...

Page 12: ...ime OK The submenu Date Time is shown on the display The active input position flashes Enter the day month and year as an 8 digit number via the keypad e g 4 Q2Q 3 for 14 10 2013 Presstherightorleftcontrolkeytochange the input position e g to correct an entry Press the down control key to switch to the time input field Enter the hours and minutes in 4 digit format via the keypad e g QM 5 for 07 15...

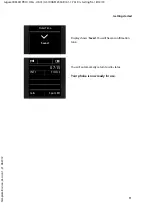
Page 13: ...starting fm 8 14 13 Template Borneo Version 1 21 06 2012 Getting started Display shows Saved You will hear a confirmation tone Date Time Saved i V 07 15 INT 1 14 Oct Calls Spot LED You will automatically return to idle status Your phone is now ready for use ...

Page 14: ...gtones Assign specific tunes to internal and external calls reminders page 23 wake up calls page 33 and to certain callers page 28 Protecting yourself against unwanted calls Set your phone up so that it doesn t ring if there is an anonymous call or use the time control page 24 Adjusting your phone to your surroundings Use 3 sound profiles to adjust your phone to a quiet or loud background page 31 ...

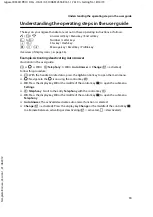
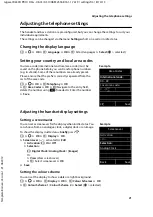
Page 15: ...wer Illustration in the user guide v Ï OK q Telephony OK Auto Answer Change activated Follow this procedure v With the handset in idle status press the right control key to open the main menu Ï Navigate to the Ï icon using the control key p OK Press the display key OK or the middle of the control key w to open the submenu Settings q Telephony Scroll to the entry Telephony with the control key q OK...

Page 16: ...s is marked in black e g v for press right on the control key The control key allows you to navigate within menus and entry fields In idle status or during an external call it has the following functions When the handset is in idle status s Open the phonebook v or w Open the main menu u Open list of handsets During an external call s Open the phonebook u Initiate an internal consultation call t Ad...

Page 17: ...Skip back one menu level or cancel operation Save Save entry Overview of icons on the display keys page 37 Menu guidance The functions of your telephone are displayed on a menu that consists of several levels Menu overview page 38 Main menu first menu level When the handset is in idle status press right on the control key v to open the main menu Themainmenu functionsareshownin thedisplayasicons Th...

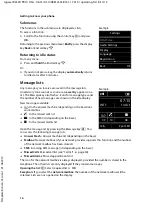
Page 18: ...e depending on the base net work mailbox u In the missed calls list u î In the SMS list depending on the base u In the missed alarms list Open the message list by pressing the Message key f You can access the following message lists u Answer Mach Answer machine list depending on the base u Mailbox Network mailbox if your network provider supports this function and the number of the network mailbox...

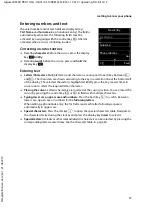
Page 19: ... at the bottom left of the display The selected character is highlighted Briefly press the key several times in succession to select the required letter character u Placing the cursor Letters characters are inserted at the cursor position You can insert the cursor by pressing the control key r or q in fields with multiple characters u Typing lower case upper case and numbers Press the hash key to ...

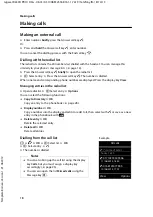
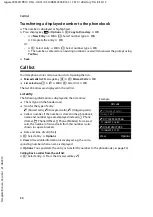
Page 20: ...ne number are displayed Press the display key View Managing entries in the redial list Open redial list q Select entry Options You can select the following functions u Copy to Directory OK Copy an entry to the phonebook page 28 u Display number OK Copy a number into the display and edit it or add to it then select with c or save as a new entry in the phonebook with Ó u Delete entry OK Delete the s...

Page 21: ...y The saved number is dialled by press ing any key Press the End call key a to cancel dialling Ending one touch call mode Press the display key OFF Press and hold the key Or Press and hold the key Accepting a call You have the following options Press c If Auto Answer is switched on page 22 remove the handset from the charging cradle Activate deactivate Simple Auto Answer In addition to using the A...

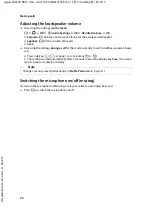
Page 22: ...t the volume at 5 levels Save u Accessing the settings during a call for the mode currently in use handsfree earpiece head set Press side keys ø page 1 or control key t r The setting is saved automatically after 2 seconds or press the display keySave The screen reverts back to its previous display Switching the microphone on off muting If you turn the microphone off during a call your caller can n...

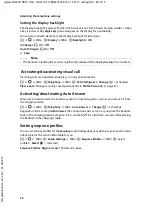
Page 23: ...ix is correctly separated from the rest of the area code v Ï OK q Telephony OK q Area Codes OK p Navigate to the entry field delete the number using Ñ if needed Enter the number Save Adjusting the handset display settings Setting a screensaver You can set a screensaver for the display when in idle status You can choose from an analogue clock a digital clock or an image To show the display in idle ...

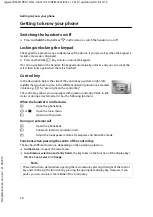
Page 24: ...hanges are only saved permanently in Profile Personal page 31 Activating deactivating Auto Answer When set to Auto Answer the handset accepts an incoming call as soon as you remove it from the charging cradle v Ï OK q Telephony OK Auto Answer Change activated Regardless of the setting Auto Answer the connection ends as soon as you place the handset back in the charging cradle Exception Press and h...

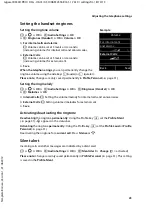
Page 25: ...dy for internal calls and anniversaries External Calls r Setting volumes melodies for external calls Save Activating deactivating the ringtone Deactivating the ringtone permanently Using the Profile key C set the Profile Silent page 31 ñ appears in the status bar Activating the ringtone permanently Using the Profile key C set the Profile Loud or Profile Personal page 31 Deactivating the ringtone f...

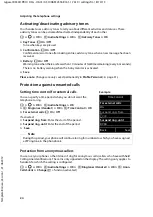
Page 26: ... unwanted calls Setting time control for external calls You can specify a time period when you do not want the telephone to ring v Ï OK q Audio Settings OK q Ringtones Handset OK q Time Control OK For external calls r On Off If activated Suspend ring from Enter the start of the period Suspend ring until Enter the end of the period Save Protection from anonymous callers You can set your phone so th...

Page 27: ...idle status Press and hold the digit key The number is dialled immediately Or Briefly press the digit key Press the left hand display key with the number name abbreviated if necessary to dial the number Or Press the display key Change to change the key assignment or press the display key Clear Key to delete the assignment Assigning display keys In idle status press and hold the left or right hand ...

Page 28: ...resetting the handset Handset Reset audio and display settings will be deleted Resetting the handset v Ï OK q System OK q Handset Reset OK Confirm security prompt with Yes ECO DECT ECO DECT uses less energy and reduces transmission power Reducing radiation depending on the base The radiation can only be reduced if your base supports this function Your telephone s transmission power is automaticall...

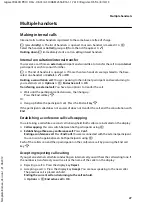
Page 29: ...ticipant called answers then hang up Press the End call key a Or Hang up before the participant calls Press the End call key a If the participant called does not answer of does not transfer the call end the consultation with End Establishing a conference call call swapping You are taking a call while a second call is being held Both callers are indicated on the display Call swapping You can switch...

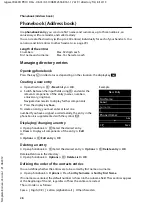
Page 30: ...o create an entry you must enter at least one number If you have assigned a caller melody the entry in the phonebook is supplemented with the symbol Æ Displaying changing an entry Open phonebook q Select the desired entry View Display all components of the entry Edit Or Options q Edit entry OK Deleting an entry Open phonebook q Select the desired entry Options q Delete entry OK Delete all entries ...

Page 31: ...ctory an individual entry or several individual entries Transferring individual entries Open phonebook q Select the desired entry Options q Copy Entry OK q to Internal OK q Select the recipient handset OK Transferring the entire directory Open phonebook q Select the desired entry Options q Copy List OK q to Internal OK q Select the recipient handset OK Notes u An external call interrupts the trans...

Page 32: ...the call list List entry The following information is displayed in the list entries u The list type in the header row u Icon for the type of entry Missed calls Accepted calls š Outgoing calls u Caller s number If the number is stored in the phonebook name and number type are displayed instead ä Phone Home k Phone Office l Phone Mobile For missed calls the number of missed calls from this number is...

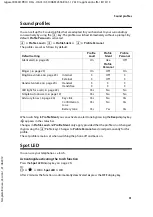
Page 33: ... the profile is not changed by pressing the C Profile key Changes to Profile Personal are stored permanently for this profile The set profile remains set when switching the phone off and back on Spot LED You can use your telephone as a torch Activating deactivating the torch function Press the Spot LED display key page 25 Or v É OK Spot LED OK After 2 minutes the function is automatically deactiva...

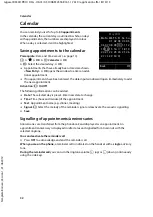
Page 34: ...ollowing information can be added u Date The selected day is preset Enter new data to change u Time Time hour and minute of the appointment u Text Appointment name e g dinner meeting u Signal r Select the melody of the reminder signal or deactivate the acoustic signalling Save Signalling of appointments anniversaries Anniversaries are transferred from the phonebook and displayed as an appointment ...

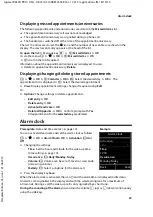
Page 35: ...q Select the desired appointment View Display appointment settings change if required using Edit Or Options Change settings or delete appointments Edit entry OK Delete entry OK Activate Deactivate OK Delete all Appoints OK Confirm prompt with Yes All appointments for the selected day are deleted Alarm clock Prerequisite Date and time are set page 10 You can activate deactivate and set the alarm cl...

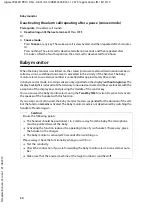
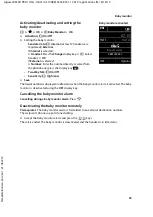
Page 36: ...ut ringtone The display backlight is reduced to 50 Advisory tones are deactivated All keys are locked with the exception of the display keys and pressing the middle of the control key You can answer the baby monitor alarm using the Two Way Talk function Deactivate activate the speaker of the handset with this function If you accept an incoming call the baby monitor mode is suspended for the durati...

Page 37: ... press the display key ö Two Way Talk r On Off Sensitivity r High Low Save The target number is displayed in idle status when the baby monitor alarm is activated The baby monitor is deactivated using the OFF display key Cancelling the baby monitor alarm Cancelling during a baby monitor alarm Press a Deactivating the baby monitor remotely Prerequisites The baby monitor alarm is forwarded to an exte...

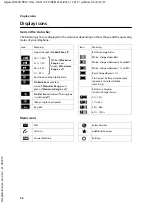
Page 38: ...n activated white if Maximum Range is on green if Maximum Range is off Profile Silent activated The ringtone is switched off Beep ringtone activated Key lock Ð White if Maximum Range is on Green if Maximum Range is off i Ñ Ò ó ñ Battery charge status White charged over 66 White charged between 34 and 66 y White charged between 11 and 33 y Red charged below 11 y Flashes red battery almost empty app...

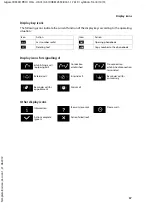
Page 39: ...for signalling of Other display icons Icon Action Ò Last number redial Ñ Deleting text ö Opening phonebook Ó Copy number to the phonebook Icon Action Establishing a call outgoing call Connection established No connection established connection terminated z W X External call Internal call Reminder call for anniversary ØÙÚ ØãÚ ØðÚ Reminder call for appointment Alarm call Øá Ú ØìÚ Information Securit...

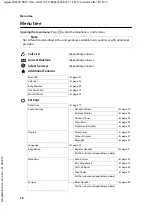
Page 40: ...al Features Spot LED page 31 Calendar page 32 Baby Monitor page 34 One Touch Call page 19 Missed Alarms page 33 Ï Settings Date Time page 10 Audio Settings Handset Volume page 20 Earpiece Profiles page 22 Advisory Tones page 24 Silent Alert page 23 Ringtones Handset page 23 Display Screensaver page 21 Colour Schemes page 21 Backlight page 22 Language page 21 Registration Register Handset page 9 fu...

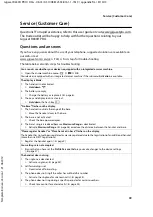
Page 41: ...The key and display lock is activated Hold down the hash key No Base flashes on the display 1 The handset is outside the range of the base Move the handset closer to the base 2 The base is not activated Check the base power adapter 3 The base s range is reduced because Maximum Range is deactivated Activate Maximum Range page 26 or reduce the distance between the handset and base Please register ha...

Page 42: ...d for the caller The caller should ask the network provider to enable Calling Line Identification CLI 2 Caller display CLIP is not supported by the network provider or is not enabled for you Caller display CLIP is enabled by the network provider 3 Your telephone is connected via a PABX or a router with an integrated PABX gateway that does not transmit all information Reset the system Briefly pull ...

Page 43: ...re sustainable life resources for humanity We are com mitted to a responsibility for our products that comprises their entire life cycle The environmen tal impact of products including their manufacture procurement distribution utilisation ser vice and disposal are already evaluated during product and process design Further information on environmentally friendly products and processes is availabl...

Page 44: ...ix Care Wipe the device with a damp cloth or an antistatic cloth Do not use solvents or microfibre cloths Never use a dry cloth this can cause static In rare cases contact with chemical substances can cause changes to the device s exterior Due to the wide variety of chemical products available on the market it was not possible to test all substances Impairments in high gloss finishes can be carefu...

Page 45: ...arging time in charging cradle hours 7 5 No Radiation deactivated without display backlight in idle status No Radiation activated without display backlight in idle status DECT standard Supported GAP standard Supported No of channels 60 duplex channels Radio frequency range 1880 1900 MHz Duplex method Time division multiplexing 10 ms frame length Repetition frequency of the transmission pulse 100 H...

Page 46: ... 2012 Appendix Character charts Standard characters Press the relevant key the number oftimesindicated 1 Space 2 Line break 1x 2x 3x 4x 5x 6x 7x 8x 9x 10x 1 2 a b c 2 ä á à â ã ç 3 d e f 3 ë é è ê 4 g h i 4 ï í ì î 5 j k l 5 L m n o 6 ö ñ ó ò ô õ M p q r s 7 ß N t u v 8 ü ú ù û O w x y z 9 ÿ ý æ ø å Q 0 1 2 ...

Page 47: ...ntry 30 Call protection 24 Call signal visual 22 Call waiting external during an internal call 27 internal during an external call 27 Calling external 18 internal 27 Care 42 Care of the device 42 Changing display language 8 Changing the phone settings 21 Changing the settings 21 Character charts 44 Charge status indicator 1 Charge status of the batteries 36 Charging cradle handset connecting 5 set...

Page 48: ...g the charging cradle 5 display backlight 22 display language 8 21 earpiece volume 20 idle status 16 list 14 muting 20 registering 9 restoring to default setting 26 screensaver 21 setting 21 setting up 6 speaker volume 20 switching on off 14 transferring a call 27 use as a baby monitor 34 using multiple 27 Handsfree mode 19 Handsfree volume 20 Hash key 1 Headset socket 7 Hearing prevent loss of 3 ...

Page 49: ...nniversaries appointments 33 Missed call 30 Muting the handset 20 N Number copying to the phonebook 30 Numbers entering 17 O On off key 1 One touch call 19 Operating time of handset 43 Order in the phonebook 28 P Phone restoring to default setting 26 setting 21 Phonebook 28 copying number from text 30 opening 14 order of entries 28 sending entry list to handset 29 sending to handset 29 Power adapt...

Page 50: ... see Advisory tones Silent alert 23 Simple Auto Answer 19 SMS incoming message list 16 Snooze mode alarm 34 Sound profiles 31 Sound see Ringtone Speaker 19 Speed dial 25 Star key 1 Status bar 1 icons 36 Switching microphone handset on off 20 T Technical data 43 Telephone operating 14 Three way conference call ending 27 Time control ringtone for external calls 24 Torch function 31 Transferring an e...

Page 51: ...A31008 M2553 R161 1 7619 ...

Reviews: