background image

8

SCAN AND PLAYBACK

Scanner Setting

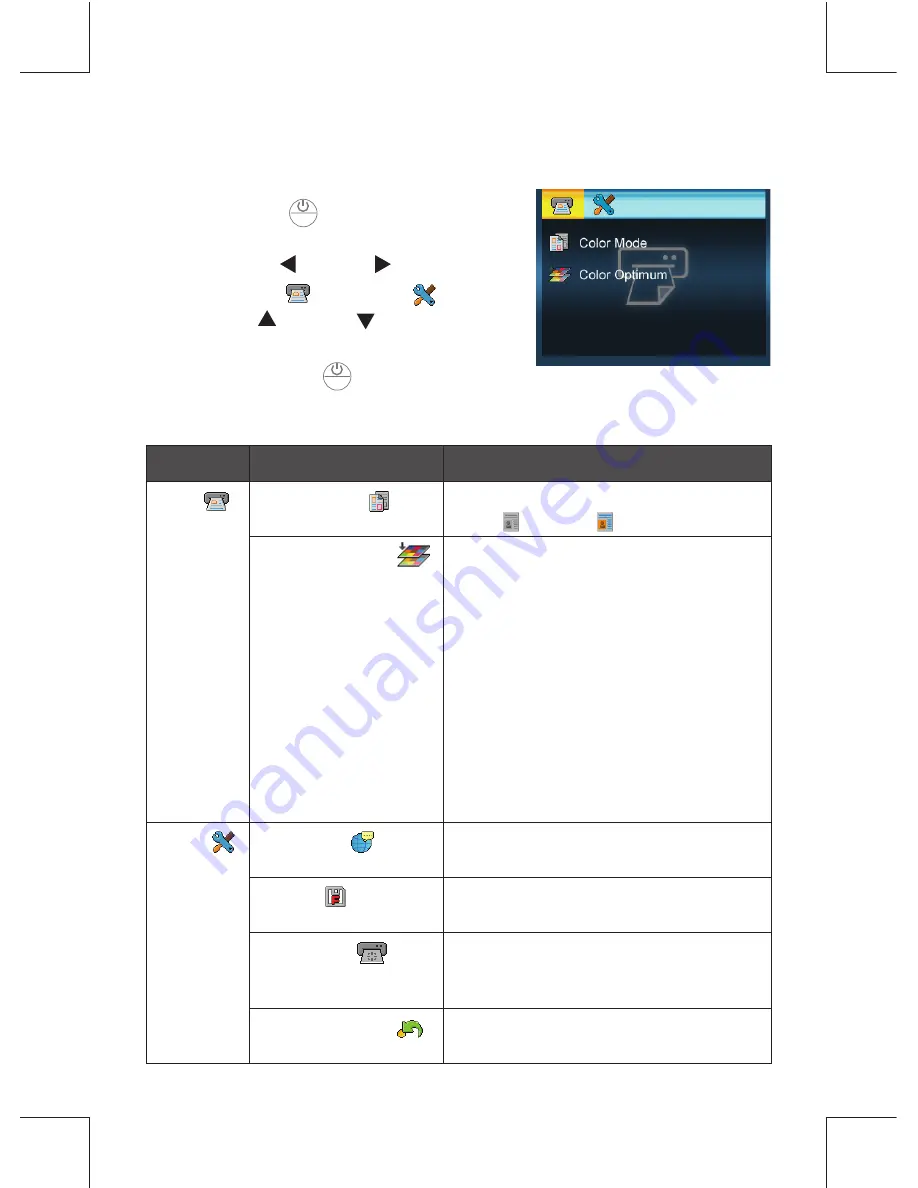
1. Press 

MENU

(

MENU

) button to enter the 

scanner setting menu.

2. Press 

LEFT

( )

/RIGHT

( )

 button to 

select 

Scan

 (

) or 

Setup

 (

) .

3. Press 

UP

( )

/DOWN

( )

 button to 

select an option from the submenus.

Note:

 Press 

MENU

(

MENU

) button 

repeatedly to go to the upper level, 
or exit the 

Scan

 menu.

Menus

Sub-menus

Descriptions

Scan

(

) Color Mode(

)

Selects a scan mode:

Gray(

), Color(

).

Color Optimum(

) This function provides a color 

optimization mechanism which 

will achieve the best color match 

possible based on the actual color 

content of the image.

Note 1:

 Scanning will take longer 

than normal with this 

setting. Please be patient 

and wait until the process is 

fi

 nished.

Note 2: 

This setting is set to its 

default of “OFF” after the 

scanner is restarted.

Setup

(

) Language(

)

English, German, French, Italian, 

Spanish, Dutch, Portuguese, Polish.  

Format(

)

Deletes all the data stored in the 

SD/MMC card.

Calibration(

)

Select “OK” to calibrate the scanner.

Note:

 Refer to page 14 for detailed 

procedures.

Factory Default(

) Restores the scanner settings to the 

default settings.

Summary of Contents for Full Size

Page 1: ...Before operating this product carefully read and follow the instructions Please retain this user manual for future reference GiiNii NuLife 2 4 inch LCD Full Size Photo Scanner User Manual...

Page 2: ...nner 7 SCAN AND PLAYBACK 8 Scanner Setting 8 Using the Photo Protective Sleeve 9 Scanning Images 9 Playing back and Scanned Images 10 Zoom 11 Playback Setting 12 TRANSFERRING THE SCANNED IMAGES TO PC...

Page 3: ...ct near water in the rain or allow any liquid to get inside this product Water and moisture may cause short circuit to the electronic components and lead to malfunctions Do not use this product near s...

Page 4: ...instructions on page 13 for more details L 2 86 82 329 00071 CALIBRATION PAPER A620 82 329 00071 U 1 3 1 4nn VW Inserte esta tarjeta en el esc ner con la cara BLANCA hacia abajo Cart o de calibragem I...

Page 5: ...menu 5 OK OK Press to make or confirm selections in the menus 6 Down Moves down to select the option below Moves down in the thumbnail mode 7 Right Moves right to select the option Moves to the next...

Page 6: ...to select USB Power then press OK OK button Connecting to Power Using AC adapter Connect one end to the scanner s DC IN jack and the other to wall socket Using mini USB cable as a power source 1 Conn...

Page 7: ...7 Inserting a SD MMC Card Insert your SD or MMC card into the card slot with the gold contacts facing up Rear View Turning on the Scanner Press Power MENU button to turn on the scanner MENU...

Page 8: ...optimization mechanism which will achieve the best color match possible based on the actual color content of the image Note 1 Scanning will take longer than normal with this setting Please be patient...

Page 9: ...canning Images Note Please insert a SD MMC card A reminder message will appear if you did not insert a SD or MMC card to the scanner 1 Insert the photo or document facing DOWN into the feed slot adjus...

Page 10: ...d in the 100NVTIM folder When the counter reaches 9999 it will be automatically generated another new folder in a sequential order Note The scanner will enter the playback mode after scans or press OK...

Page 11: ...ress OK OK button to view the image in full screen 1 Press ZOOM button to zoom in an image Each time of the button is pressed the image will be enlarged in the sequence of x2 x3 x4 and x5 2 Press UP D...

Page 12: ...n French Italian Spanish Dutch Portuguese Polish Format Deletes all the data stored in the SD MMC card Calibration Select OK to calibrate the scanner Note Refer to page 14 for detailed procedures Fact...

Page 13: ...and the PC Note The Removable Disk on the PC shows the files stored in the SD MMC card which is connected to the scanner Disconnecting the Scanner from PC 1 Double click the Safely Remove Hardware ic...

Page 14: ...sert the thin end of the cleaning stick into the slot of the scanner at the rear side Move the stick from one side to the other slightly a few times then remove it Rear side Cleanning stick Step 2 Usi...

Page 15: ...he calibration process Note The process will take few minutes to finish and then shut down automatically Please turn the power back on again 3 Align the feed slot cover Assembly the edge s two latchin...

Page 16: ...Scan Zoom OK Up Down Left Right Dimensions 300 x 86 x 56 2 mm 11 8 x 3 4 x 2 2 Weight 520g 1 1lbs Check to make sure the mini USB cable is firmly plugged into the scanner Please clean and calibrate th...

Page 17: ...serviceable used parts and is at least functionally equivalent or most comparable to the original product in current inventory or 3 refund the original purchase price of the product The Company warra...

Page 18: ...nty of any kind by including refurbished GiiNii products sold As IS by some retailers THIS LIMITED WARRANTY DOES NOT COVER Shipping charges to return defective product Labor charges for installation o...

Page 19: ...E LIABLE FOR ANY INCIDENTAL OR CONSEQUENTIAL DAMAGES FOR BREACH OF ANY EXPRESS OR IMPLIED WARRANTY ON THIS PRODUCT EXCEPT TO THE EXTENT PROHIBITED BY APPLICABLE LAW ANY IMPLIED WARRANTY OR MERCHANTABI...

Page 20: ...20 GiiNii International Product Registration P O Box 1689 Pleasanton CA 94566 2010 GiiNii International 82 329 00110...

Reviews: