background image

3

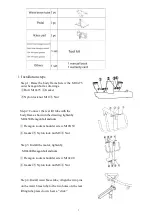
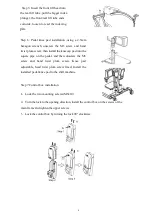
1. Installation steps

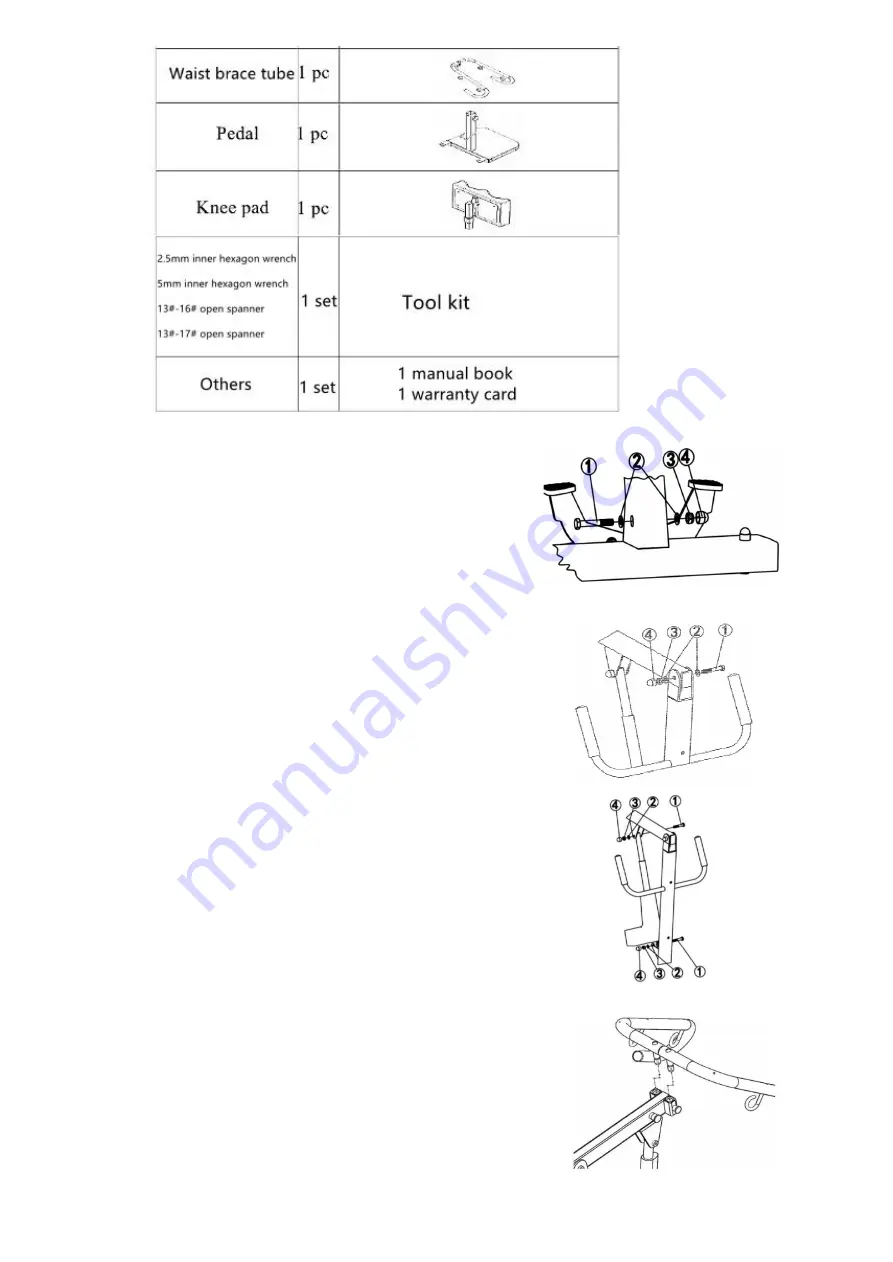
Step 1: Raise the body frame,Screw the M10x75

outer hexagon bolt as drawings.

Bolt M10x75

Gasket

Nylon lock nut M10

Nut

Step 2: Connect the rear lift tube with the
body frame shown in the drawing, tighten by

M10x50 Hexagon bolt and nuts .

Hexagon socket shoulder screw M10X50

Gasket

Nylon lock nut M8

Nut

Step 3: Install the motor, tighten by

M10x40 Hexagon bolt and nuts

Hexagon socket shoulder screw M10x40

Gasket

Nylon lock nut M8

Nut

Step 4: Install waist brace tube, Align the two pins
on the waist brace tube to the two holes on the rear
lifting tube press down, hear a “click”

Summary of Contents for Accessiblehoist

Page 1: ...Proper use of this product is the prerequisite to ensure safety convenience and durability Please read this instruction carefully before using and be sure to master the matters marked with the mark Gi...

Page 2: ...Guide 5 Battery Charging 7 Maintenance 8 Trouble Shooting 8 Warranty 9 X Maintenance Record 10 NOTES This manual contains important information about the product Please read carefully and fully under...

Page 3: ...ccessories are not damaged Choose the right accessories according to the patient s condition Under no circumstances shall the shifting machine be modified Pay attention to avoid local high frequency e...

Page 4: ...ease contact the distributor in time Overall size 1200x1320x665 Button unfold size 885mm Motor 24V 8000N Lifting speed 8 3mm s Protection class IP54 Net weight 57kg Max load 200kg Lifting times per ch...

Page 5: ...e shown in the drawing tightenby M10x50 Hexagonboltandnuts Hexagon socket shoulder screw M10X50 Gasket Nylon lock nut M8 Nut Step 3 Install the motor tighten by M10x40 Hexagonboltandnuts Hexagon socke...

Page 6: ...hen install the kneecap pad into the square pipe on the pedal and then unscrew the M3 screw and hand twist plum screw Knee pad adjustable hand twist plum screw fixed Install the installed pedal knee p...

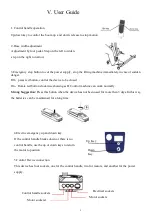
Page 7: ...tton clockwise showing as B Control machine can work normally Strong Suggestion Press this button when the device has not been used for more than 3 days In this way the batteries can be maintained for...

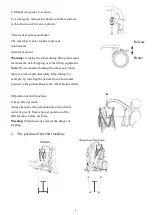
Page 8: ...tipping over the lifting equipment Note We recommend locking the wheel only when there is a risk of personal injury from sliding for example by lowering the patient from a horizontal position to the g...

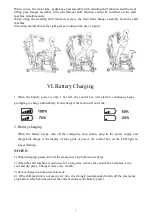
Page 9: ...to charge immediately If not charged the motor will not work 2 Battery charging When the battery beeps turn off the emergency stop button plug in the power supply and charge Full charge is the display...

Page 10: ...complete checkup at least once a year Pay special attention to areas where wear occurs such as joints bolts etc Trouble Shooting Couldn t lift or land 1 Check whether the emergency stop button is pre...

Page 11: ...onsible for sending someone to repair or recall them 6 Paid service will be available after one year The warranty not cover 1 Not properly used in accordance with the instructions 2 Not using parts ma...

Page 12: ...10 Maintenance record Date Problems Causes Note X Maintenance Record...

Reviews: