
5. If the paper is not advancing normally upon rotating the brass gear clockwise [see
a. Push the Paper Release mechanism with your right thumb, reach behind the Printer, and
grasp the paper where it enters the Printer.
b. Gently pull the paper out from the back of the Printer.
c. Tear off the jammed paper.
6. Reload the paper.
Paper jam should be cleared.
II. Removing Paper Jams That Require Opening Printer Assembly
After performing the steps mentioned in
, if the Printer still
appears to be jammed (for example, paper does not reload, further jams immediately occur,
and so on), the Printer Assembly has to be opened to expose more of the paper path.
To remove paper jams that require opening the Printer Assembly, proceed as follows:
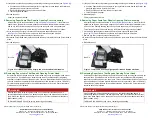
1. Pull a blue pin back slightly to rotate the Printer Head to expose the paper path
). The Printer Head is held onto the Printer Slide by two blue pins.
2. Remove any newly exposed scraps of the paper jam.
3. Rotate the Printer Head back in place and push the blue pin forward to lock the Printer Head in
place.
4. Reload the paper.
III. Removing Paper Jams That Require Opening Printer Head
Small scraps of paper lodged inside the Printer Head may cause recurring jams and are not
easily removed. A qualified service technician can remove the Blade Holder (with blade
attached) to expose this part of the paper path. There are Blade Holder Release Tabs. These
tabs can be tedious to operate (for detailed animation of this procedure, refer to TRP-2387).
This relatively simple procedure for a qualified technician may recover a Printer that would
otherwise have to be replaced.
Figure 3: Left Blue Pin Pulled Up Slightly and Print Head Rotated Clockwise
Blue Pin
Clearing paper jams using screwdrivers and so on, that contact the blade edge will
permanently damage the blade. The damaged sharp edge of the blade will cause further
jams. If the blade appears to be damaged or dull, you can order new blades with holders
[M04119A005 (10X)].
THE BLADE IS SHARP. Exercise care in contacting and handling.
WARNING
!
Call Gilbarco Technical Support at: 1-800-743-7501
Gilbarco Inc. · 7300 West Friendly Avenue, P.O. Box 22087
Greensboro, NC 27420 · Phone # 336-547-5000 · Fax # 336-292-8871
Encore
®
and Eclipse
®
are registered trademarks of Gilbarco Inc.
5. If the paper is not advancing normally upon rotating the brass gear clockwise [see
a. Push the Paper Release mechanism with your right thumb, reach behind the Printer, and
grasp the paper where it enters the Printer.
b. Gently pull the paper out from the back of the Printer.
c. Tear off the jammed paper.
6. Reload the paper.
Paper jam should be cleared.
II. Removing Paper Jams That Require Opening Printer Assembly
After performing the steps mentioned in
, if the Printer still
appears to be jammed (for example, paper does not reload, further jams immediately occur,
and so on), the Printer Assembly has to be opened to expose more of the paper path.
To remove paper jams that require opening the Printer Assembly, proceed as follows:
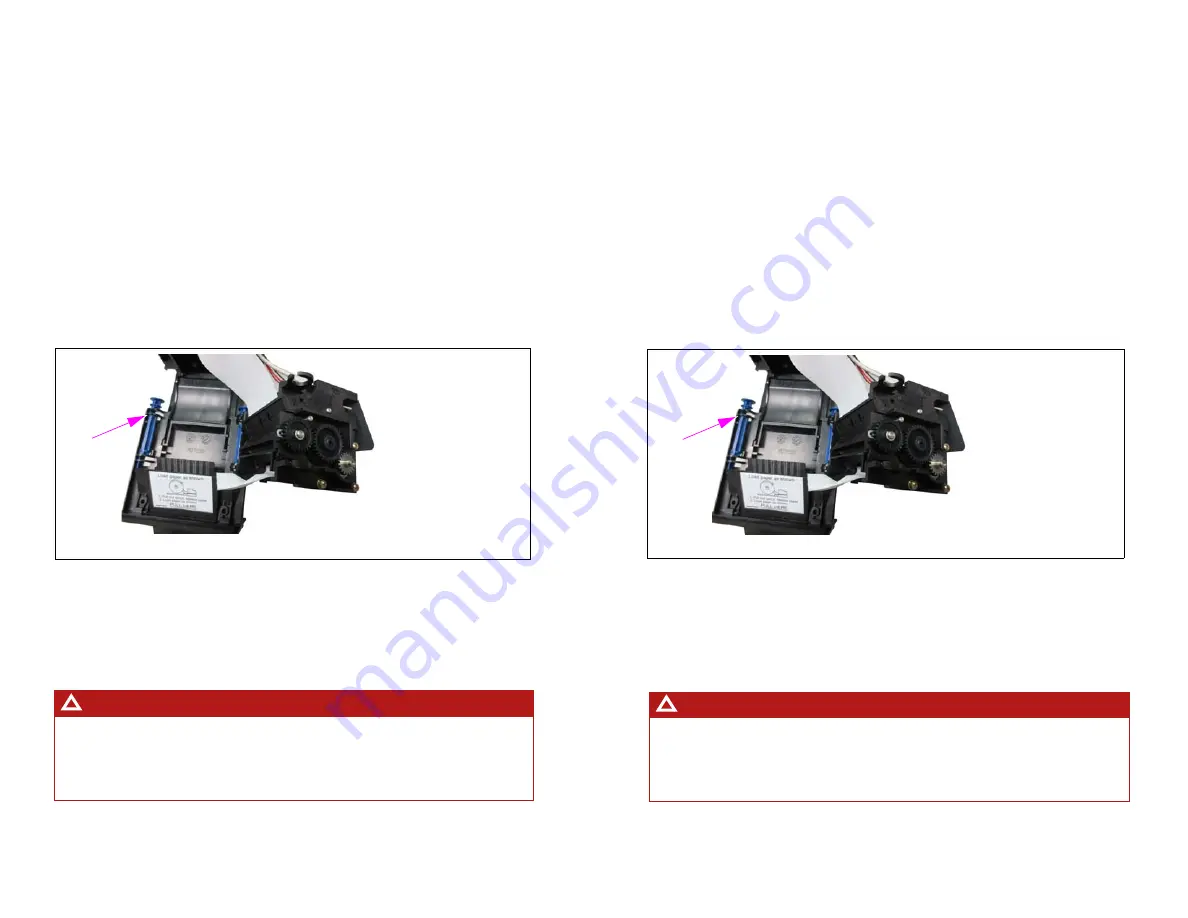
1. Pull a blue pin back slightly to rotate the Printer Head to expose the paper path
). The Printer Head is held onto the Printer Slide by two blue pins.
2. Remove any newly exposed scraps of the paper jam.
3. Rotate the Printer Head back in place and push the blue pin forward to lock the Printer Head in
place.
4. Reload the paper.
Figure 3: Left Blue Pin Pulled Up Slightly and Print Head Rotated Clockwise
Blue Pin
III. Removing Paper Jams That Require Opening Printer Head
Small scraps of paper lodged inside the Printer Head may cause recurring jams and are not
easily removed. A qualified service technician can remove the Blade Holder (with blade
attached) to expose this part of the paper path. There are Blade Holder Release Tabs. These
tabs can be tedious to operate (for detailed animation of this procedure, refer to TRP-2387).
This relatively simple procedure for a qualified technician may recover a Printer that would
otherwise have to be replaced.
Clearing paper jams using screwdrivers and so on, that contact the blade edge will
permanently damage the blade. The damaged sharp edge of the blade will cause further
jams. If the blade appears to be damaged or dull, you can order new blades with holders
[M04119A005 (10X)].
THE BLADE IS SHARP. Exercise care in contacting and handling.
WARNING
!
Call Gilbarco Technical Support at: 1-800-743-7501
Gilbarco Inc. · 7300 West Friendly Avenue, P.O. Box 22087
Greensboro, NC 27420 · Phone # 336-547-5000 · Fax # 336-292-8871
Call Gilbarco Technical Support at: 1-800-743-7501
Gilbarco Inc. · 7300 West Friendly Avenue, P.O. Box 22087
Greensboro, NC 27420 · Phone # 336-547-5000 · Fax # 336-292-8871
Call Gilbarco Technical Support at: 1-800-743-7501
Gilbarco Inc. · 7300 West Friendly Avenue, P.O. Box 22087
Greensboro, NC 27420 · Phone # 336-547-5000 · Fax # 336-292-8871
Encore
®
and Eclipse
®
are registered trademarks of Gilbarco Inc.


