01_03
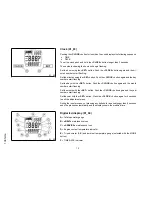
Clock (01_03)
Pushing the «
CLOCK
» button for less than 1 second displays the following sequence:
•
TIME
•
DATE
To set the clock push and hold the «
CLOCK
» button longer than 3 seconds.
The numbers showing the hours will begin flashing.
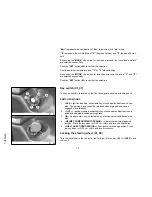
Set the hour using the «
SET
» button. Push the «
CLOCK
» button again and the mi-
nutes numbers start flashing.
Set the minutes using the «
SET
»button. Push the «
CLOCK
» button again and the day
numbers start flashing.
Set the day with the «
SET
» button. Push the «
CLOCK
» button again and the month
numbers start flashing.
Set the month with the «
SET
» button. Push the «
CLOCK
» button again and the year
numbers start flashing.
Set the year with the «
SET
» button. Press the «
CLOCK
» button again for 4 seconds
to exit the adjustment menu.
During the reset process, not pressing any buttons for a period longer than 8 seconds
ends the process automatically and the display shows the modified time.
01_04
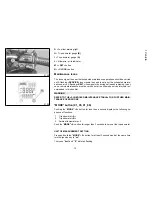
Digital lcd display (01_04)
A
= Total odometer gauge
B
=
«BELT»
maintenance icon
C
=
«SERVICE»
maintenance icon
D
= Engine coolant temperature indicator
E
= Trip odometer (A-B) and ambient temperature gauge (selected with the MODE
button)
F
= TIME-DATE indicator
12
1 Vehicle
Summary of Contents for Fuoco 500ie
Page 4: ...4 ...
Page 7: ...Fuoco 500ie Chap 01 Vehicle 7 ...
Page 8: ...01_01 8 1 Vehicle ...
Page 10: ...01_02 10 1 Vehicle ...
Page 27: ...Fuoco 500ie Chap 02 Use 27 ...
Page 44: ...44 2 Use ...
Page 45: ...Fuoco 500ie Chap 03 Maintenance 45 ...
Page 59: ...03_21 03_22 03_23 59 3 Maintenance ...
Page 66: ...03_31 03_32 03_33 66 3 Maintenance ...
Page 76: ...76 3 Maintenance ...
Page 77: ...Fuoco 500ie Chap 04 Technical data 77 ...
Page 78: ...04_01 78 4 Technical data ...
Page 83: ...Fuoco 500ie Chap 05 Spare parts and accessories 83 ...
Page 86: ...86 5 Spare parts and accessories ...
Page 87: ...Fuoco 500ie Chap 06 Programmed maintenance 87 ...
Page 94: ...94 6 Programmed maintenance ...


