407
Electrical System
Ballast Replacement
The following instructions are for replacement of standard ballast.
See “Extinguishable Ballast Re-
placement” below for additional instructions for replacing extinguishable ballast and high-output
lamp tubes.
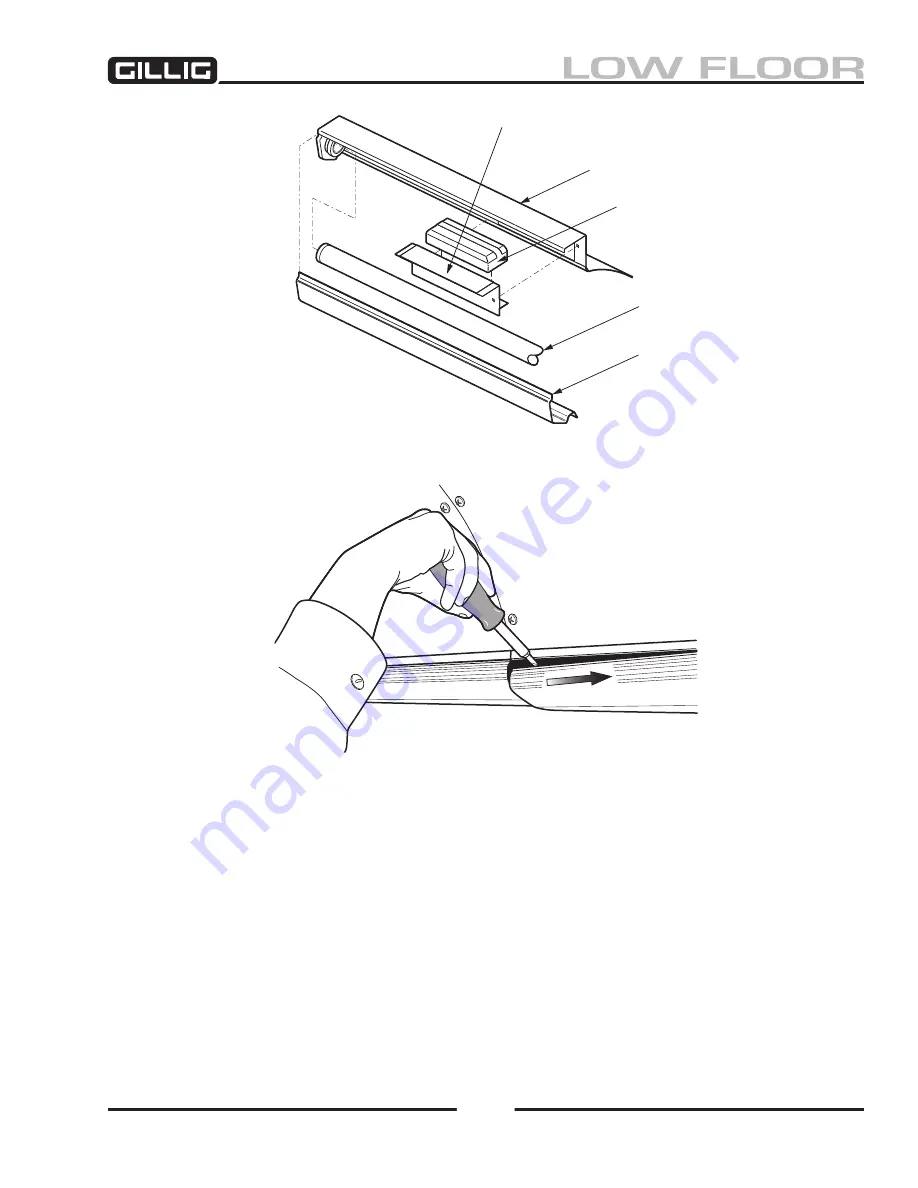
1. Remove the two screws which attach the ballast mounting plate to the ceiling panel. Pull the as-
sembly far enough out from the panel to gain access to the ballast.
2. Disconnect the electrical connectors attaching the ballast to the ceiling wiring harness.
3. Remove the two mounting screws which attach the ballast to the mounting plate. Remove the
ballast from the coach for service or replacement.
4. Replace the ballast by reversing the above steps.
Figure 9-49, Fluorescent Lamp
Figure 9-50, Remove Lens
Light Panel
Ballast Mounting Plate
Ballast
Bulb
Lens
Summary of Contents for LOW FLOOR
Page 18: ...Specifications 18...
Page 58: ...Preventive Maintenance 58...
Page 110: ...Engine 110...
Page 138: ...Transmission Driveline Rear Axle 138...
Page 182: ...Suspension 182...
Page 260: ...Air System 260...
Page 420: ...Electrical System 420 Deutsch DT Series Connectors...
Page 421: ...Electrical System 421...
Page 422: ...Electrical System 422 Deutsch HD 10 Series Connectors...
Page 423: ...Electrical System 423...
Page 424: ...Electrical System 424 Deutsch HD 30 Series Connectors...
Page 425: ...Electrical System 425...
Page 442: ...Heating Air Conditioning 442...
Page 492: ...Body and Interior 492 Figure 11 33 USSC Seat Assembly...
Page 493: ...Body and Interior 493 Figure 11 34 USSC Seat Suspension Assembly...
Page 495: ...Body and Interior 495 Figure 11 37 Seat Air Connections...


