Brakes & Wheels
286
Front Wheel Bearing Adjustment
1. Use torque wrench to tighten adjusting nut to 100 ft-lb while rotating hub in both directions.
2. Loosen adjusting nut completely and then tighten nut to 20 ft-lb while rotating hub.
3. Back off adjusting nut 1/3 turn.
4. Install lock ring, lockwasher, and jam nut.
5. Tighten jam nut to 200–300 ft-lb.
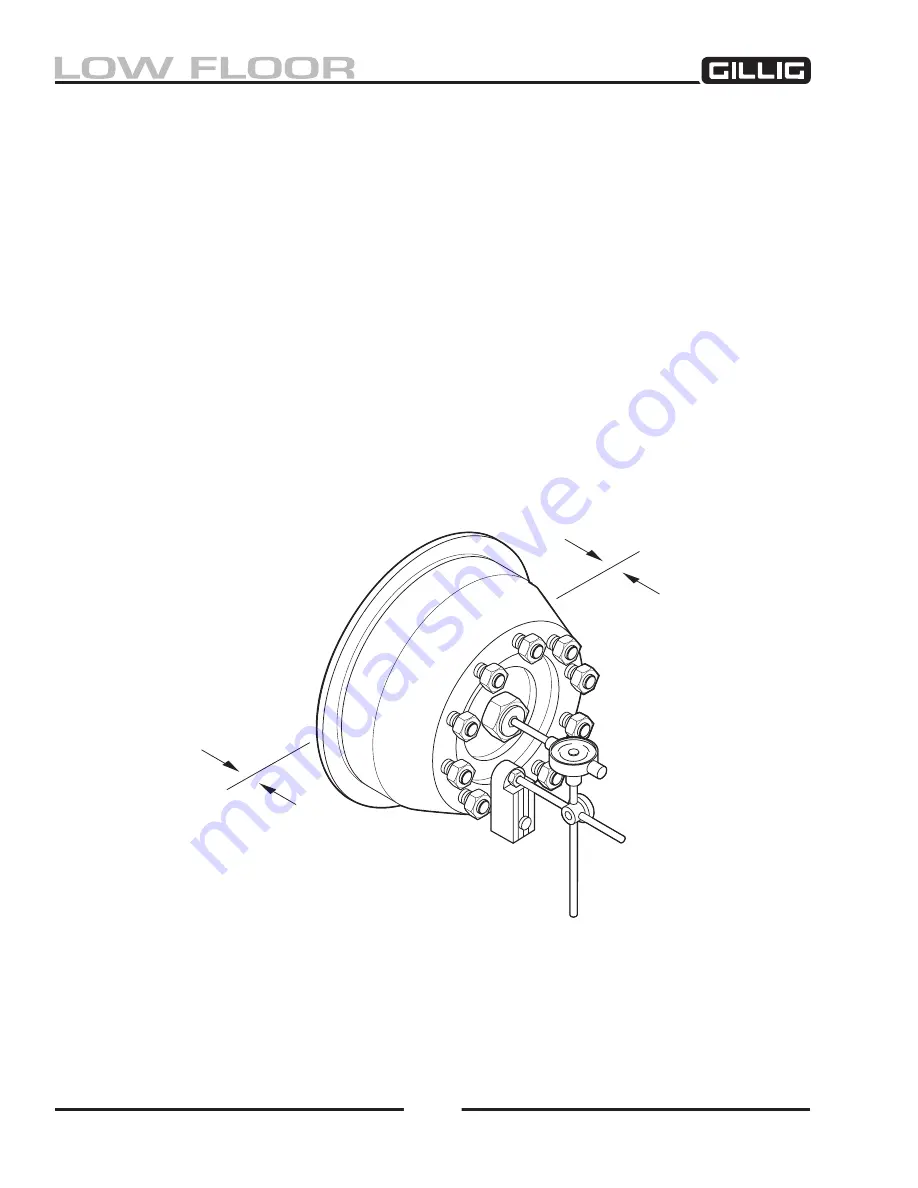
6. Attach a dial indicator with the magnetic base at the bottom of the hub or the brake drum if
installed (Figure 7-13).
7. Adjust the dial indicator so that the pointer is against the center of the knuckle. Set the dial
indicator on zero.
8. Measure the end play while pushing/pulling on both sides of the hub while looking at the dial
indicator. The end play is the total travel observed. If the end play is not within 0.001–0.005
inch, repeat steps 3 to 5, reducing the amount the adjusting nut is backed off in step 3 to 1/4 turn.
9. When the proper end play is achieved, lock the jam nut in place by bending the edge of the jam
nut lock washer over one flat of the jam nut.
Figure 7-13, Measuring Wheel Bearing End Play
Summary of Contents for LOW FLOOR
Page 18: ...Specifications 18...
Page 58: ...Preventive Maintenance 58...
Page 110: ...Engine 110...
Page 138: ...Transmission Driveline Rear Axle 138...
Page 182: ...Suspension 182...
Page 260: ...Air System 260...
Page 420: ...Electrical System 420 Deutsch DT Series Connectors...
Page 421: ...Electrical System 421...
Page 422: ...Electrical System 422 Deutsch HD 10 Series Connectors...
Page 423: ...Electrical System 423...
Page 424: ...Electrical System 424 Deutsch HD 30 Series Connectors...
Page 425: ...Electrical System 425...
Page 442: ...Heating Air Conditioning 442...
Page 492: ...Body and Interior 492 Figure 11 33 USSC Seat Assembly...
Page 493: ...Body and Interior 493 Figure 11 34 USSC Seat Suspension Assembly...
Page 495: ...Body and Interior 495 Figure 11 37 Seat Air Connections...


