background image


9


3. Before you fly 

The Gingo must be assembled by a suitably qualified paragliding professional, for example your 
instructor. In particular great care and attention must be paid to the fitting of the rescue 

parachute in the harness. The pilot should then adjust the harness for comfort. 

Assembly 

Gin Gliders recommend that assembly be carried out in the order below. If there is any doubt 
whatsoever about this procedure, please seek professional advice from your instructor, GIN 

dealer or importer. 

Speed system 

The speed system is assembled from top to bottom. Pass the cord of the speed bar through the 

pair of pulleys near the side pocket and route it out through the eyelet near the front corners at 
each side of the seat. Attach the elastic cord to the speed bar to prevent tangling in case of a 

parachute deployment. 

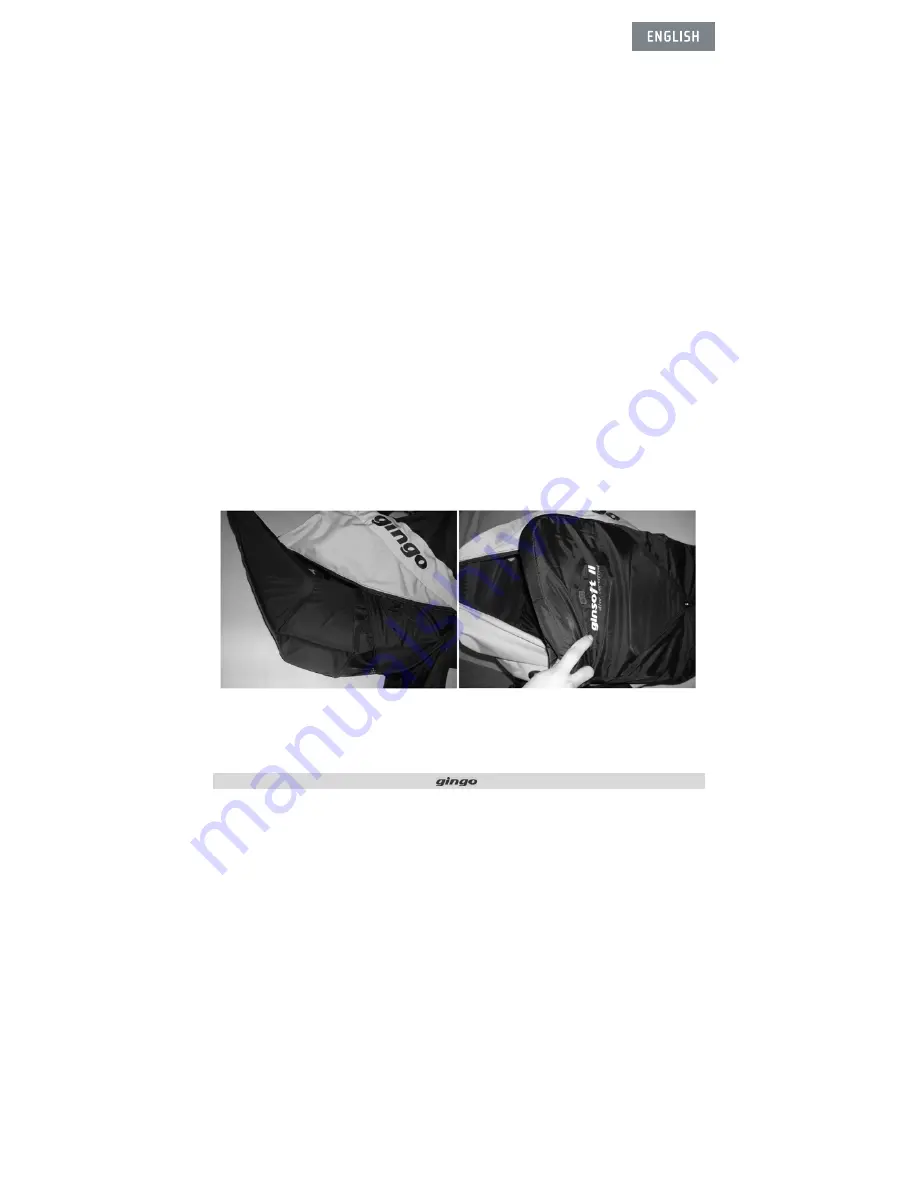
Back and Lateral Protection 

When you receive the GINSOFT II it is rolled. Please let it lay open for several hours before you 

install it in the harness. To install it, open the zipper inside the back pocket and slide the 
GINSOFT II back protection inside. It needs to slide into the space underneath the seat plate and 

behind the back support. Do not put it underneath the cross straps in the back of the harness. 

The protection should be not compressed in normal use and should not hamper the space of the 

rescue or move into an incorrect position.  


You can add lateral protection to the Gingo, by fitting a pair of Gin side impact plates into the 

harness either side of the back protector and securing them with the Velcro straps. 
 

Summary of Contents for Gingo

Page 1: ...Gingo Owner s Manual Please read this manual before flying with the Gingo for the first time...

Page 2: ...you do resell your harness Happy Flights and Safe Landings The GIN Team Safety Notice By the purchase of our equipment you are responsible for being a certified paraglider pilot and you accept all ri...

Page 3: ...stments 13 Shoulder straps 13 Lateral straps 13 Leg straps 13 Side straps to seat plate 13 Chest strap 13 Speed bar 14 4 Flying with the Gingo 15 Pre flight checks 15 Rescue Deployment 15 Storage Pock...

Page 4: ...es and can provide you with many useful items for flying which are all manufactured in GIN Gliders own production facility to guarantee highest quality standards Gin has over 15 years experience of de...

Page 5: ...ith his paraglider Please refer to the manual of your paraglider to find out if this might be the case The Gingo is a sleek and easy harness designed for maximum comfort and ease of use The elegant de...

Page 6: ...ptional back and lateral protection Large dorsal storage pocket and numerous small pockets for long flights The Gingo is DHV certified and available in sizes S M and L Weight 4 4 Kg M size without bac...

Page 7: ...is designed for use with GIN rescue parachutes like the ONE G Other manufacturers rescue systems may also be used Every first installation of a rescue system into the harness that means every new comb...

Page 8: ...inium speed bar Flight Deck The Gingo may be fitted with a flight deck allowing easier viewing of instruments and or carrying of ballast Other Accessories For up to date information on additional acce...

Page 9: ...t near the front corners at each side of the seat Attach the elastic cord to the speed bar to prevent tangling in case of a parachute deployment Back and Lateral Protection When you receive the GINSOF...

Page 10: ...llon Rapide type carabiner is recommended The carabiner should be rated at least 9 times the maximum weight for example a 6mm stainless CEN certified carabiner 2785 Kg The Maillon should be held in pl...

Page 11: ...lly how the professional installs the rescue system so that you can remember the procedure when you have to do it yourself the next time This compatibility check that means to test if the rescue can b...

Page 12: ...12 Rescue Installation guide Take special care The deployment handle must be attached to the side loop on the deployment bag not to the centre loop...

Page 13: ...e position that means leaning back reduces the stability of the harness and increases the risk of twisting after an asymmetric deflation Leg straps The correct adjustment of the leg straps is to have...

Page 14: ...rd too short could result in the speed system being constantly and unintentionally engaged during flight It is safer to start with the speed bar a little long and shorten it following your first fligh...

Page 15: ...ness and both carabiners are secured by their locking mechanisms The speed bar is attached correctly to glider All pockets are closed properly and any loose items are tied down safely Check again that...

Page 16: ...ight body position and be sure to do a PLF Parachute Landing Fall to minimize the risk of injury Storage Pockets The Gingo contains a large back pocket and smaller side pockets They are positioned to...

Page 17: ...e and Maintenance Avoid dragging your harness over rough or rocky ground Unnecessary exposure to UV rays heat and humidity should be always avoided Keep the harness in your rucksack when not in use St...

Page 18: ...e of the carabiner hook in points All sewing must be intact and any anomalies attended to immediately to avoid exacerbation of the problem Special attention should be paid to the rescue installation p...

Page 19: ...at plate 38 cm Carabiner Distance 38 54 cm Weight without parachute 4 4 Kg for size M Parachute Container Integrated container underneath the seat plate Options Back protection GINSOFT II side protect...

Page 20: ...OXFORD SHUTTLELESS LOOM FINISHED P D W R W P YARN W T 320GR YD FINISHING MATERIAL W T 30GR YD TOTAL W T 350GR YD 1 2 INSIDE FABRIC CODE 420D HD N OXFORD PU 60 NAME Dong Jin international Corp SUPPLIE...

Page 21: ...Ub Namyangju City Kyunggi Do Korea WIDTH mm 43 30 BREAKING STRENGTH KS K 0411 1613 KG 1409 6 KG ELONGATION KS K 0411 23 3 22 4 BUCKLES RING Name T LOOK SAFETY BUCKLE NAME SUP AIR SUPPLIER ADDRESS SUP...

Page 22: ...KSK 0409 14 8 kg ELONGATION KSK 0409 26 5 Every effort has been made to ensure that the information in this manual is correct but please remember that it has been produced for guidance only This owne...

Reviews: