Hand wash the pan and cover before initial use, and after each subsequent use.
Do NOT immerse the Skillet (3) or Thermostat Heat Control Probe (6) in water, or
let it come in contact with any liquid.
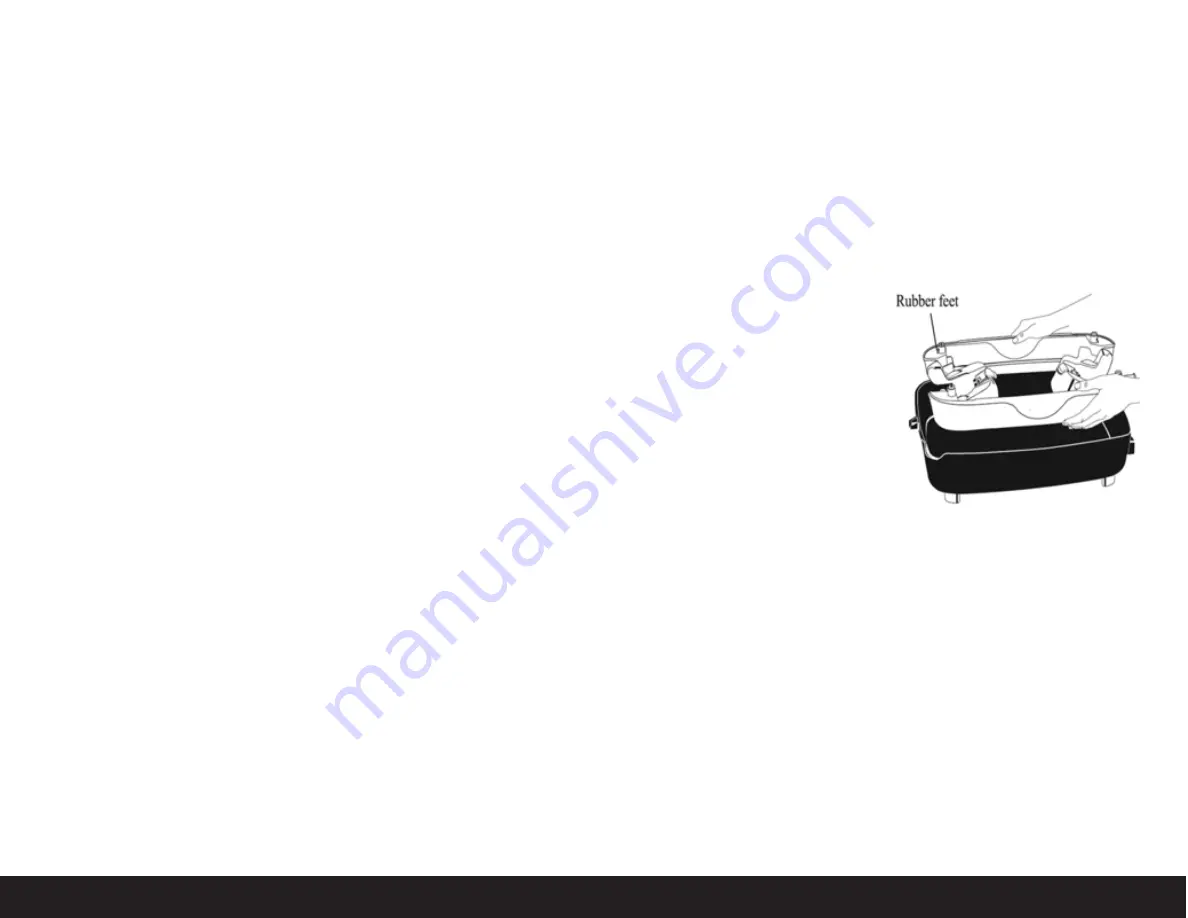
To disassemble the skillet for cleaning and storage:
1. Lift the skillet pan off of the base and clean as described below.
2. Push the handles down, until they fold into the base.
3. For compact storage, rotate the handles up and inward and place the base in
the pan in an inverted position so that the rubber feet are facing up. Then place
the cover upright onto the pan (see figure below).
UTENSILS & COOKING
CUSTOMER REVIEWS
CLEANING & CARE
8
9
HOW TO OPERATE
Ginnys.com • 1.800.544.1590
8
9
Do NOT use steel wool or abrasive
kitchen cleaners.
Soaking the skillet to loosen food
residue is not necessary. If, however,
soaking the skillet is desired, do NOT
soak for more than 2 hours.
Soaking
for more than 2 hours may damage
the ceramic nonstick finish.
Need image from vendor manual
here...
HOW TO OPERATE
CAUTION: This product is not intended to melt wax, gels, plastics, glue or other
materials for making candles, or for other hobbyist activities, or in any
commercial or business application.
1. Place assembled skillet on a dry, level heat-resistant surface.
2. Insert the Thermostat Heat Control Probe (6) into the skillet so the two
electrical pins on the skillet are fully inserted into the heat control. Connect
cord to a 120V AC electrical wall outlet only.
3. Turn Thermostat Heat Control Probe (6) to desired temperature. Remove
cover and preheat skillet. The pilot light will go off when the selected
temperature is reached (this takes approximately 5–10 minutes).
NOTE: As the skillet heats up, you may hear a clicking sound; this is due to the
expansion of the metal as it heats. It is normal. You may also notice this
sound as the unit cools down.
4. Prepare food for cooking. Because the skillet features a ceramic nonstick
finish, food may be prepared with little or no oil.
5. Place food in skillet and cook according to the temperature requested. Heat
should be adjusted according to personal preference and food being cooked.
During cooking, pilot light will go on and off (this indicates that the desired
temperature is being maintained).
NOTE: For best results, use heat resistant nylon, plastic or wood utensils in
the skillet. Do NOT use metal utensils as they may damage the ceramic
nonstick surface. Do NOT cut foods on the cooking surface.
6. Turn Thermostat Heat Control Probe (6) to “OFF” position when cooking is
complete. Unplug heat control from wall outlet, then from the appliance. Allow
skillet to cool before cleaning.
The Thermostat Heat Control Probe (6) on your Easy Skillet has a “simmer”
setting, along with a temperature range from 220–420°F (in 50° increments).
In time, the ceramic nonstick finish may darken over the heating element. To
remove this discoloration, use a non-abrasive cleaner, available at most grocery
and hardware stores. Follow the cleaner’s instructions, being careful that any
cleaning solution coming in contact with the exterior of the appliance is wiped off.
• After treating the skillet with a commercial cleaner, wipe the cooking surface
lightly with cooking oil before using.


