background image


USING YOUR PRESSURE COOKER 


Having familiarized yourself with the components of the unit and their purposes, it 
is important that you read the following information about pressure-cooking and the 
step-by-step instructions before you begin to cook. 
 
Pressure  cookers  create  moist  heat  under  pressure  to  cook  the  food,  because  the 
cooking process is done in a sealed vessel, very little liquid is lost. Hence, you will 
need  only  about  8  oz.  more  liquid  than  is  needed  for  the  finished  dish.  You  can 
achieve the best results by following these simple step-by –step instructions: 
 
1.


Prepare your ingredients using the recipe you have selected. 

2.


If you are cooking vegetables, soups or desserts, skip to step. 

3.


Many  meat  and  poultry  recipes  call  for  brown  the  meat  or  poultry  before 
cooking. To brown the meat or poultry using your pressure cooker, preheat the 
uncovered pressure cooker,  being  careful  not to overheat  the cooker. Pour the 
required  amount  of  cooking  oil  called  for  in  the  recipe  into  the  cooker. 
CAUTION: Pouring cooking oil into an overheated pan could cause the oil to 
ignite. 

4.


Put  the  meat  or  poultry  in  cooker  and  sear  thoroughly  on  all  sides  until  it  is 
deep  brown  and  crisp.  Monitor  the  heat  to  prevent  burning.  Season.  Less 
seasoning may be required, as foods cooked in a pressure cooker retain more of 
their  natural  flavor.  Remove  pressure  cooker  from  heat  and  allow  it  to  cool 
slightly before adding liquid to the unit. 

5.


Pour the amount of liquid called for in the recipe into the pressure cooker. 

 
Handy Tip: When preparing more than one item at a time, make sure that the items 
being prepared have the same cooking times and temperatures. 


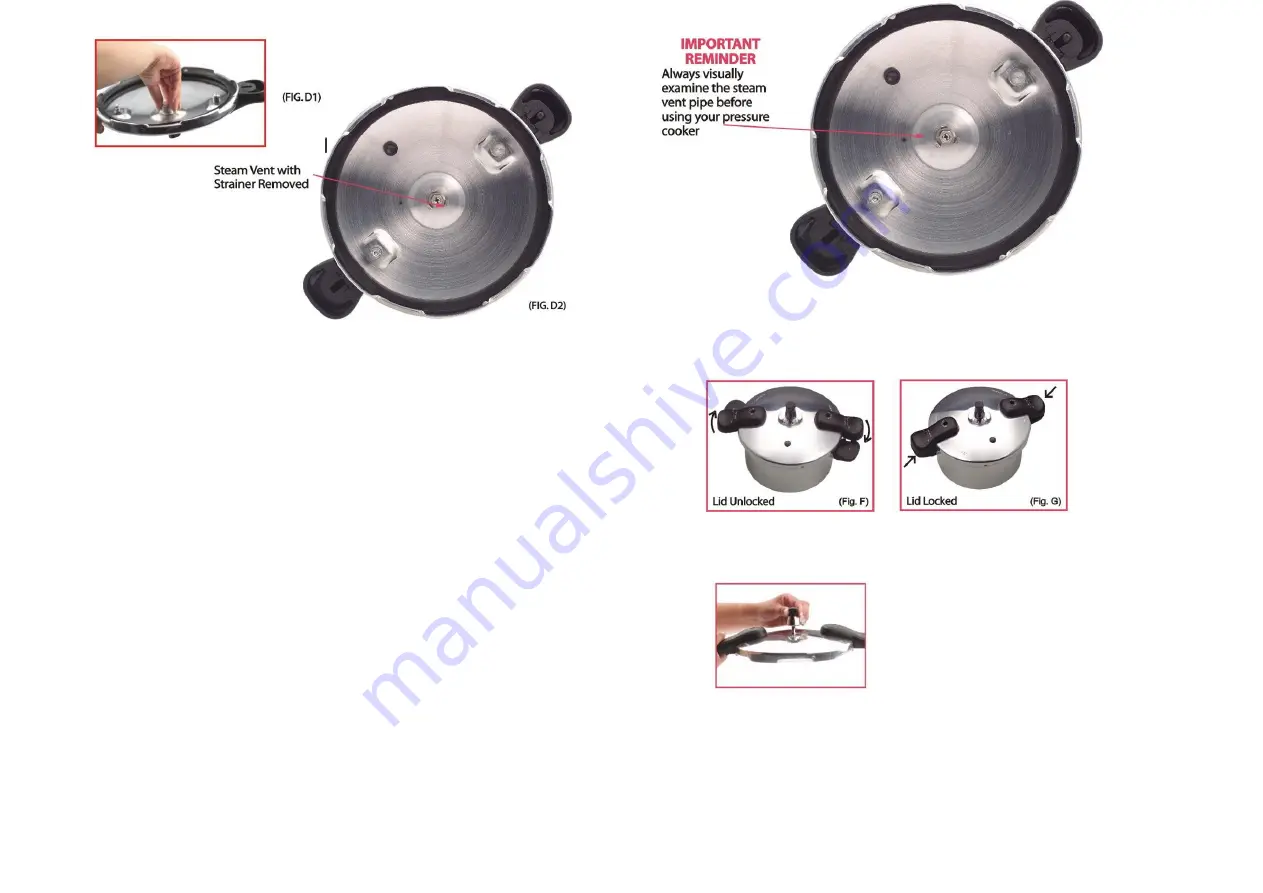
6. To lock the lid in place, align the “V” mark on the lid with the arrow on the body 
handle. Rotate the lid until the cover drops into position. Lock the lid in place by 
rotating  it  clockwise  until  the  lid  handle  is  aligned  with  the  body  handle.  The 
pressure  cooker  lid  is  properly  locked  in  place  when  the  lid  handles  are  directly 
above the body handles. 

DO NOT OVER-ROTATE THE LID

(Fig F and Fig G). 


7. Place the pressure regulator in the vent pipe, screwing it in until it moves down 
no further. The pressure regulator will fit loosely on the vent pipe. It will not touch 
the top of the pressure cooker cover. 


8.  Heat  the  pressure  cooker  until  the  pressure  regulator  begins  a  gentle  rocking 
motion.  A  medium  to  high  heat  setting  is  best.  The  safety  lock  will  move  up  and 
down, releasing dry air and a little steam. Once the cooker has reached its operating 
pressure  and  temperature,  the  safety  lock  will  seal  and  remain  in  the  up  position 
until  the  pressure  is  released.  The  overpressure  plug  will  rise  slightly  and  seal  as 
well. 
9.  Calculate  cooking  times  when  the  pressure  regulator  begins  to  rock  gently. 
Gradually lower the heat to maintain a slow, steady rocking motion. Cook for time 

Summary of Contents for Y24-12-00

Page 1: ...or dried vegetables do not fill over 1 2 full Overfilling may cause a risk of clogging the vent pipe and developing excess issue See COOKING TIMES 9 Do not cook foods such as applesauce cranberried pear barley oatmeal or other cereals split peas noodle macaroni rhubarb or spaghetti These foods tend to foam and froth and may block the pressure release valve 10 Always check the pressure release devi...

Page 2: ...ly healthy and fit Pressure cooking preserves flavors and nutrients then derizes meat and cooks foods three to ten times faster than other methods The PRESSURE REGULATOR fits onto the STEAM VENT PIPE When the proper operating pressure 15 lbs sq in is reached the pressure regulator will rock gently and control the pressure inside the cooker The gentle rocking motion of the pressure regulator is an ...

Page 3: ...ld never be pressure cooked The pressure cooker is marked at the 1 2 and 2 3 full levels so that you always know how much liquid is in the unit Be sure to not let any of the foods you are cooking extend above the maximum fill level Fig C 2 Visually examine the steam vent pipe for obstructions before using the cooker To examine the steam vent unscrew the pressure regulator Fig A 1 on the top of the...

Page 4: ...heir natural flavor Remove pressure cooker from heat and allow it to cool slightly before adding liquid to the unit 5 Pour the amount of liquid called for in the recipe into the pressure cooker Handy Tip When preparing more than one item at a time make sure that the items being prepared have the same cooking times and temperatures 6 To lock the lid in place align the V mark on the lid with the arr...

Page 5: ... cover handle with a small brush After cleaning rinse the spring and metal shaft of the safety valve and thread gently into place Be careful nott to over torque the valve 2 The overpressure plug can also be removed for cleaning by pushing it out of its opening from the top of the cover After cleaning reinsert it by pushing the domed side of the plug into the opening from the underside of the cover...

Page 6: ...f you find that the lid becomes difficult to open or close follow these suggestions Hard to close Press the palm of you hand on the cover area directly opposite the cover handle while moving the cover handle to the closed position with your other hand After brazing meat or poultry the cover may be difficult to closed due to expansion of the pressure cooker body from heating Allow the presssure coo...

Page 7: ...meats and poultry prior to adding liquid for the pressure cooking process This will help to lock in flavor Use a small bit of cooking oil to prevent the foods from sticking All roasts listed below refer to a 3 lb size Roast do not require cooling the cooker after the prescribed cooking time However on cut pieces of meat or poultry always cool the cooker to avoid overcooking FRESH VEGETABLES When u...

Page 8: ...t no charge provided the product is returned freight prepaid with proof of purchase to Ginny s Allow 2 4 weeks for return shipping This warranty does not cover improper installation misuse abuse or neglect on part of the owner Warranty is also invalid in any case that the product is taken apart or serviced by an unauthorized service station This warranty gives you specific legal rights and they ma...

Reviews: