Initial start-up
73
Code no. 550038
Rev. no. 16/1018
6.2. Machines with gas heating. Gas pressure control
WARNING!
IN ANY OPERATING CONDITION, THE PRESSURE OF THE GAS SUPPLY ENTERING THE IRONER
MUST CORRESPOND TO THE PRESSURE INDICATED IN SECTIONS 4.3 AND 4.4 OF THIS MANUAL.
PRESSURES OTHER THAN THOSE INDICATED MAY CAUSE THE IRONER TO MALFUNCTION AND
PRESENT A RISK OF SERIOUS INJURY.
THE MANUFACTURER DECLINES ALL RESPONSIBILITY IN THESE CASES.
WARNING!
TO AVOID THE RISK OF AN ACCIDENT, THE CONNECTION AND DISCONNECTION OF THE
PRESSURE GAUGE PIPE TO THE SOLENOID VALVE SHOULD BE CARRIED OUT WITH GAS
SHUTOFF VALVE CLOSED AND THE MACHINE DISCONNECTED FROM THE POWER
SUPPLY.
DO NOT ACCESS THE INSIDE OF THE MACHINE IF THE TEMPERATURE OF THE SURFACES
TO BE HANDLED IS HIGH.
6.2.1. CE models with atmospheric burner. Heating by natural gas, propane gas and propane-butane
mixture.
ETL models with an atmospheric burner. Propane gas heating
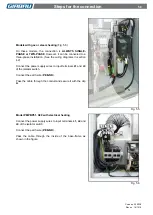
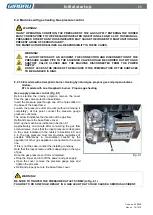
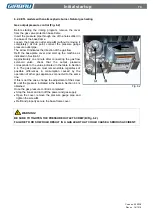
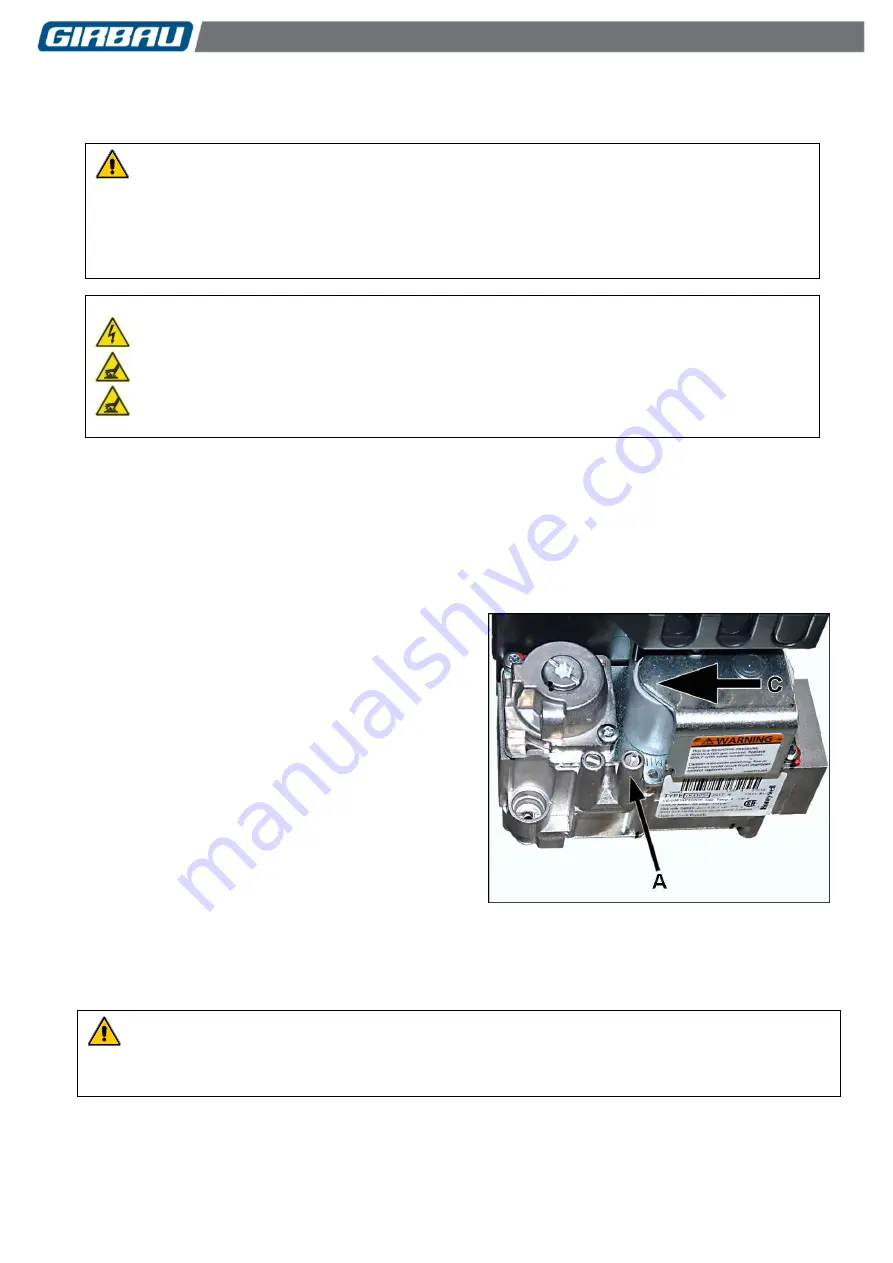
Gas supply pressure control (Fig. 6.1)
Before starting the ironing program, remove the cover
from the gas valve protection base-frame.
Insert the pressure pipe through one of the holes drilled in
the base of the base-frame.
Loosen the pressure outlet screw
A
(without removing it
completely). At this point, connect the pressure gauge
pressure outlet pipe.
The arrow
C
indicates the direction of the gas flow.
Refit and secure the base-frame cover.
Start up the machine as indicated in Section 6.1.
Approximately one minute after connecting the gas flow
solenoid valve, check that the input pressure corresponds
to the value indicated in the tables in Sections 4.3 and
4.4. The gas pressure must remain stable regardless of
possible differences in consumption caused by the
operation of other gas appliances connected to the same
line.
If this is not the case, contact the installing company.
Note that the input pressure differs depending on the type
of gas.
Once the gas pressure control is completed:
Stop the ironer and turn off the power and gas supply.
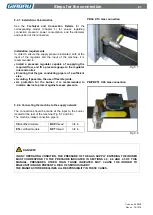
Open the cover, remove the pressure gauge pipe and
tighten the screw
A
.
Refit and properly secure the base-frame cover.
Fig. 6.1
WARNING!
BE SURE TO TIGHTEN THE PRESSURE OUTLET SCREW (A/Fig. 6.1).
FAILURE TO DO SO WOULD RESULT IN A GAS LEAK THAT COULD CAUSE A SERIOUS ACCIDENT.

