background image


10 

DRIVING  

When driving the wheelchair for the first time you should always start with the slowest 
speed setting and gradually increase as you get accustom to your wheelchair. The seat 
should also be slightly tilted (approx. 8 degrees) for best driving performance. Never 
drive your wheelchair when seat tilt is set flat or zero degrees as this puts extra load on 
front castors and will prematurely wear castor tyres and may also interfere with ground 
clearance of foot plates or foot plates interfering with castor wheel. 
 

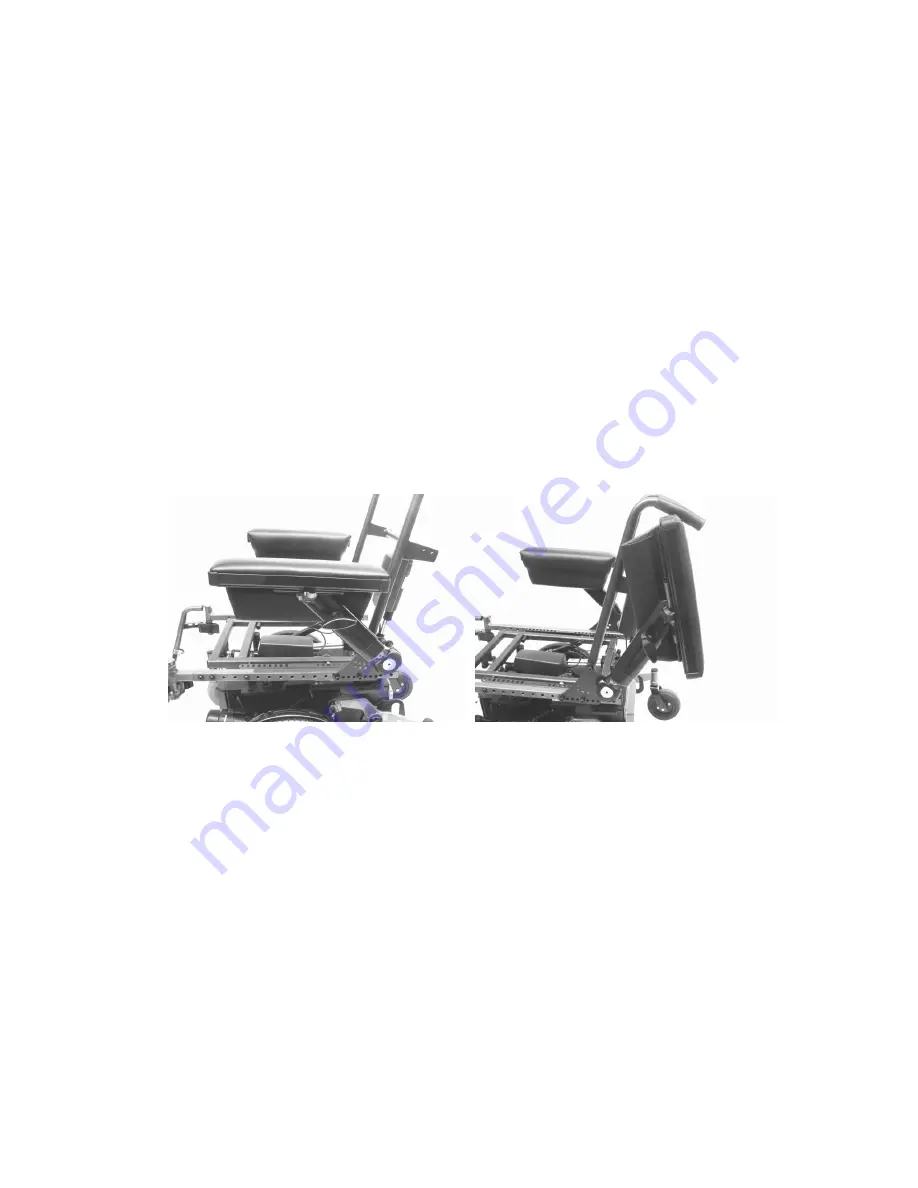
Armrests 


The Flip up armrests are adjustable in height, position forward or aft of arm pad. 
These can be permanently set in the desired position and locked with bolts or user 
adjustable using locking knobs or thumb knobs. 
To adjust height, loosen Turn Knob located on outside of armrest Post.  When 
adjustment is complete retighten Turn knob 

firmly. 


Forward and Back Adjustment of Arm Pad 

Loosen small turn knob located on the outside and underneath arm pad. Retighten when 
adjustment is complete. Do not undo more that one turn. This knob also allows 
adjustment of joystick module. 
 

Flip Up Armrest Lock  

Located on the inside of the armrest mount bracket.  Pull knob out and turn 90 degree. 
This will allow armrest to move freely up and down. To lock, turn knob 90 degrees and 
allow knob to drop in. Drop armrest down and arm should be in the locked position. 


Summary of Contents for Centro

Page 1: ... 0 IMPORTANT For your safety and comfort read carefully and understand all of the features prior to using your new Centro Powerchair Misuse may result in electrical or mechanical damage Maximum Recommended User Weight 175 kg ...

Page 2: ...P 15 Section 7 Battery charging and maintenance P 16 Section 8 Care and maintenance P 20 Section 9 Trouble shooting P 22 Section 10 Precautions for controller use P 23 Section 11 Transfer to and from your wheelchair P 25 Section 12 Centro Vertical Lift seat model Warning P 26 Section 13 Warranty P 27 Section 14 Spare Parts P 28 Note Specific Controller information and controller operators manual w...

Page 3: ...mobility Please take the time to familiarise yourself with the functions and features of your power chair by reading this owners manual If you have any queries about the functions of the chair you can call Glide Products or your nearest Glide Products dealer If you have a Vertical Lift model it is essential you read and fully understand Section 12 before use GLIDE REHABILITATION PRODUCTS 25 LEDGAR...

Page 4: ...Back Rest Canes 2 Arm Rest 3 Arm Rest height adjustment knob 4 Rear Transport Tie Down point 5 6 rear Castor wheel 6 Attendant Park Brake 7 Drive clutch 8 14 Drive wheel 9 8 front castor wheel 10 Front Transport Tie Down point 11 Foot plates 12 Leg Rest release latch 13 Leg Rest Hanger 14 Joystick Module 15 Backrest ...

Page 5: ...occupant and bystanders have hands well clear of operation 3 Drive clutches should be engaged at all times while occupant is seated When drive clutches are disengaged there is no braking when manoeuvring wheelchair 4 To manually push the chair you must make sure that you have control over the wheelchair before releasing the motor drive clutch Only manually manoeuvre wheelchair on level ground whil...

Page 6: ... it is only for a short time as this will prevent accidental movement of chair or release of park brakes Traction could be lost on inclined or decline if wet and grassy surfaces Take extra care and drive slowly on these surfaces Extreme Tilting and reclining must be done on level ground ONLY Chairs fitted with Tilt and Recline features should be NOT be driven with these features in a extreme Tilt ...

Page 7: ...that you are in the centre of the ramp and that the ramp is wide enough for your wheelchair Do Not use ramp if you feel that a wheel may drop off the side Do not veer or turn while on ramp This may cause chair to tip and a fall may result Drive wheelchair at a slow steady speed Keep chair moving Return tilt and recline to normal driving position when back on level ground When descending a ramp goi...

Page 8: ...nment so as not to cause injury to yourself or others Have an authorised Glide Rehabilitation Products agents make adjustments to the controller if the chair is not performing to your satisfaction There are no controller adjustments that can be made by the user or carer apart from speed level selection Safety Performance Check WARNING Make sure the chair operates as it is designed to do If there i...

Page 9: ...on or pad on the control box until you are seated correctly in the chair and have your hand on the control box IMPORTANT Please familiarise yourself with the individual functions of your controller in particular the On Off button or pad Both types of control systems have an On Off button or pad that operate by pressing once for ON and pressing the same button or pad again for OFF 1 Do not displace...

Page 10: ...on forward or aft of arm pad These can be permanently set in the desired position and locked with bolts or user adjustable using locking knobs or thumb knobs To adjust height loosen Turn Knob located on outside of armrest Post When adjustment is complete retighten Turn knob firmly Forward and Back Adjustment of Arm Pad Loosen small turn knob located on the outside and underneath arm pad Retighten ...

Page 11: ... one pin is used Once the legrest is on the locating pins and with foot plates up swing legrest towards centre of chair firmly so latch will click into position Height Adjustment of Footplate Your footplate will be fitted with one of two types of adjustment styles 1 Clamp Type to adjust height simply loosen clamp bolt move to desired position retighten clamp bolt 2 Incremental Hole Type to adjust ...

Page 12: ...cate clutch in the disengaged resting position This will allow the chair to be free wheeled You may need to take some load off the Drive clutch by moving the Drive wheel by hand slightly forwards or backwards at the same time as pulling out Drive clutch Brakes Your power chair has electronic brakes and they are activated in the flowing manner 1 If chair suffers a power failure while driving 2 When...

Page 13: ...rated actuator These are operated in several ways Button located on controller in conjunction with joystick Remote switches located for best access by occupant Please refer to respective Controller manufactures user guide for more info Please familiarize yourself with this function for trouble free operation Adjusting the seat angle 1 Electrically operated actuator This is operated in several ways...

Page 14: ...ence The Centro has been designed to accommodate many of these systems including Glide s own Because of the varying nature of these systems and possible changes to the centre of gravity it will be necessary for a Health Professional with the aid of the selling agent representative to insure the wheelchair is set up safely Power Seat Tilt Your wheelchair will more than likely have a 50 degree power...

Page 15: ... Care Professional or Selling Agent Representative before using any of these options These could included Power Elevating Legrests Vertical Lift Raise Seat Refer Section 12 Power Swing away Chin Control Unit WARNING Before using any power operated option ensure everyone is clear of wheelchair as pinch points may inflict serious injuries ...

Page 16: ...S2942 1994 We used and recommend the Unwin vehicle tie down system in accordance with manufactures specifications CAUTION Do not use leg rests armrest footplates or any other area apart from the designated points as attachment points for your tie down system Unoccupied wheelchairs in vehicles must be safely secured or stored securely outside the passenger compartment Posture Positioning Belts must...

Page 17: ...oper charging each night As the batteries deteriorate you will notice that the batteries are not lasting as long between charges and eventually you will need to replace as a full charge may only last a couple of hours or less Charging your power chair 1 Ensure charger is switched off 2 Ensure wheelchair controller is switched off 3 Connect charger to wheelchair via the charging socket located on t...

Page 18: ...d Remove battery cover and attached security hook as illustrated below 4 Unscrew and remove circuit breaker 5 To avoid accidental shorting of batteries when installing ensure terminal protection caps are installed If not then use insulation tape and cover all terminals 6 Orientate front battery and lift into back of Battery Box and slide forward Orientate rear battery and lift into battery box Sec...

Page 19: ... of this weight Replacing batteries with smaller or lighter batteries such 50amp hr batteries may change the balance of the wheelchair Recommended Battery Battery Type GEL Sealed Lead Acid Deep Cycle 2 x 12v 70amp hr approx weight each 24kg Maximum Battery dimension 260L x 171W x 220H Do not use batteries weighing less than 20kg each WARNING Note Please refer to battery wiring diagram page 20 The ...

Page 20: ...20 Battery Wiring Diagram Note If warranted packing blocks could be used to limit battery movement as batteries come in varying shapes and sizes ...

Page 21: ...an be moved do not operate wheelchair and get a service technician to rectify immediately 4 Check all cables for possible damage and ensure all connectors are secured i e battery motors and controller 5 Check both front and rear castors for any excessive movement about the top or bottom bearing mounts or pintle shaft Contact your nearest Glide Products agent for repair of this fault if it occurs B...

Page 22: ...ducts selling Agent or Glide Products direct Seat frame stop The Seat Frame Stop is a safety stop only and is factory set to the correct height If adjustment is required then the following procedure must be followed Firstly the tilt seat actuator must be set in the bottomed out position and then the adjuster set so it is just toughing the seat frame The adjuster must not be used as a limit stop Da...

Page 23: ...ng a Molybdenum base grease after cleaning Never use alkaline based solvents Packing shipping The Centro Power Chair is shipped to Glide Products agents in a fully enclosed pallet mounted cardboard box to minimise damage during transport Your chair should arrive to you fully assembled and ready to use If your chair needs to be transported interstate or overseas it is recommended that a shipping bo...

Page 24: ...ow 60 seconds before resetting circuit breaker 7 If you still have problems after reviewing the above checklist please contact your nearest Glide Agent or Glide Products direct Wheelchair Speed suddenly reduced If Smart Drive Encoders are fitted and a problem is detected by the controller then the wheelchair speed will be reduced by 50 get you home mode It will be safe to continue to drive but all...

Page 25: ...n unexpected manner release the joystick This action will stop the wheelchair under any circumstances 2 Although the controllers are designed and manufactured to be extremely reliable and each unit rigorously tested possibility of a system malfunction always exists however small the probability Under some conditions of detected system malfunction the controller must for safety reasons stop the cha...

Page 26: ...tly and should not be used until rectified WARNING PG Controls and Dynamic Controls accept no liability for losses of any kind arising from unexpected stopping of the wheelchair or improper programming of the controller or improper use of the wheelchair or controller ...

Page 27: ...nt is ambulant or able to do standing transfers removing swing away footplates will allow better placement of feet when standing or conversely closer access to seat when transferring into chair Where possible have someone assist you during the transfer 5 You will need to learn safe transfer techniques from your Health Professional 6 Always have wheelchair as close as possible to chair that you are...

Page 28: ...ift This is ideal where users are in environments where constant change in seat heights are required such as the work place or for home use WARNING Before operating any function of the Vertical lift ensure everyone is well clear of the wheelchair and notify persons within your vicinity of your intension before raising or lowering the lift Never operate if small children are present Raise on Level ...

Page 29: ...ards unit must be returned for evaluation and possible repair before replacement Chassis 5 5 year warranty Chassis will be replaced within the first five year period Thereafter Glide will extend the warrant for further five years and will either replace or repair chassis Upholstery 6 month warranty This will cover against defects in materials or workmanship Warranty does not cover against normal w...

Page 30: ... F 14 Pneumatic 300 8 Drive Wheel Part Number 202672 14 Foam Filled 300 8 Drive wheel Part Number 202672 F 7 Castor tyre rear pneumatic Part Number 20120 7 Castor tyre rear foam filled Part Number 20120 F TUBES 8 Front Rear Part Number 202492 300 8 Drive wheel Part Number 202565 Replacement wheel 6 Castor Wheel rear complete with bearing Part Number 310130 ...

Page 31: ... be implied in favour of and all rights and remedies that but for this provision would be conferred upon the purchaser or other persons against Lendal Pty Ltd arising under or as a result of the Trade Practices Act 1974 any other legislation or the general law are excluded and limited to the maximum extent possible and in cases where Lendal Pty Ltd s liability cannot be completely excluded but may...

Reviews: