6
Visit our website at http://xtm.globalhobby.com or for Customer Service at http://globalservices.globalhobby.com
Step 3: Installing Your Engine Assembly
●
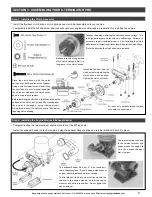
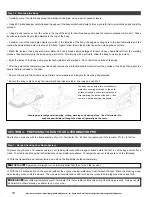
Install your engine to the chassis, taking care to ensure that the engine is lined up properly and that the gear mesh between the clutch
bell and the spur gear is correct. It's important that the gears do not bind.
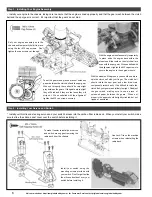
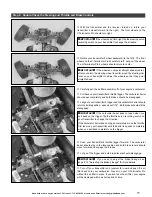
To set the gear mesh, place a piece of notebook
paper between the clutch bell and the spur gear.
When set properly, there should be very slight
play between the gears. If the gears are too tight
they will bind and if they are too loose they will
strip out. When satisfied with the alignment,
tighten the M5 cap screws securely.
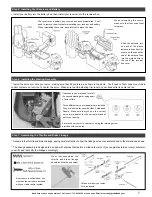
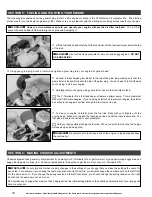
Set your engine assembly onto the
chassis and temporarily hold it in place,
using the four M5 cap screws. Don't
tighten the cap screws yet, though.
With the engine mount assembly temporarily
in place, slide the engine back within the
mounts until the teeth on the clutch bell are
even with the spur gear. When satisfied with
the alignment, tighten the M3 cap screws to
secure the engine to the engine mounts.
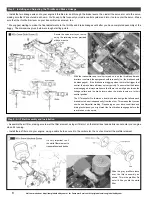
With the wheels off the ground, you should be able to
spin the clutch bell with your finger. The clutch bell
should rotate the spur gear and other drive-train
components rather easily. If it's difficult to rotate the
clutch bell, your gear mesh is likely too tight. Readjust
the gear mesh, making sure to use a piece of
notebook paper between the gears. When set
properly, the paper should be tightly crinkled, but not
ripped or punctured.
Step 4: Installing Your Servos and Switch
●
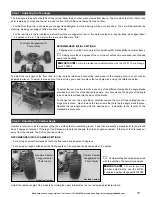
Install your throttle and steering servos and your switch harness into the carbon fiber radio deck. When you install your switch, make
sure to slide the silicone dust cover over the switch before installing it.
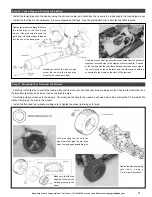
To make it easier to install your servos
and switch, we suggest removing the
radio deck from the chassis.
Install your switch, using the
mounting screws provided with
your switch. Don't forget to slide
the silicone dust boot over your
switch before installing it.
Use Lock-Tite on the machine
screws when reinstalling the
radio deck.

