8
Visit our website at http://xtm.globalhobby.com or for Customer Service at http://globalservices.globalhobby.com
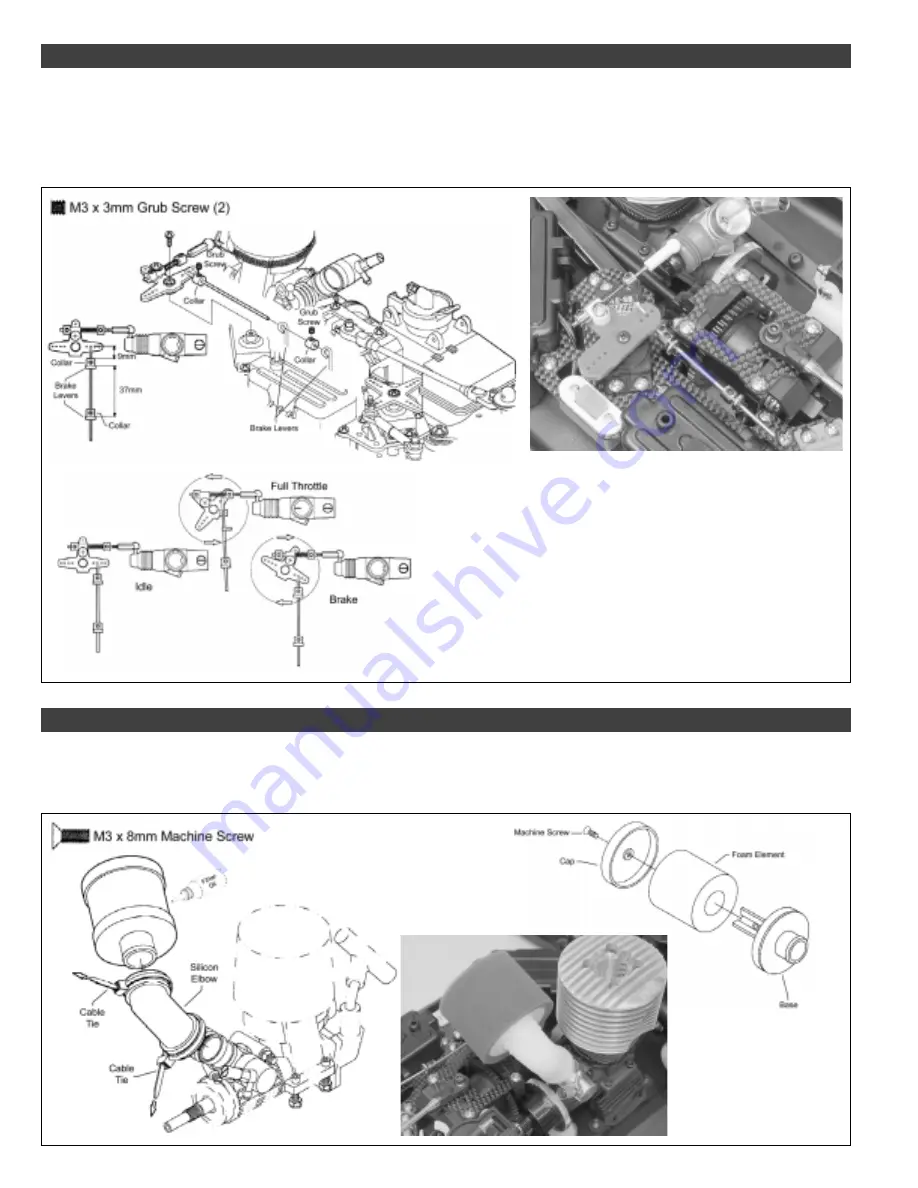
Step 8: Installing and Adjusting the Throttle and Brake Linkage
●
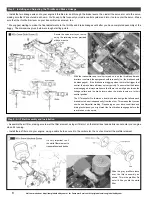
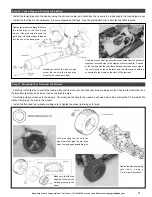
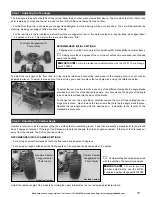
Install the two linkage wires onto your engine's throttle arm and through the brake levers, then install the servo arm onto the servo,
making sure that it's centered, as shown. You'll need to first connect your radio control system and turn it on to center the servo. Make
sure that the throttle trim lever on your transmitter is centered, too.
●
We suggest waiting to make the final adjustments to the throttle and brake linkages until after you have completed assembly of the
buggy. The dimensions given below are rough starting points.
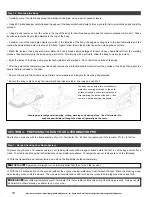
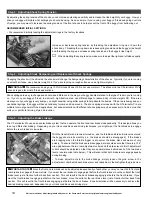
With the transmitter and receiver turned on, and the throttle and brake
trim lever centered, the spur gear should turn easily (i.e., the brakes should
be disengaged). If the brakes are dragging when the throttle trigger is at
neutral, the brake discs will wear out very quickly. To ensure that the brakes
are disengaged, always make sure that there is a small gap between the
linkage collars and the brake levers when the brake levers are in their
neutral position.
The X-Terminator Pro features a dual-disc brake design that allows each
brake disc to be set independently from the other. This means that you can
now have differential braking. Depending on your track conditions and
driving techniques, you might want the front brakes to engage before the
rear brakes or vice-versa.
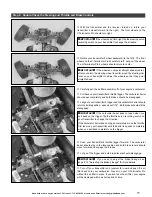
Secure the servo arm to your servo,
using the retaining screw provided
with your servo.
Step 9: Air Filter Assembly and Installation
●
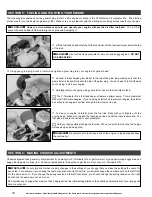
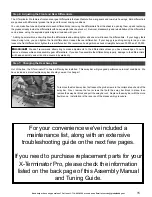
Assemble the air filter, making sure to wet the filter element, using air filter oil, so that small dust and debris cannot enter your engine
when it's running.
●
Install the air filter onto your engine, using a cable tie to secure it to the carburetor, then cut and install the prefilter element.
It's very important to oil
the white filter element to
trap small dust and debris.
Slide the gray prefilter sleeve
over the filter assembly, as
shown. This is the prefilter. Do
not oil it like you did the white
filter.

