background image

Global Specialties 

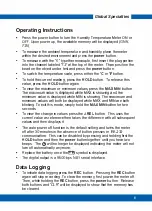
Operating Instructions 

Press the power button to turn the Humidly Temperature Meter ON or 

OFF. Upon power up, the available memory will be displayed (GNV-

725) 

To measure the ambient temperature and humidity place the meter

within the desired environment and press the 

power 

button.

To measure with the "K" type thermocouple, first insert the plug portion

into the channel labeled ''T2" at the top of the meter.  Then position the

bead on the object under test and press the 

power 

button.

To switch the temperature scale, press either the 'C or 

'F 

button.

To hold the current reading, press the 

HOLD 

button.  To release this

value, press the 

HOLD 

button again.

To view the maximum or minimum values, press the 

MAX MIN 

button.

The maximum value is displayed while MAX is showing and the

minimum value is displayed while MIN is showing. The maximum and

minimum values will both be displayed while MAX and MIN are both 

blinking. To exit this mode, simply hold the 

MAX MIN 

button for two

seconds.

To view the change in values press the 

.c.REL 

button.  This uses the

current value as reference then takes the difference with all subsequent

values and then displays it.

The auto power off function is the default setting and tums the meter

off after 30 minutes in the absence of button presses or RS-232

communication.  This can be disabled by pressing and holding first the

HOLD 

button and then the 

power 

button together until you hear two

beeps.  The 

will no longer be displayed indicating the meter will not

turn off automatically anymore

Replace the battery once the 

(=11 

symbol is displayed.

The digital output is a 9600  bps N 81  serial interface.

Data Logging 

To initiate data logging press the 

REC 

button.  Pressing the 

REC 

button

again will stop recording. To clear the memory, first power the meter off.

Then, while holding the 

REC 

button, press the 

power 

button.  Release

both buttons and "CLR" will be displayed to show that the memory has 

be cleared.

Summary of Contents for GNV-720

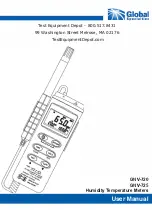
Page 1: ...GNV 720 GNV 725 Humidity Temperature Meters User Manual Test Equipment Depot 800 517 8431 99 Washington Street Melrose MA 02176 TestEquipmentDepot com...

Page 2: ...ion Using the Software Calibration Instructions Warranty Service Information 2019 Global Specialties All rights reserved 2 2 3 3 4 5 6 7 7 8 9 10 11 Unauthorized duplication of Global Specialties docu...

Page 3: ...rged at any time Dry thoroughly before attempting to make measurements Do not use solvents or expose to solvent fumes as they may cause deterioration or damage Do not operate In the presence of noxiou...

Page 4: ...facilities in the disposition of this product Caution Refer to the operating instructions Introduction The GNV 720 and GNV 725 are digital humidly temperature meters that measure relative humidity and...

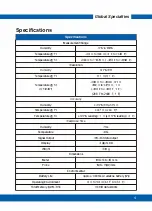
Page 5: ...1 C CT32 40 J 200 Fto 200 F 1 F 200 F to 2498 F 1 F Accuracy Humidity 2 5 RH at 25 C Temperature T1 e0 7 C e1 4 FJ Temperature T2 0 5 reading 1 C 0_5 reading 2 F Response Time Humidity 75s Temperatur...

Page 6: ...output connector RS 232 13 AC power adapter connector 14 Tripod mounting hole 15 Battery cover E il 0 Cl AREL MAX _ K BBB B ffi d n ru111111iI T2 8BfJ 8 88 8 Bi c F Celsius and Fahrenheit indicators R...

Page 7: ...both be displayed while MAX and MIN are both blinking To exit this mode simply hold the MAX MIN button for two seconds To view the change in values press the c REL button This uses the current value a...

Page 8: ...save settings Pressing the Power button at any time will cancel the process To display the time press the TIME button The time will be displayed with the year at the top the month and day at the botto...

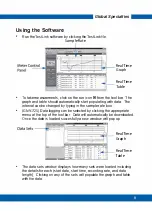
Page 9: ...by typing in the sample rate box GNV 725 Data logging can be selected by clicking the appropriate menu at the top of the tool bar Data will automatically be downloaded Once the data is loaded succesf...

Page 10: ...The meter will beep twice if the value is out of tolerance The meter will exit cal bration mode if the value is within tolerance T1 Temperature 1 Turn the unit off Pres and hold MAX MIN HOLD and c but...

Page 11: ...tory conditions press the and hold the power button and HOLD buttons together It is recommended to first insert the probe into the standards for 20 minutes before initiating the calibration procedure...

Page 12: ...451001 000 Rev A Test Equipment Depot 800 517 8431 99 Washington Street Melrose MA 02176 TestEquipmentDepot com...

Reviews: