background image

From the library of Superior Sewing Machine & Supply LLC - www.supsew.com

Summary of Contents for WF 1767-AE-AUT

Page 1: ...GLOBAL WF 1767 AE AUT Instruction Parts manual www globalsew com info globalsew com ...

Page 2: ...From the library of Superior Sewing Machine Supply LLC www supsew com ...

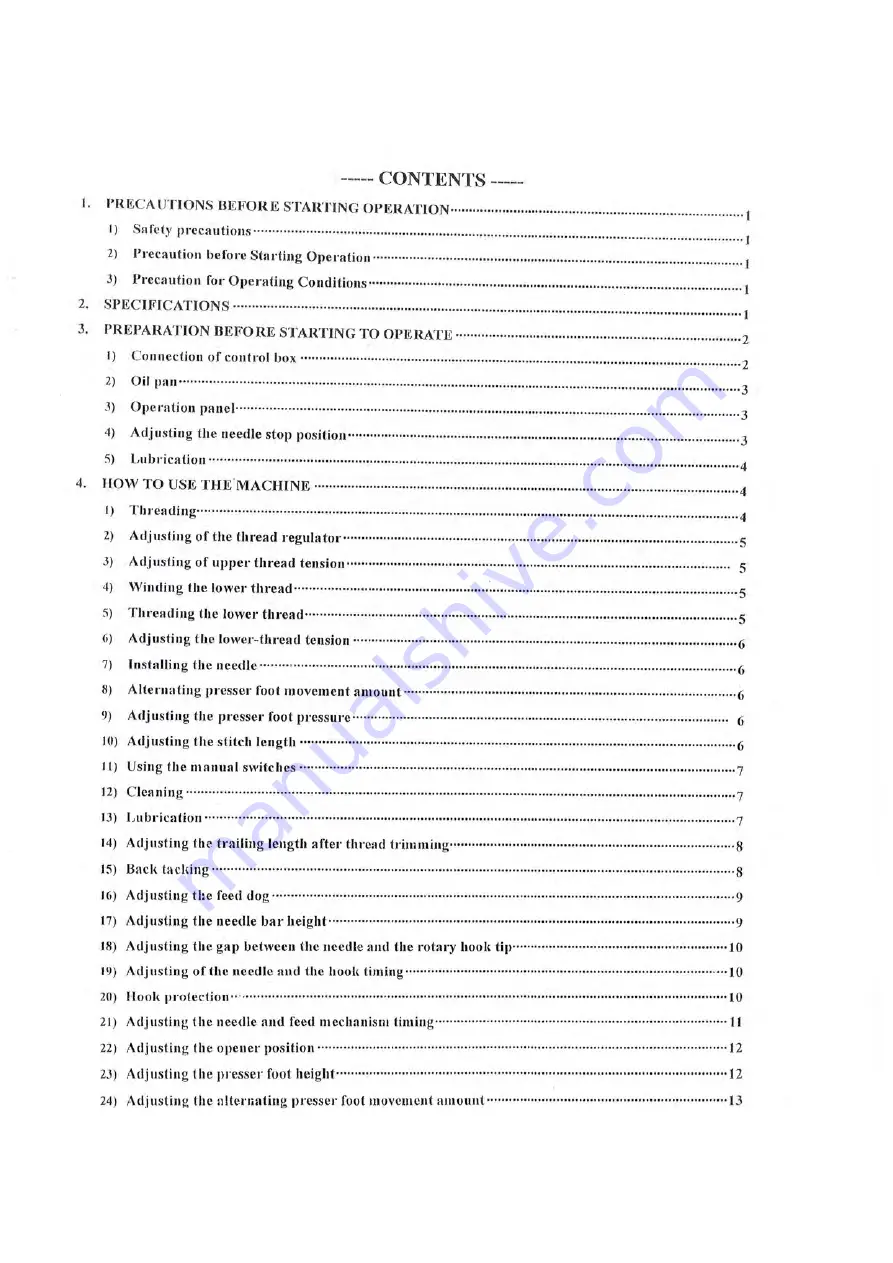
Page 3: ... 7 lnstnlling the needlc 6 8 Alterna ting presser foot movement amount 6 9 Adjusting the presser foot p ressurc 6 10 Adjusting the stitch length 6 11 Using the manuni switches 7 12 C lea ninj 7 13 Lubricntiou 7 14 Adjusting the trailing length 1fte1 thread trimming 8 15 Back lacldng 8 I Adjusting tile feed d ug 9 17 Adjusting the needle ba r height 9 18 Adj us ting the gnp between the needle anti ...

Page 4: ...f 19 2 Timing of the deactivation of the knife 19 3 Position of the release block 19 4 Lubrication of the eccentric 19 5 Stroke of the knife 19 Tin1ing of knife rnovernent 20 7 Knife overlap 20 8 Setting and pressure of the knife blades 20 PARTS LIST A ARM BED AND ITS ACCESSORIES 2 1 B T HREAD TENSION REGULATOR MECHANISM 25 SE VING M ECHANISM 28 D PRESSER FOOT MECHANISM 31 E UPP ER FEED LIFTING RO...

Page 5: ...te the machine before lubricating 3 When a new sewing machine is first turned 011 verify the rotational direction of the pulley with the power on The pulley should rolate counterclockwise when viewed from the pulley 4 Verify the voltage and single or three phase with those given on the machine nameplate 3 Precaution for Operating Conditions I A void using the machine at abnormally high temperature...

Page 6: ...inds ofjoint Caution the pin of synchronizer wire is the same with another two external pins and if there is a misconnection the synchronizer might be burn windpipe of HP signal Iine of motor power synchronizer wire pedal wire control pane l wire connection board wire power input I ine s ignaI Iine of connection board ttii i 4 When connecting the pipes please check the _ joint at the picture of th...

Page 7: ... set plate 2 with the three screws 3 2 Install the set plate 2 to the back ofthe machine arm with the two screws 4 4 Ad justing the needle stop position l Adjusting the needle up stop position When the sewing machine stops in the needle up stop position the stop position of trimming and the treadle is pressed back the red mark on the pulley should be consistent with the mark on the belt cover A Ad...

Page 8: ...in a position over the mark on the belt cover the needle down stop position d isc 2 should be turned in the opposite direction as the direction ofmachine pulley rotation When the black mark stops in a position under the mark on the belt cover Turn the disc 2 in the same direction as the pulley rotation d irection c After adjusting install the cover 3 with screw 4 Note There is no need to loosen th...

Page 9: ...nsion 4 Winding the lower thread I Place the bobbin onto the bobbin winder shaft 2 Pass the thread for winding thread as shown in the figure and wind the end of the thread clockwise around the bobbin several times J Push the bobbin presser 1 toward the bobbjn 4 The operation will automatically stop when winding is completed The amount of thread wound onto the bobbin should be a maximum of 80 if th...

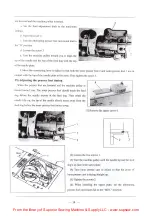
Page 10: ...le clamping screw 8 Alternating presser foot movement amount The alternating movement amount for the inner presser fool and the outer presser foot can be adjusted within the range of 1 7 111111 using the alternating presser foot movement dial I Turn the alternating presser foot movement dial I clockwise or counterclockwise to align the mark MIN A B C D E F M X 9 Adjusting the presser foot pressure...

Page 11: ...m clown stop position or move down to the needle down stop position from up stop position 12 Cleaning I The area around the feed clog and the hook should be cleaned every day 2 Remove any thread scraps from inside the rotary hook 3 Keep he control box clean 13 Lubrication I Check the oiI level at the sight glass I every week If the oil is not enough remove oil filling screw 2 and pour in oil Check...

Page 12: ... the oil satchel is changed the flock side should be faced to connecting plate I0 The oil wick 7 and 8 should be set between the oil satchel 9 and plate 8 4 Checking the lubrication oil Turn on the power switch Depress the treadle gently and check that the oil level rises in the oil sight glass 14 Adjusting the trailing length after thread trimming Adjust by turning the pre tensioner l If the tens...

Page 13: ...ustment dials to the minimum settings Then adjust so that the distance from the setting surface of the needle plale 2 to the end of the needle bar l is 18 5mm when the needle bar I is at its lowest position Set the feed adjustment dials to the minimum settings Then adjust so that the distance from the setting surface of the needle plate 2 lo the end of the needle bar I is 18 5mm when the needle ba...

Page 14: ...he picture of below 2 Set the hook base 6 to the fit position 3 Rotate the adjusting plate 3 let the hook base 6 depend on the bed plate 4 4 TighL en the screws 2 and 5 6 2 I 19 Adjusting of the needle and the hook timing 1 Set the stitch length to O 2 Remove the needle plate 3 Overturn the arm 4 Loosen the serew I 5 Turn the machine pulley to rnise the needle bar from its low position to the poin...

Page 15: ...ent dial to the maximum settings c Loosen the two screws 2 cl Turn the machine pulley until the needle bar is at its lowest position 2 E 3 Q 0 2 0 5mm l 6 0 e Turn the lower feed earn 3 gradually until it is at the position where the needle and the feed dog do not move even when the reverse lever is moved up and down r Tighten the two screws 2 2 Vertical feed direciion Set the feed adjustment dial...

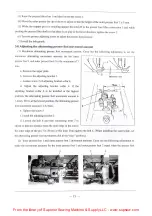
Page 16: ... as close to the inner rotary hook 2 as possible 4 Whi le pressing the opener I against the inner rotary hook 2 with your finger adjust so that the clearance between the needle plate 3 and the stopper 4 of the inner rotary hook 2 is 0 5 0 7 mm 5 Tighten the screw 6 ______ __ _ __ 6 5 6 Turn the machine pulley to move the opener I in direction a opening direction and then tighten the screw 5 23 Adj...

Page 17: ...move the adjusting bracket 3 c Loosen screw 5 ofadjusting bracket collar 4 d Adjust the adjusting bracket collar 4 If the adjusting bracket collar 4 is be installed at the highest position the alternating presser foot movement amount is l 6mm If it is at the lowestposition the alternating presser foot movement amount is l 6 7mm e Tighlen the screw 5 f Install the adjusting bracket J cl Loosen the ...

Page 18: ... foot timing When the presser feet are lowered and the machine pulley is turned toward you The inner presser foot should touch the feed dog before the needle arrives at the feed dog Then when the needle lifts up the tip of the needle should move away from the Iced dog before the inner presser foot moves away 1 Remove the upper cover 4 2 3 2 Loosen the two screws 1 3 Turn the machine pulley until t...

Page 19: ...hould be 1 4 1 6 111111 I Loosen the two screws 3 2 Move the thread holding spring l to adjust its position and then tighten the screws 3 28 Adjusting the knife timing position Afler adjusting the position of the fixed knife I adjust the knife timing position Adjust so that the driving knife 1 starts touching the fixed kni rc at a position 5 5 mm along the front edge of the driving knire 1 I Loose...

Page 20: ...o that the distance between the blade of the fixed knife 2 to the end of the driving knife I is 0 5 111111 and then tighten the bolt 4 31 Adjusting the driving knife operating position The standard distance from the left side of driving knife arm 1 to the screw tip on the plunger 2 of the thread trimming solenoid is 1 mm The clearance between the outermost side right side of the thread trimmer cam...

Page 21: ...he highest position The white point on the pulley and the point 011 the belt cover are in a straight line I Turn the machine pulley until the white point on the pulley and the point on the belt cover are in a straight line 2 Overturn the arm 3 Loosen the three bolts 5 4 Turn the thread trimmer cam 2 to adjust the position of the thread trimmer cam 2 so that the center of the pin 1 the center of th...

Page 22: ...works normally the necessary atmospheric pressure is 5 5 6 5bar Can incl 0111 through the dial plate of the filtering I Lifting knob I clockwise rotation the pressure increases 2 Lifling knob I anticlockwise rotation the pressu1 e is reduced 5 HOW TO USE THE VERTICAL CUTTER 1 _ 2 1 az jj t I cMP C MR Sewing machines with this device make possible the cutting of the material during the sewing seque...

Page 23: ...ofoperalion when the feel are 2 3 Iifled Tighten gudgeon I again 3 Position of the release block Loosen screw I Turn block 2 With the vertical culler turned on the clearance between the release block J and the latch 4 should be 0 5mm the block 2 should not touch the arm shaft Tighten screw I again 5 6 1 2 3 4 7 8 9 10 1 4 Lubrication of the eccentric Loosen screw 6 Set the position of the oil tube...

Page 24: ... screw 6 again The block 7 should not touch the link 8 Note When the knife has been reground often it may no longer be possible to set the overlap of0 5111111 In this case the spacer plate 4 can be moved from below the knife carrier 3 to above the kni fe carrier 9 C 10 O 1 i J i u __ 5 6 7 8 r 1 r 1 I I I g I I I I L I I I l I I I I _ 7 t___________l 1 1 I 8 Setting and pressure of the knife blade...

Page 25: ...24 iii r 25 26 __ 27 t 28 29 1 2 iiiiiii l _ _ iiiiiiii iiiiiiiiiiiilli 9 64 32 38 39 l Ll I 40 33 41 r 34 35 42 i n 36 43 37 44 llt 45 0 Q 0 0 Q lr8l i r 85 79 80 84 67 68 L 69 70 71 77 99 97 _1 98 From the library of Superior Sewing Machine Supply LLC www supsew com ...

Page 26: ...guide I 17 1IF J7 IBSOOI Thread tension stud I Pl 11721218001 Washer I Ill 11 171 iBSOOI Plug 2 IIF 5B8001 Fixing clamp 1 I I IIF B800 Winder shaft 1 IHOl030l 20 Screw 1 M3X 12 D IIF952BROOI Disc I 1i 1 1 1 5731F8001 Presser spring l 25 IIF95413800J Knife I b 11 101030010 Screw 1 M 3X4 1 7 IIFY 17B7 IOI Release lever I 1 IIF MYB8001 Winder lever I tJ IHO lCM0080 Screw 2 M1 X8 II IIF922B8001 Ann co...

Page 27: ...ng liir sl idt plah t I 1 1111111 00 i Sere 1 2 i v12 2 5 It Iii l l Slllll Sere 11 l 11 rnll 7 1111 2 ti I 1117 iBSOOI lug I li 1 IIF 11 1 11800 1 Snell l 115 11 10 111 IIF l97Bi OO I Gasket 10 t IIF l lllSOOI Co cr I ti llF J J llSOO I Oil indicator I I I IIF 1 BSOO I Sere I 1 I IF 1 1 IBS III iaskct 1 I IIF l J il SOtl I iaskct I I 113 I0Slltlli9 Felt I 11 i l li llihi l l Thread g uidt I I 111...

Page 28: ...613800I Wnshcr l 92 11 1 11B88001 Crack 1 93 11 1 4 1 139800 I Screw I 9 1 II M21l08001 Scn w l Y5 110050 14080 Washer l 96 111 60177101 Pushing plntc 1 97 II M2Bl7101 chip groove I 98 11 115040060 Screw 2 MJY Il l l 5050060 Screw I 100 11401050080 Screw 2 24 From the library of Superior Sewing Machine Supply LLC www supsew com ...

Page 29: ...NSION REGULATOR MECHANISM 1 1 2 3 5 4 6 33 III 34 Qi 35 r 36 37 7 8 9 12 13 9 14 38 49 50 r 16 17 18 19 20 21 23 22 48 24 31 32 40 41 5 42 43 4 From the library of Superior Sewing Machine Supply LLC www supsew com ...

Page 30: ...I 1 19 l1F9I6C8001 Thread guide I ll20 II 3 l0130705 Tension discs 4 B21 lli 310B0702 Tension release discs 2 B22 Hi l 15 30703 Tension spring 1 1323 HA l l5B7010 Stopper 2 g z 1 lli 310130701 Tension nu 2 1325 IM310110040 Screw 1 M4 X L B26 IIF936C800I Thread tension post I 1327 IJ 131050050 Screw I M 5X5 1328 ll4805C8001 Thread lension slud l B29 1148011 C800 I Screw 1 1330 113211 8113021 Plate ...

Page 31: ... 111 I 11 Iii Hill Sn I HI IIF Hllit oo I vL1g 1h t uppon I 1 11 111 11 uo1 Snknoid I II w w o I O Sn 2 1 iX 12 l iS 11 1 11lt S l I I T nsion spring I BI I II00 100 o ill Nut 1 1 11 1 11 111 Fill Ill Nut I 27 From the library of Superior Sewing Machine Supply LLC www supsew com ...

Page 32: ...0 28 b 51 52 53 54 55 53 56 57 58 617 1 3 l 33 li 66 1 67 68 69 70 65 10 11 13 16 17 18 19 21 22 12 14 15 20 25 26 lJ 72 73 t r f 1 l I 77 78 8 75 76 28 From the library of Superior Sewing Machine Supply LLC www supsew com ...

Page 33: ...x 10 l I ll007tHl J llO Retainer ring I l ti IIF t l l XOOI 13all hearing I 1 1 11I I I lil llXO Sen lti X8 I11 I YllXOO I Bu hing I II J 1060100 Screw I lli X 10 I IIF9 I WXOO I l ttllc I I i I1 11l 100XOX Washer I t II 11 illHO iO Sen I M8X fi II i IOtiO I00 Sen I Mti X 10 I I 111 XO iOOliO Sere I WiX i q IIF1II 1c i oo 1 Thread 1 nke up pin I l HJ IIF IIl i 8ouI Gasket I ll 11 11 xoo1 Needle be...

Page 34: ...G800 I Screw I Clil JZIJP1700P23 NeddI IZDPI700P23 2 DPX 17 il23 Cli2 IIF93JG7101 Needle bar bracket I rn 3 1 1 1 030 10I00 Screw I M 4 X 10 i4 IIF94 lG800I Oil satchel I Cfi5 IIF9117G8001 Oil wick 3 C66 IIF927E800I Bushing I 67 IIF968G800J Support disc 2 C68 1 1 415040120 Screw 2 M 4 X 12 C69 1100500 I010 Washer 2 70 IIF965G8001 Collar 2 n IIF921 1 800 I 13ushing I C72 11 115060200 Screw I M6X20 ...

Page 35: ...D PRESSER FOOT MECHANISM 32 29 16 17 18 __ 19 20 ______ 58 59 60 57 I 56 I oo 65 66 r rfl 96 99 9 7 98 30 31 62 From the library of Superior Sewing Machine Supply LLC www supsew com ...

Page 36: ...Inner presser cam 1 1 20 J 28060060 Screw 2 M6X 6 D2I IIF946E800 I Inner presser rod 1 022 IIF947E8001 Bearing l 023 IIF948E800I Rod pin I D21I IIF91l9E800l Oil wick I 1 25 I IF960E800I Oil wick I ll26 HF96IE800I Plug I 1 27 IIF959E800I Oil pipe 1 1 28 IIF956G800I Oil feeding pipe I D29 IIF921lE800 I Bushing I 1 30 IIF923E8001 Collar 2 D ll IIE60E48001 Adjusting shaft I n 32 11431050050 Screw 2 M5...

Page 37: ...1 J IIF J IFgoo1 Guide l I1 IIFlJ HFl itHl I Pin I 1tx 1 IIrn rnI oo 1 Oil wick I IJS I IIF9 l FX00l St rcw I lll i i I11 l l9El i00 I Stoppcr claw I Ill i i IIFlJ 191 KOO I Oil wick I 11 II 1 1 IO io 100 Scn w I ll i X 10 11 111 J lllFkOOI Bushing I llt t 111 9 l iFHOO I Outer prcsscr bar I Plill IIF J lliF O I l rcsscr connecting plalt 1 IJ J IIF li7EXOO I Connc1 li11g pin 2 IIF 781 H001 Oil wic...

Page 38: ...E UPPER FEED LIFTING ROCK SHAFT MECHANISM I I i_ 38 37 4J 34 From the library of Superior Sewing Machine Supply LLC www supsew com ...

Page 39: ...IIF90til 800 I Sprcader shafl bush L2 I Fl 1I 11 1 HhO l iO Set sere I l O lltHl l00 0 iO Nlll I l I lil ll jT 1 l l l Stopper I I IIEli I Fl it 00 I Cra k I ll l l Oli0160 Sere I l6X lfi E I IIE1 0F i800 I Set sere collar I l i I Eti0Fti80ll I Screw l l ti IIF90tW80111 Bushing R2 I l 8 IIF HJ7I 8011 I Bushing R I l I IH I Ot i0200 Sen I MfiX20 F ltt IIF l l IF8tll I Crack I l 11 IIF91 il 80U I Wa...

Page 40: ...T MECHANISM Fig Pan No Description Remarks No E i5 11 128060160 Scrcw I E i7 11 1150 10550 Scr w 4 l i8 11005008040 Spring wash r 1 ES9 11005001 0 t0 Washer 4 36 From the library of Superior Sewing Machine Supply LLC www supsew com ...

Page 41: ...MECHANISM 2 3 38 4 5 30 31 32 33 I 21 23 24 28 29 27 26 25 l 43 7 1 12 13 26 __ JC 1l 44 45 ia I 51 14 15 16 52 8 _ 53 54 47 _ 60 _ 59 ilii 58 57 56 55 From the library of Superior Sewing Machine Supply LLC www supsew com ...

Page 42: ... Reverse stitching ann U l F22 IIF934I1800l Pin j F23 1 1428060060 Boll I 16X 6 F24 IIF9271I8001 Collar l F25 HF933H800 1 Rod I F26 H0070 3050 E tpye retaining ring 5 2 F27 111 97011800l Reverse stitching shaft I F28 IIF93I H800I Reverse shati bushing R I F29 11651 111800 I Pin I F30 I14937L800 I Bolt l F ll 114938L8001 Rubber ring I F32 IIF969118001 Spring l F3 l IIF9681 1800 I Reverse stitching ...

Page 43: ...l 111 1 1 11 l l lHll mio l rcsscr spring I F I lll 11800I Key I l u IIF lhti IHOOI Oil ss al I I IIF XIIHIIOI ShaIi I 1 IIrn1 711 00I Oil enl I I _ IIF ll lll 001 Guide I F 11011 i 111 10 10 Elasll asher 1 1 1 11 111 l 11 ill lliO St rc I I IIi ltil 111 1 IIIXO IJ l othool I 39 From the library of Superior Sewing Machine Supply LLC www supsew com ...

Page 44: ...HANISM 5 10 11 12 11 15 16 17 2 TI 3 f r 4 ___J 45 46 48 45 51 l 40 41 43 41 w 53 11 54 57 J J 55 47 49 46 50 52 56 58 59 60 I L_ _ 71 72 27 28 76 77 78 79 80 L 69 70 73 74 75 tl 24 From the library of Superior Sewing Machine Supply LLC www supsew com ...

Page 45: ...I IIF J Ill1800 I Bolt 2 1 11 111 9 I 1800 I Screw 2 I rnt 1 0 Iti7101 Feed Jog I r l l __ IIF J 1 1 I800 I Feed bracket l I IIF9 i I800 l Pin I I IIF J J1800 1 Oil s al t 1 111 1 IEXOO l Fe d shaft bushing Ll I 1 Li 1I1 9 i IMIOI Wash r 2 11 11 i Hi I I o Ll lt Rl I MtiX 12 t X 111 9 11800 I F d shart arm R I l 2 I 1100 0I IO O type retaining ring 5 2 1 11 IIF l tiI l 1 I l in I 1 1 1 111 t IE800...

Page 46: ...17101 Lowe feed connecting rod assy I G62 IIF9 16I800l Pin I G6 l 11007013050 E tpye retaining ring 5 2 li6 1 IIF96 118001 Slide block 2 G65 IIF925l 800I Back sylinder connection 1 G66 lir 960118001 Pin 1 G67 IIF917l 800I Lower feed cam J G68 11428060080 Bolt 2 M6 X8 G69 IIF990l800l Bushing R l i70 IIF956G800l Oil joint I G 71 IIF99l I800I Sealing ring l 72 IIF915 800l Disk l G 73 IIF9 l618001 Stu...

Page 47: ...I HOOK SADDLE MECHANISM 49 _ ____ 5 0 5 1 52 80 81 82 83 84 85 86 87 88 89 90 91 ...

Page 48: ...rm L 1 Ill7 IIF940J8001 Roller l 1118 1 IG021J800I Driving shalt mandril l 1119 11415030060 Bolt 2 M3X6 1120 11005004030 Washer 2 1121 IIE110J8800I Driving knife I 1 1 22 IIF913J8001 Driving knife shaft l 1 123 IM15050250 Bolt 2 M5X25 1124 H005005050 Washer 2 1125 IIF905J8001 Fixed knife support bracket 1125 IIE1IOJ6800I fixed knife support bracket l 1126 IIF90l J800I Screw 2 1127 IIE4IJ2800I Open...

Page 49: ...tllll I Fixed knil c I 11 7 IIF lSY ll tOOI Um ork washer 5 11 x IIF l l IJl 00 I Hook supporl I 1I q IIF HJ _ I1 00I Oi l wick I 111 ll IIF J 19 18001 d iusting pin I llti I IIF 1011 18 101 Adjusting guid rail I Iii IIF 1 17 1 800 1 rlolt 2 l lti i lll 99 1 1 8001 Shaft I Iii l IIF l 1 1i 00 I Oi l wick I l lliii 1112 1 uso rno Bolt I 15X 30 llliti IIF 192 JXOO I Spacer I 111 IIF 18 1 1 1 00I 1lo...

Page 50: ...er I 118 1 HF965J8001 Screw 3 1185 IIF96GJ800I 130 1 3 1186 IIF970J8001 Washer I 1187 IIF969J8001 Driving gear 1 1188 IM03030080 Screw 4 1189 IIC0l 3870 I8 0 ring I 1190 IH I5040100 Bolt 1 M 4 X 10 1191 HG025J800I Thread trimmer solenoid 1 1 1 92 IIG0I9J800I Solenoid setting bracket I 1 1 93 11 115040080 Bolt l M4X8 1191I IIG020J8001 Solenoid selling plate I 46 ...

Page 51: ...I OIL LUBRICATION MECHANISM 14 30 s r _l i _ c 15 5 6 32 33 31 34 35 117 36 26 ...

Page 52: ...sx 150 I 19 IIF919K8001 Spring I 120 IIF9fi2K800I Tape l 12I lli 0 l042160 Screw 2 122 IIF9fi0K800l Guard plate 1 123 lff956K710l Valve 1 124 IIF955K8001 Main oil pipe I I 3x I 5x 110 25 IIF920K8001 Oil joint 2 126 IIF92IKS00I Oil pipe 1 Q l 7X I 5X 25 127 IIF922K800I Oil pip1 1 4 7x 1 sx 120 128 IIF938K800 I Oil joint I 129 HF939K8001 Oil pipe 1 p7X 1 5X 1 10 130 HF951K800I Oil pipe setting plate...

Page 53: ...O I 17 l ll lillK iXIIO I Oil pip I 1 7 X l iX I I l 1 11 IIHl hl Slllll Support pring 1 1 IIF I 1 hSlHl I Fdt pan I I I I1 1 IPOI 0 10 Cahk tic I l il IIF9 I IKl lOOI Oil pipe I I l X l1 X 250 I lll J K800 l Oil pipc l l l X I CJ X liOO I i l lll 1iOK8t OOl O il pipe I l IX l XliU I I IIF I7 IKSOO I Oil pipe I 1l1 3 X I i X 1200 49 ...

Page 54: ...J ACCESSORIES fij _ 2 0 3 6 7 11 50 20 a 21 21 32 26 22 ...

Page 55: ...070 Srn w driver L I 117 11 00 1 00 Sncw drivcr M I I IS 11 0ll 1 I S rcw drivcr S I I l 1 IIF lOXl 00I Bell guard R I _i J IIF9 I il 1 00l Rubber washer I 1 21 1 1 1 1I060 120 Bolt 1 l 2 IIF 07umo1 Bell guard L I r IIF ll ll 8001 13oh I l l lltllJ iOIJ I ll iO Washer I 15 Iii I liE800 I Nut l I 1 i 1 Hll lllli l080 Screw I _ I17 l lll8lllll Rubber ring J l s llllOI00 I Hi I lcxagonal wrench 6 I l...

Page 56: ...K PNEUMATIC CONTROL UNIT 32 7 r 8 u I 90 H 10 9 11 20 12 21 14 13 52 ...

Page 57: ...IOI control hox wire ass I CNI hll I IISO I 1 i Oll sc rn h ltl IIU IOJ 10 washer I 1111 IIEliOll 17 IO I pm umatic assy 1 Ill 11 UOO I O IO nylon lix r I h I 1IF 1 H IS HJI windpipe 2 300M 11 I fi h 11 111 9I 1111 00I indpipe 3 800 11I I I II I II Ill IOIltifJ scn 1 2 i lh lll till 1771 ll I hu11011 ires conncc lling assy 1 hl7 IIEli 1 1 7 Io I plolling 1 111 IIEtiOllliXOOI h1111011 sc l frame 1 ...

Page 58: ...L KNIFE MECHANISM 80 81 86 i i 82 i _ 1M_ 87 88 i 86 i 83 I 89 14 21 22 18 16 17 25 19 20 i I 27 54 94 95 ...

Page 59: ... 1 1 11 li 1 71 00I oil wick I I l l IIEli I 8800 I supporting block I I o 1 1 1I SO 02 0 scn 11 I 14 X 25 I I 111 l io llJl IO sc rc11 l 1 1 3 X 14 L IHlO iOO I0 10 washer I 3 1 1 lll lil 9HOOI supporling blo k I I l 11 1 ii0 10 iO SCl t V 2 M1 x ti l i IIEl 01 00 I shall 1 l ti 1111 iO iO I l iO Ct 2 M 5X 18 I _ I Eli I 0 I washer 2 l S 11 1 62 l OO I selling platform I l _ 1 IIEt1 1t iOOI oil n...

Page 60: ... 62 IIE66Nl8001 shaft I L6 3 IIEGl N08001 bushing 2 1 64 IIE66N2800I oil nozzle I 1 65 1 1 102050300 scn w I M 5X 30 1 66 IIE6G N3800I collar 1 L67 1 14280110040 SCl t W 1 M 4 X 1 L68 11007013070 Retaining ring I l f59 IIE66N4800l Selling block l L70 11401030080 screw 1 M 3X 8 1 71 1 1 00500I 030 washer I 1 72 HE66N57101 Oil allocator I 1 73 IIE62N58001 Oil joint 6 I 711 IIE67N3800I oil tube 1 1 7...

Page 61: ...1lll I tiu lling I I Ill l Fi S tiSI ill I link l I II 11 1 illiilllOll Sl l C I I q 111 1 t SXO II pin l I IIEtit i J Hll hl c k I I 1 1 IIFti J OKlllll nrntrnl k vc r I 1 1 1 l Fll OXO lllll hanJ knob I IRX O 1 11 1IE i I1 00I block I u 1111so io1 o C rl II I 1 M 1Xl2 I 11 lll fi9 1 00I block l l I 111 iO IOONO ere l 57 ...

Page 62: ......

Page 63: ...ine run approx 2 minutes Let the sewing machine run In Intervals 2 3 Hold a piece of paper next to the hook and check if sufficient oil ls spun off onto the paper Remove cover plate 2 Loosen screw 3 until the tube 1 not longer moves This is the case when the tube is in the center of the drilled hole Turn screw 3 in until the tube movement just starts and then an 1 8 turn farther The hook lubricati...

Page 64: ...e In lritervallen laufen assen Ein Stuck Papler neben den Greifer halten und prufen ob genOgend 01auf das Papier abgeschleudert wird Abdeckblech 2 entfernen Schraube 3 losen bis slch das Rohrchen 1 nicht mehr bewegt Dies isl der Fall wenn slch das Rohrchen In der Mille der Bohrung beflndel Schraube 3 hlneindrehen bis die Rohrchenbewegung gerade beginnt und noch 1 8 Umdrehung welter hinelndrehe n D...

Page 65: ......

Page 66: ......

Reviews: