33
EN
Timer 15 minutes
The control panel of the hood is equipped with a turbine timer, which turns it off 15 minutes af-
ter the timer is activated. In order to activate the timer, the hood turbine must be running at any
speed. The timer is activated / deactivated by pressing the button on the remote control until
the dot starts blinking on the display in the bottom right corner.
The metal filters should be cleaned more frequently, if required!
The control panel of the hood is equipped with a functionality that automatically switches off the
turbine if the control panel has not been used for 2 hours.
IN CASE OF PROBLEMS
The range hood does not function at all:
• Check whether the fuse in the domestic installation is not pulled out.
• Check if the thermal cutout of the motor has not been activated due to high temperature. If
this is the case, switch off the device and wait for about 20 - 30 minutes until the temperature
returns to normal; then switch the hood on again.
• Make sure that the plug is inserted in the socket.
• Remove the plug to restart the device. Wait for about 15 - 20 seconds and then plug it back in.
Alternatively, you can also pull out the fuse for that time and then put it back in.
Insufficient efficiency / noisy operation:
• Check whether the cross-section of the ventilation duct is sufficient and whether it has not too
many bends and sharp angles.
• Check if the return flap (if optionally installed) is not jammed in the ventilation duct.
• If the ventilation duct is equipped with a swinging grille, remove it.
• Make sure that the metal filters are clean.
• Replace the active carbon filter if it is older than 6 months (only in recirculation mode).
• Check whether the amount of air extracted from the kitchen is balanced by sufficient fresh air
supply (to prevent negative pressure).
• Check whether the ventilation chimney is not obstructed.
• Excessively low atmospheric pressure may reduce the performance of the hood. Verify the
functioning of the hood again on another day.
6
Summary of Contents for Alario 60
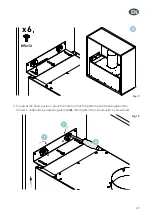
Page 12: ...12 PL 6 Zamontuj filtr przeciwt uszczowy 7 Pod cz rur do kr ca silnika Rys 11 Rys 12...
Page 30: ...30 EN 6 Install the grease filter 7 Connect the duct to the motor connection Fig 11 Fig 12...
Page 48: ...48 DE 6 Den Fettfilter einsetzen 7 Verbinden Sie das Rohr mit dem Motorstutzen Abb 11 Abb 12...


