1
Attach the end of the hose into the
container outlet with the spanner provided.
2 Screw the spray lance onto the trigger
valve.
3
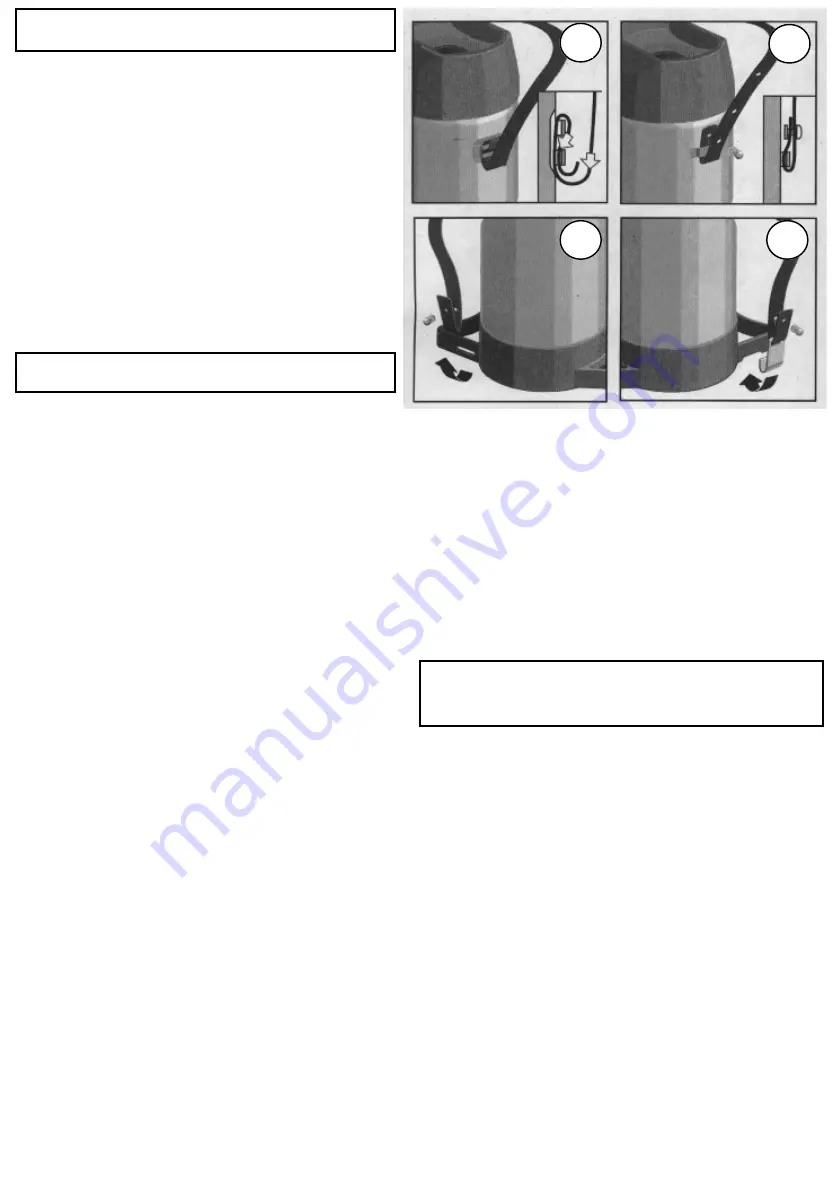
Fit the carrying strap(s) as per diagrams
opposite; diagram A is for the 176T/172RT,
diagram B is for the 141T/142T and
diagrams C and D are for the 142T/172RT.
4
Test the sprayer with water, following
instructions 1a to 6a under “OPERATING
THE SPRAYER”.
&#)&1#% $ ) -.)#
The ‘D’ handle on top of the pump is designed
to carry the sprayer if you don’t wish to put it on
your back, or shoulder. To lock the handle in
position, hold it down and turn it clockwise until
the hooks on the handle locate on the two lugs
on the pump barrel.
1a Before removing the pump, always ensure that
the container is not pressurised, by holding
down the red decompression button until no
further air can be heard escaping.
Take care also, to remove any particles which
may have accumulated in the filler funnel during
storage, to prevent them falling into the
container and causing blockages.
2a Always unscrew the pump assembly very
slowly at first allow any remaining pressure
to escape safely. To unscrew it, hold down the
pump handle and turn it anti-clockwise against
the lugs on the pump barrel.
3a Measure and pour in water, up to but not more
than, the nominal working capacity of the
sprayer. (5 litres or 10 litres)
4a Replace the pump assembly (do not
overtighten) and operate it until the pressure
gauge indicates that a suitable working
pressure has been achieved. Over pumping will
result in the safety relief valve operating and air
will be heard escaping. If this occurs, cease
pumping immediately.
See Testing the Safety Relief Valve under
“MAINTAINING AND LUBRICATING THE
SPRAYER”.
&)#1% $ ) -.)#
&)#1% $ ) -.)#
cont’d
5a Operate the on/off trigger control valve a few
times until a satisfactory spray pattern occurs.
(Immediate shut-off may not occur until all air has
been expelled from the system).
6a Providing there are no leaks, the sprayer is now
ready for use.
1b Release any remaining pressure as described at
1a under “OPERATING THE SPRAYER”.
2b Unscrew and remove the pump assembly.
3b Empty out the remaining contents and dispose of
them safely.
4b Refill the sprayer with an appropriate cleaning
fluid, or a weak, lukewarm solution of detergent
and water, replace the pump and shake the
container carefully to dilute any remaining
residue. To ensure that the hose, lance and
nozzle are also thoroughly rinsed, pump in a little
pressure and operate the trigger valve. Repeat
the operation, until the sprayer is thoroughly
cean.
Store the sprayer upside down, with the pump
removed, so the container can dry.
)!&.% $ 7 '")1 % $
) -.)#
D
C
B
A
Summary of Contents for Spezial 141 T
Page 1: ......


