10
221462C
3 Water Systems
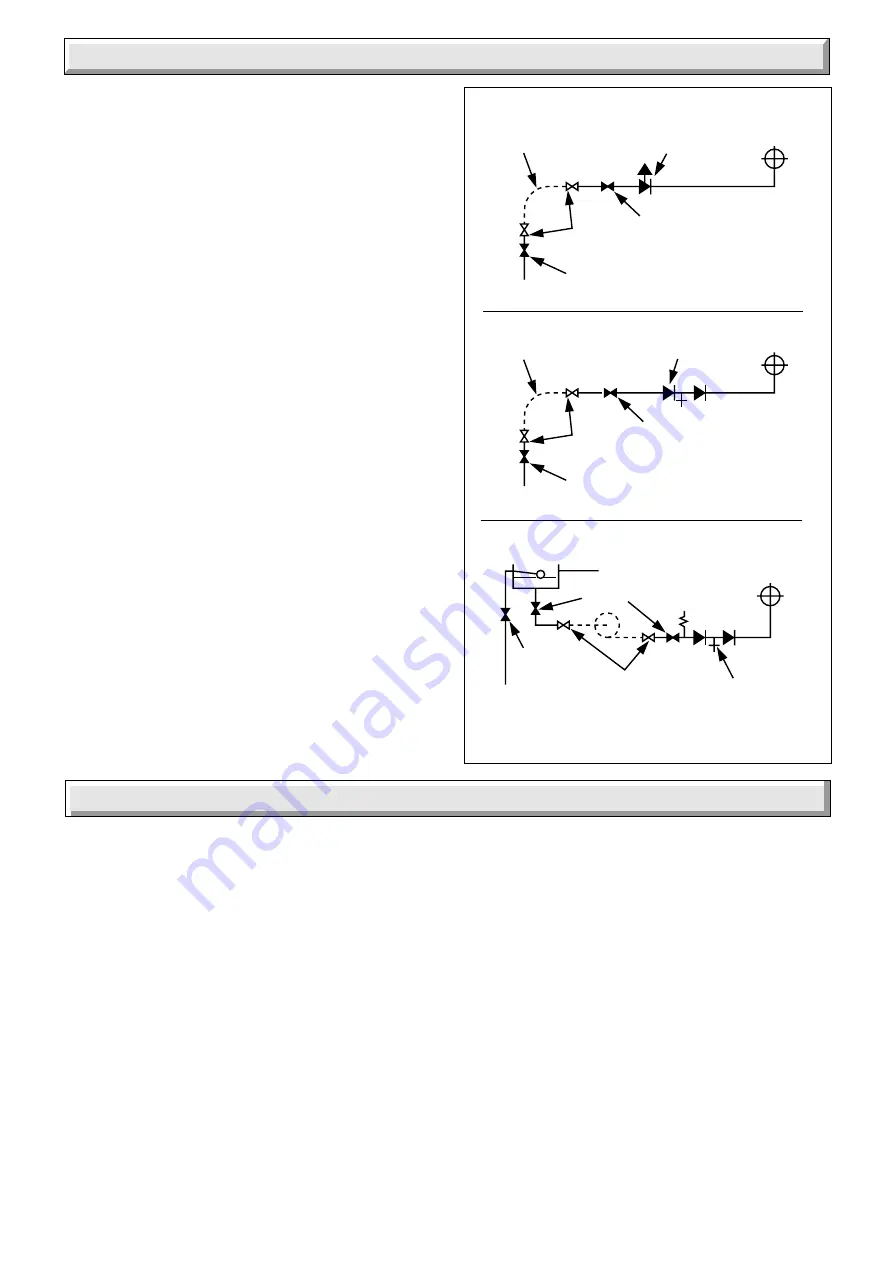
Diagram 3.5
FILLING SEALED
WATER SYSTEMS
METHOD 1
METHOD 2
METHOD 3
SUPPLY STOP
VALVE
SUPPLY
PIPE
HOSE
UNIONS
SERVICING
VALVE
TEMPORARY
HOSE
HEATING
SYSTEM
HEATING
SYSTEM
TEMPORARY
HOSE
HOSE
UNIONS
SERVICING
VALVE
SUPPLY
PIPE
SUPPLY STOP
VALVE
DOUBLE CHECK
VALVE ASSEMBLY
HEATING
SYSTEM
SERVICING
VALVE
SUPPLY
STOP VALVE
SUPPLY
PIPE
HOSE
UNIONS
DOUBLE CHECK
VALVE ASSEMBLY
OVERFLOW
CISTERN
COMBINED
CHECK VALVE
AND VACUUM
BREAKER
PRESSURE
REDUCING
VALVE
3132
3.8 Domestic Hot Water Cylinder
SINGLE FEED INDIRECT CYLINDERS ARE NOT SUITABLE.
The domestic hot water cylinder must be of the indirect coil type.
It must be suitable for working at a gauge pressure of 0.35bar
above the safety valve setting.
3.9 Water Make-up
Provision should be made for the replacing the water loss from
the system using a make up bottle mounted in a position higher
than the top point of the system, connected through a non-
return valve to the return side of either the heating circuit of the
domestic hot water cylinder.
Alternatively, provision for make up can be made by using a
filling loop.
3.10 Filling a Sealed Water System
Provision for filling the system at low level must be made. Three
methods are shown in diagram 3.5. There must be no permanent
connection to the mains water supply, even through a non-
return valve.
4.1 Appliance Preparation
Remove the controls cover by pulling it forwards and off, see
diagram 4.1.
Remove the boiler from the carton and lay it on its back.
The side grilles are packed in the bottom of the carton.
Remove the outer case by undoing the screws at the bottom
and unhooking at the top, see diagram 4.1.
Remove the two screws and attach the side grilles by hooking
over the top of the side panel and secure, see diagram 4.1.
4.2 Appliance Fitting
Refer to diagram 1.2 for fixing screw positions and minimum
clearances.
Mark position of the three fixing screws.
Drill and plug the holes, suitable for No10x2in woodscrews.
Fit the screws, leave about 6mm proud.
Hook the boiler on to the lower screw and keyhole slots at the
top, tighten all screws.
Connect the system pipework to the boiler.
Fix the flue to the flue hood in accordance with normal practice.
4 Installation


