25 94003 GM-Racing XG-4i 2.0 FHSS Race Spec
English
2. GETTING STARTED
1. Place 6 AA batteries in the battery compartment in the bottom of the transmitter. Pay
attention to the polarity! If the batteries are loaded incorrectly, the transmitter may be
damaged. When the transmitter will not be used for a longer period of time, always remo-
ve the batteries.
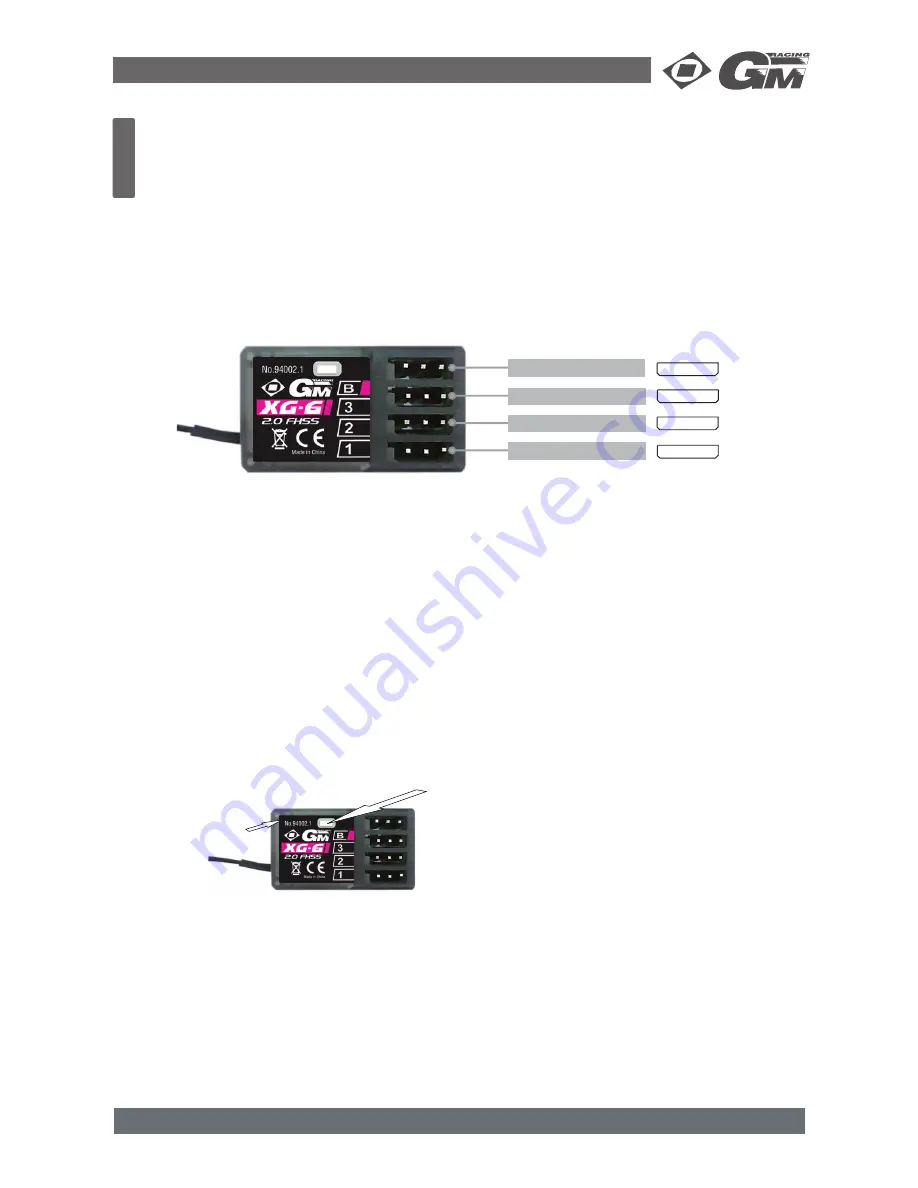
2. Connect and install the receiver and servos.
Attention:
The transmitter comes with an Futaba style charge socket for the use with Char-
ging-Cord No. 3022.65! Do not use any other Graupner charging cord, this may
destroy the batteries.
Batt. (4.8 - 6.0 V)
Channel 3 - AUX
Channel 2 - Throttle
Channel 1 - Steering
S
+
-
S
+
-
S
+
-
S
+
-
THE REMOTE CONTROL SYSTEM
Here you get an overview of the XG-4i 2.0 FHSS Race Spec 2.4 Ghz 3-channel remote control
system and its various functions and settings. Before the
fi
rst trip should be sure all of these
functions and settings have read and understood.
Be careful with the installation of the receiver. Never bend or shorten the coaxial
antenna wire! The actual „antenna“ is the stripped end of the antenna wire and
must be installed in the vehicle so far above as possible. Avoid damages of the
antenna cable!
3. BINDING PROCESS
1. Turn on the transmitter. Then connect the power of receiver while keeping the Bind-Button
on top of the receiver pushed. The BIND-LED will
fl
ash red.
2. The biding is succesfull, when the BIND-LED turn into solid green. Now you can release the
Bind-button.
Note:
1. During Frequency Pin Setup, make sure that Tx and Rx is one meter away, and around 10
meters there is no similar (2.4 GHz) device.
2. Once success, no need to process the Binding again for that receiver.
3. If fail in Setup (BIND-LED
fl
ashes red), please try again patiently.
Bind-Button
Bind-LED
Summary of Contents for XG-4i
Page 64: ...02 2011 V1 0 ...

