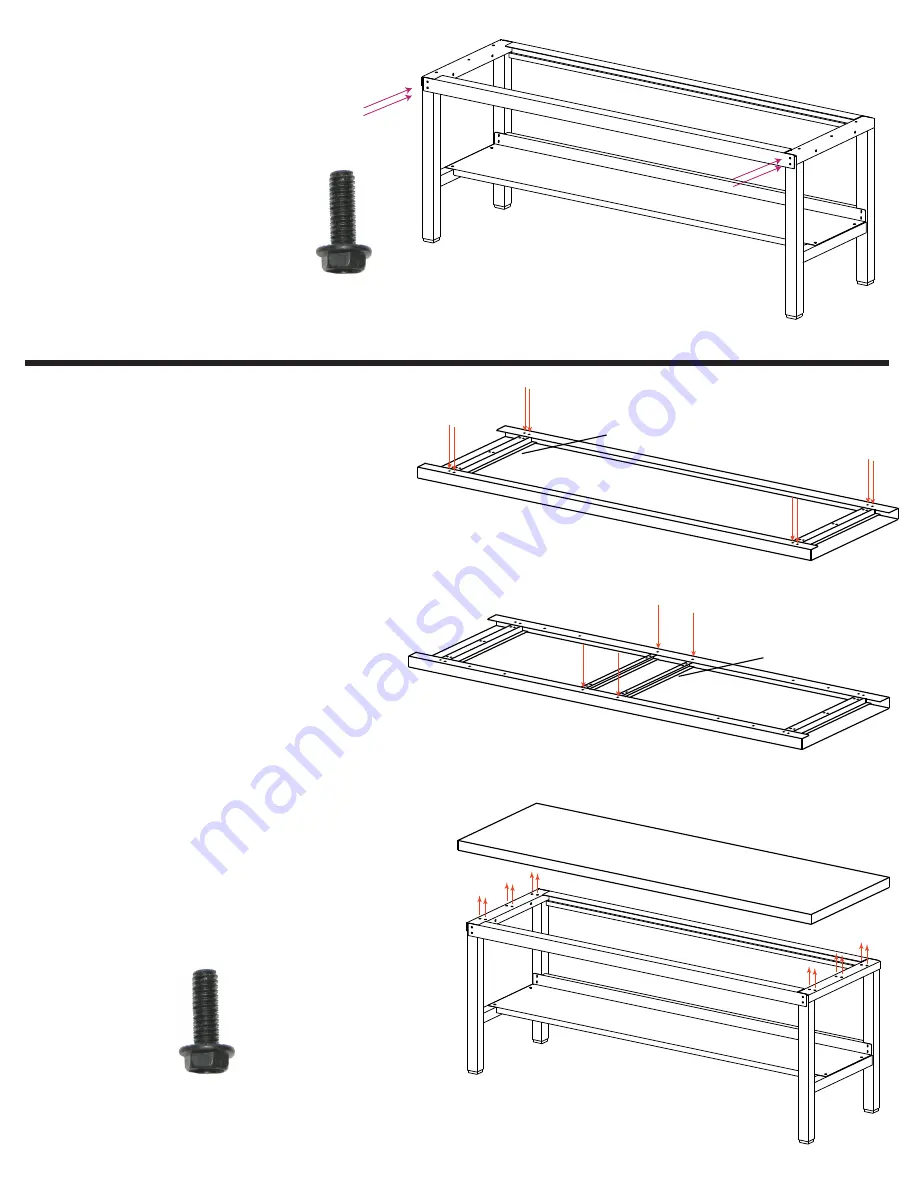
STEP 4
Attach top support braces to the
front & back of each leg.
Note: Some benches will only require
one back brace depending on the width
and type of top purchased.
Use (4) 1/4-20 x 3/4" bolts per
supplied brace.
Once braces are attached, fully
tighten the 8 bolts for the shelf.
STEP 5
On a clean blanket or pad to keep from
scratching the top, flip the top bottom side up
on the blanket.
Insert the leg mounting brackets into the top.
With the top bottom side up the side of the
bracket with the threaded holes should be facing
up. The brackets will slide under the lip on
the underside of the top. Attach the brackets
to the top using (4) 1/4-20 x 3/4” flange head bolts
per bracket threaded into the pre-installed nuts on
the brackets. Do not fully tighten.
Next install the center top supports in the same
way as the leg mounting brackets. These will mount
using (2) 1/4-20 x 3/4” flange head bolts
per bracket threaded into the pre-installed nuts on
the brackets.
NOTE: The support brackets are also used to attach
the optional under mount drawer. Holes are provided
to position the bracket so the drawer can be mounted
on center, left or right sides.
Once all top brackets are installed, flip the top over and
position it on the leg assembly. Line up the holes in the
top of the leg assembly with the pre-installed nuts in the leg
mounting brackets.
Attach using (6) 1/4-20 x 3/4” flange head
bolts per leg. Finger tighten at first. Once all legs are
installed go back and fully tighten all the bolts in
in this step.
STEEL TOPS
w/ NO WOOD CORE
1/4-20 x 3/4”
Flange Head Bolt
Leg Mounting
Bracket
Top Support
Bracket
1/4-20 x 3/4”
Flange Head Bolt


