3)
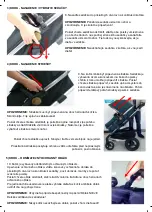
STEP - MOUNTING / REMOVING THE SEAT
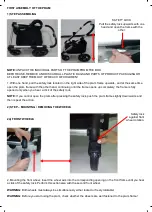
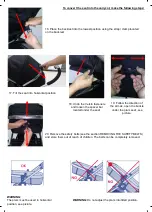
8. Place the seat into the corresponding openings on the pram
frame.
WARNING:
Pull the seat upwards and check whether it is really
fixed!
If you want to remove the seat, press both safety locks located
on both sides at the bottom of the seat joint and pull the seat
upwards. Do not perform these actions with a child in the seat.
WARNING:
Do not remove the seat from the pram if a child is
seated in it!
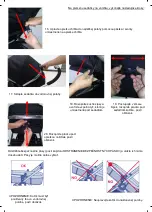
4) STEP
– MOUNTING THE CANOPY
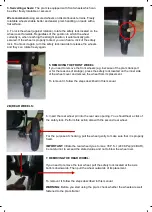
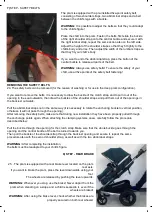
9. A canopy can be attached to the pram.
The seat is equipped with two end pieces on the sides
of the backrest, allowing to attach the canopy. If you
want to attach the canopy, insert the clamping system
into the end pieces as shown in the picture. Then
fasten the fabric cover of the canopy to the seat by a
zip.
WARNING:
The canopy must be attached to both sides of the pram. Check
whether it is properly locked!
If you want to remove the canopy, it is necessary to completely unzip the
canopy cover and to press the buttons inside the end pieces of the canopy.
Finally, it is necessary to pull the canopy upwards.
If you want to adjust the canopy, pull/push its middle part in the direction of
the arrows.
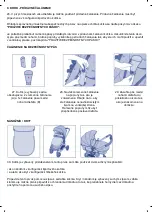
The spacious canopy offers protection for your baby from adverse
weather, see picture.
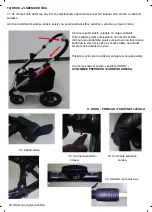
5)
STEP - REMOVABLE PROTECTIVE ARCH
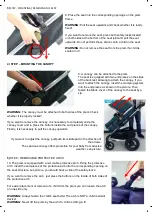
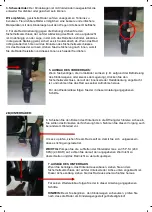
10. The pram is equipped with a removable protective arch. Fixing the protective
arch: insert the end pieces of the protective arch into the corresponding opening on
the seat structure, see picture, you should hear a click of the safety locks.
If you want to remove the arch, just press the buttons on the inside of both sides of
the protective arch.
For easier placement or removal of a child from the pram you can loosen the arch
on one side only.
WARNING:
Always fasten the child’s seat belts! The arch is NOT a child restraint
device!
WARNING:
Never lift the pram by the arch if a child is sitting in it!


