background image


34 


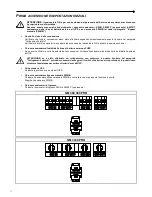
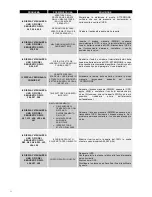
A

CCENSIONE DA RETE


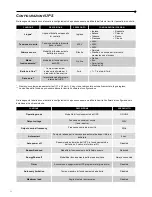
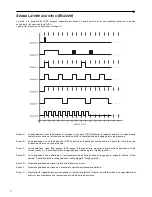
  Chiudere  i  sezionatori  d'ingresso  SWIN  e  SWBYP  (se  presente)  e  lasciare  aperto  il  sezionatore  bypass  manuale  SWMB.  

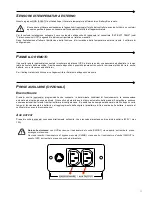
Dopo qualche istante l'UPS si attiva ed il led "Stand-by / allarme" lampeggia: l'UPS è nello stato di stand-by. 

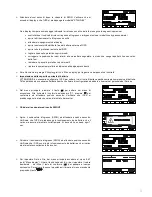
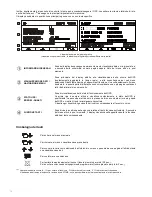
  Premere  il  pulsante 

  per  entrare  nel  menu  di  accensione.  Alla  richiesta  di  conferma  selezionare  “SI”  e  premere 

nuovamente il pulsante 

 per confermare. Si accendono tutti i led attorno al display per 1 sec. circa e viene emesso un 

beep. La sequenza di accensione termina quando l’UPS si predispone nello stato con carico alimentato da inverter. 


A

CCENSIONE DA BATTERIA


  Assicurarsi che il sezionatore/fusibili della linea di batteria  esterna all’UPS sia chiuso 

  Tenere premuto il tasto “Cold Start” (posto dietro la porta) per circa 5sec. L’UPS si attiva e si accende il display. 

  Premere  il  pulsante 

  per  entrare  nel  menu  di  accensione.  Alla  richiesta  di  conferma  selezionare  “SI”  e  premere 

nuovamente il pulsante 

 per confermare. Si accendono tutti i led attorno al display per 1 sec. circa ed il buzzer inizia ad 

emettere un beep ogni 7 sec.. La sequenza di accensione termina quando l’UPS si predispone nello stato funzionamento da 
batteria. 


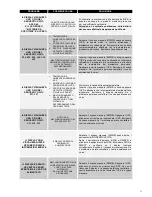
Nota:

  se  non  viene  eseguita  la  sequenza  appena  descritta  entro  1  min.  l’UPS  si  spegne  autonomamente  per  non  scaricare 

inutilmente le batterie 


S

PEGNIMENTO


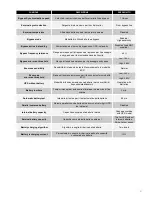
Dal  menù  principale,  selezionare  la  voce  “SPEGNIMENTO”  e  premere 

  per  entrare  nel  sottomenù,  selezionare  quindi 

l’opzione “SI - CONFERMA” e premere 

 . L’UPS si predispone nello stato di stand-by ed il carico non è più alimentato. Per 

spegnere completamente l’UPS, aprire i sezionatori d'ingresso SWIN e SWBYP (se presente), attendere alcuni secondi perché 
si spenga il display ed infine aprire il sezionatore/fusibili della linea di batteria esterna all’UPS. 

8


8


8


8


8


8


Summary of Contents for GM 3100 PRO

Page 1: ...1 MANUALE UTENTE USER MANUAL UPS GM 360 PRO GM 380 PRO GM 3100 PRO 60 100 kVA Uninterruptible Power Systems ...

Page 2: ...ambientale sviluppato dall azienda in accordo con la normativa vigente In questo prodotto non sono presenti materiali pericolosi come CFC HCFC o amianto L imballo è costituito da MATERIALE RICICLABILE Smaltire i singoli elementi secondo la normativa vigente nel paese di utilizzo del prodotto Fare riferimento alla seguente tabella per l identificazione dei materiali DESCRIZIONE MATERIALE Pallet Leg...

Page 3: ...7 SEZIONE DEI CAVI DI COLLEGAMENTO 17 DISPOSIZIONE DEI CAVI DI COLLEGAMENO E INSERIMENTO DELLE FERRITI TOROIDALI 17 OPERAZIONI PRELIMINARI ALLE CONNESSIONI 18 CONNESSIONI DEL MODELLO CON BYPASS STANDARD GM 360 380 PRO 19 CONNESSIONI DEL MODELLO CON BYPASS SEPARATO GM 360 380 PRO 20 CONNESSIONI DEL MODELLO CON BYPASS STANDARD GM 3100 PRO 21 CONNESSIONI DEL MODELLO CON BYPASS SEPARATO GM 3100 PRO 22...

Page 4: ... MENU DISPLAY 37 MODALITÀ DI FUNZIONAMENTO 38 BYPASS MANUALE SWMB 38 ALIMENTATORE AUSILIARIO RIDONDANTE PER BYPASS AUTOMATICO 39 POWER WALK IN 39 DECLASSAMENTO DELLA POTENZA PER CARICHI 200 208V FASE NEUTRO 39 CONFIGURAZIONE UPS 40 PORTE DI COMUNICAZIONE 42 CONNETTORI RS232 E USB 42 COMMUNICATION SLOT 42 PORTA AS400 43 SEGNALATORE ACUSTICO BUZZER 44 SOFTWARE 45 SOFTWARE DI MONITORAGGIO E CONTROLLO...

Page 5: ...e hanno permesso di raggiungere elevate prestazioni quali ZERO IMPACT SOURCE garantisce bassa distorsione d ingresso fattore di potenza prossimo a uno e massima compatibilità con il gruppo elettrogeno BATTERY CARE SYSTEM permette la gestione personalizzata delle batterie per le diverse topologie e il monitoraggio continuo delle stesse aumentandone così l efficienza e la durata SMART INVERTER garan...

Page 6: ...6 VISTE ANTERIORI UPS Pannello di controllo con display grafico Ruote per la movimentazione dell UPS Porta frontale con serratura Freni di stazionamento Griglia di aerazione ...

Page 7: ...Porta comunicazione RS232 Alloggiamento Scheda Parallelo UPS opzionale Da sinistra a destra Sezionatore di ingresso SWIN Sezionatore di bypass separato opzionale SWBYP Sezionatore di bypass manuale SWMB Sezionatore di uscita SWOUT Sezionatore ad uso esclusivo del personale del service QN Slot per schede accessorie di comunicazione Pannello copri morsetti ...

Page 8: ...oni di potenza FASI BYPASS SEPARATO opzionale OUTPUT L1 L2 L3 Connessioni di potenza FASI USCITA N Connessioni di potenza N BATTERIA N INGRESSO N BYPASS N USCITA PE Connessioni di potenza TERRA A1 A2 Connessione per segnale di sincronismo esterno A3 A4 Connessione per ausiliario bypass di manutenzione remoto A5 A6 Connessione per ausiliario sezionatore d uscita remoto EXT BATT TEMP Connessione per...

Page 9: ...a FASI BYPASS SEPARATO opzionale OUTPUT L1 L2 L3 Connessioni di potenza FASI USCITA N Connessioni di potenza N BATTERIA N INGRESSO N BYPASS N USCITA PE Connessioni di potenza TERRA A1 A2 Connessione per segnale di sincronismo esterno A3 A4 Connessione per ausiliario bypass di manutenzione remoto A5 A6 Connessione per ausiliario sezionatore d uscita remoto EXT BATT TEMP Connessione per sonda di tem...

Page 10: ... POSTERIORE UPS Alloggiamento prese EnergyShare Aux Output 10A max e relativa protezione opzionale Ventole schede di potenza Alloggiamento accessorio Scheda contatti MultiCOM 382 Ventola caricabatterie 4 1 3 2 ...

Page 11: ...ionamento da batteria con preallarme di fine scarica o shutdown imminente Lampeggiante in Stand by funzione di riaccensione programmata attiva e rete assente LED carico su bypass Acceso fisso carico alimentato da linea bypass LED stand by allarme Acceso fisso allarme presente Lampeggiante stato di Stand by LED batterie da sostituire Acceso fisso batterie da sostituire Lampeggiante allarme batterie...

Page 12: ...ESSO La serie di UPS con Bypass Separato consente un collegamento distinto tra la linea d ingresso e la linea di bypass L uscita dell UPS sarà sincronizzata alla linea di bypass in modo che in caso di intervento del bypass automatico o di chiusura del bypass manuale SWMB non vi siano scorrette commutazioni tra tensioni in controfase ...

Page 13: ... 8910 B T U h 3 65 kW 3140 kcal h 12460 B T U h 4 75 kW 4074 kcal h 16170 B T U h Potenza dissipata a carico nominale distorcente pf 0 7 e con batterie cariche 1 2 41 kW 2070 kcal h 8220 B T U h 3 12 kW 2680 kcal h 10640 B T U h 4 12 kW 3540 kcal h 14060 B T U h Locale di installazione portata ventilatori per asportare calore 2 1400mc h 2000 mc h 2600mc h Corrente dispersa verso terra 3 300 mA Gra...

Page 14: ...nte non deve superare il 90 senza condensa verificare che la temperatura ambiente con UPS funzionante si mantenga tra 0 e 40 C L UPS è in grado di funzionare con una temperatura ambiente compresa tra 0 e 40 C La temperatura consigliata di funzionamento dell UPS e delle batterie è compresa tra 20 e 25 C Se infatti la vita operativa delle batterie è mediamente di 5 anni con una temperatura di funzio...

Page 15: ...e le 2 staffe che fissano l UPS al pallet svitando le viti di tipo A e B Le staffe tolte precedentemente servono anche da scivoli Fissare gli scivoli al pallet utilizzando le viti di tipo A e facendo attenzione di allinearli in corrispondenza delle ruote Se necessario sbloccare i freni delle ruote anteriori Assicurarsi che la porta sia ben chiusa ATTENZIONE si raccomanda di far scendere l UPS spin...

Page 16: ...o lo spazio libero sufficiente per consentire le operazioni di avviamento spegnimento e le eventuali operazioni di manutenzione 1 5 mt la parte superiore deve distare almeno 50cm dal soffitto in modo da consentire le operazioni di manutenzione la parte posteriore dell UPS deve essere posta ad almeno 30 cm dalla parete per un corretto deflusso dell aria soffiata dalle ventole di aerazione sulla par...

Page 17: ...380 PRO la sezione massima dei cavi che si può inserire nella morsettiera è pari a 95 mmq cavi flessibili e rigidi GM 3100 PRO la sezione massima dei cavi che si può inserire nei morsetti è pari a 95mmq per le FASI e 150mmq per le batterie cavi flessibili e rigidi DISPOSIZIONE DEI CAVI DI COLLEGAMENO E INSERIMENTO DELLE FERRITI TOROIDALI Si consiglia di cablare i cavi di potenza instradandoli dal ...

Page 18: ...ano presenti tensioni pericolose La prima connessione da effettuare è quella del conduttore di protezione cavo di terra da collegare alla vite siglata PE L UPS deve funzionare con il collegamento all impianto di terra Il Neutro d ingresso deve essere sempre collegato ATTENZIONE è richiesto un sistema di distribuzione trifase a 4 fili La versione standard dell UPS deve essere collegata ad una linea...

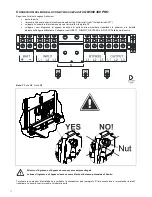
Page 19: ...one cavo di terra alla vite siglata PE collegare i cavi d ingresso d uscita e di batteria alla morsettiera rispettando le posizioni e le polarità indicate nella figura sottostante Collegare i cavi N BATT N INPUT e N OUTPUT alla barra di neutro Nota PE vite M6 N vite M8 Terminate le operazioni d installazione e verificate le connessioni vedi paragrafo Prima accensione e impostazioni iniziali ripris...

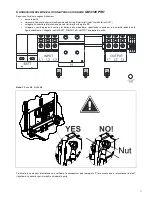
Page 20: ... e di batteria alla morsettiera rispettando le posizioni e le polarità indicate nella figura sottostante Collegare i cavi N BATT N INPUT N BYPASS e N OUTPUT alla barra di neutro Nota PE vite M6 N vite M8 Il Neutro d ingresso e di bypass devono essere sempre collegati Le linee d ingresso e di bypass devono essere riferite allo stesso potenziale di Neutro Terminate le operazioni d installazione e ve...

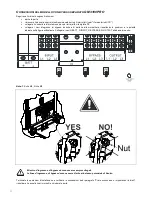
Page 21: ...ne cavo di terra alla vite siglata PE collegare i cavi d ingresso d uscita e di batteria alla morsettiera rispettando le posizioni e le polarità indicate nella figura sottostante Collegare i cavi N BATT N INPUT e N OUTPUT alla barra di neutro Nota PE vite M6 N vite M8 Terminate le operazioni d installazione e verificate le connessioni vedi paragrafo Prima accensione e impostazioni iniziali riprist...

Page 22: ... di batteria alla morsettiera rispettando le posizioni e le polarità indicate nella figura sottostante Collegare i cavi N BATT N INPUT N BYPASS E N OUTPUT alla barra di neutro Nota PE vite M6 N vite M8 Il Neutro d ingresso e di bypass devono essere sempre collegati Le linee d ingresso e di bypass devono essere riferite allo stesso potenziale di Neutro Terminate le operazioni d installazione e veri...

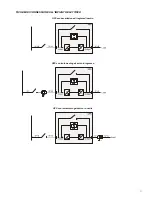
Page 23: ...23 SCHEMI DI CONNESSIONE ALL IMPIANTO ELETTRICO UPS senza variazione di regime di neutro UPS con isolamento galvanico in ingresso UPS con isolamento galvanico in uscita ...

Page 24: ...senza variazione di regime di neutro e con ingresso bypass separato UPS con isolamento galvanico in ingresso e con ingresso bypass separato UPS con isolamento galvanico in uscita e con ingresso bypass separato ...

Page 25: ...ranno essere riferiti allo stesso potenziale Qualora le due alimentazioni fossero differenti è necessario utilizzare un trasformatore di isolamento su uno degli ingressi UPS senza variazione di regime di neutro e con ingresso bypass separato connesso su linea di alimentazione indipendente UPS con ingresso di bypass separato connesso su linea di alimentazione indipendente e con isolamento galvanico...

Page 26: ...e Protezioni AC esterne automatiche Mod UPS Ingresso rete Ingresso bypass separato opzionale 60kVA 100A 100A 80kVA 125A 125A 100kVA 160A 160A Nel caso di carico non lineare sovradimensionare adeguatamente la linea di neutro N previa valutazione in loco Se il dispositivo di protezione a monte dell UPS interrompe il conduttore di neutro deve anche interrompere contemporaneamente tutti i conduttori d...

Page 27: ...mente coordinati con quelli presenti in ingresso L interruttore differenziale posto a monte dovrà avere le seguenti caratteristiche corrente differenziale adeguata alla somma di UPS carico si consiglia di tenere un margine opportuno per evitare interventi intempestivi 300mA consigliato tipo B ritardo maggiore o uguale a 0 1s La corrente di dispersione del carico si somma a quella dell UPS sul cond...

Page 28: ...o Dopo l installazione effettuare l abilitazione dell opzione tramite il software di configurazione CONTATTI AUSILIARI Nella zona connessioni UPS sono disponibili i morsetti per collegare i contatti ausiliari dei sezionatori bypass di manutenzione remoto e uscita remoto Questi sono identificati rispettivamente dalle diciture SERVICE BYPASS e AUX SWOUT Per l installazione fare riferimento ai paragr...

Page 29: ...che di rete uscita batteria ecc e rilevare eventuali allarmi Per il dettagli relativi all utilizzo e ai collegamenti fare riferimento all apposito manuale PRESE AUSILIARIE OPZIONALI ENERGYSHARE Presa di uscita opzionale programmabile che consente in determinate condizioni di funzionamento la sconnessione automatica del carico ad essa applicato Gli eventi che determinano lo stacco automatico della ...

Page 30: ...ò causare l interruzione dell alimentazione al carico e il danneggiamento dell UPS Utilizzare sezionatori e cavi di potenza adeguati alle correnti dell UPS Utilizzare cavo doppio isolamento di sezione 1mmq per il collegamento dei morsetti SERVICE BYPASS e AUX SWOUT ai relativi contatti ausiliari dei sezionatori BYPASS DI MANUTENZIONE REMOTO 3 e USCITA 2 Verificare la compatibilità fra il Bypass di...

Page 31: ...ppresentato lo schema a blocchi dell UPS e vengono descritte le singole parti che lo compongono Diagramma a blocchi dell UPS IMPORTANTE I nostri gruppi di continuità sono concepiti e realizzati per una lunga durata anche nelle condizioni di servizio più severe Si ricorda tuttavia che si tratta di apparecchiature elettriche di potenza e come tali necessitano di controlli periodici Inoltre alcuni co...

Page 32: ... bloccato in posizione chiusa Chiusura sezionatore fusibili della linea di batteria esterna all UPS Dopo aver verificato la corretta polarità delle connessioni chiudere il sezionatore fusibili della linea di batteria esterna all UPS ATTENZIONE se è stato effettuato un collegamento non conforme a quanto riportato nel paragrafo Collegamenti elettrici potrebbero essersi danneggiati i fusibili di batt...

Page 33: ...ssario configurare l UPS per settare i valori corretti della capacità nominale complessiva di batteria Tale operazione deve essere effettuata tramite il software di configurazione dedicato e riservato al personale del Serivice Dal menu principale premere il tasto per entrare nel menu di accensione Alla richiesta di conferma selezionare SI premere per confermare ed attendere qualche secondo Verific...

Page 34: ...si accende il display Premere il pulsante per entrare nel menu di accensione Alla richiesta di conferma selezionare SI e premere nuovamente il pulsante per confermare Si accendono tutti i led attorno al display per 1 sec circa ed il buzzer inizia ad emettere un beep ogni 7 sec La sequenza di accensione termina quando l UPS si predispone nello stato funzionamento da batteria Nota se non viene esegu...

Page 35: ...r Battery Line Inverter Load Inverter Output Line Battery Charge Automatic Static Bypass Lo schema mostra lo stato dei tre moduli logici di potenza PFC Converter Inverter Automatic Static Bypass Ogni modulo può assumere uno dei seguenti stati Modulo Spento Modulo acceso in funzionamento normale Modulo in allarme o in blocco I seguenti simboli invece rappresentano il flusso di energia da e verso le...

Page 36: ... Zona di visualizzazione dello stato di funzionamento dell UPS La prima riga è sempre attiva e visualizza costantemente lo stato dell UPS in quell istante La seconda si attiva solo in presenza di un eventuale errore e o guasto dell UPS e mostra il tipo di errore guasto riscontrato A destra ogni rispettiva riga visualizza il codice corrispondente all evento in corso FUNZIONE TASTI Zona divisa in qu...

Page 37: ...37 MENU DISPLAY ...

Page 38: ...si alla frequenza nominale ed il bypass non è più utilizzabile free running mode BYPASS MANUALE SWMB ATTENZIONE in caso si notino malfunzionamenti contattare il centro assistenza La manutenzione dell UPS può essere eseguita unicamente da personale qualificato ed addestrato dal costruttore ATTENZIONE all interno dell apparecchiatura può essere presente tensione pericolosa anche con i sezionatori di...

Page 39: ...r Walk In attivabile e configurabile tramite il software di configurazione Quando la modalità è attiva al ritorno rete dopo un periodo in autonomia l UPS ritorna ad assorbire dalla stessa in modo progressivo per non mettere in crisi a causa dello spunto un eventuale gruppo elettrogeno installato a monte La durata del transitorio è impostabile da 1 a 125 secondi Il valore di default è 10 secondi qu...

Page 40: ...t 2 sec viene reimpostata automaticamente la lingua inglese La modifica della funzione può essere bloccata tramite il software di configurazione Nella seguente tabella sono elencate le configurazioni che possono essere modificate tramite il software di configurazione in dotazione ai centri assistenza FUNZIONE DESCRIZIONE PREDEFINITO Operating mode Modalità di funzionamento dell UPS ON LINE Output ...

Page 41: ...ionamento in modalità ECO Normal Eco mode min max threshold Range di tensione ammesso per il funzionamento in modalità ECO Low 200V High 253V UPS without battery Modalità di funzionamento senza batterie per convertitori di frequenza stabilizzatori Operating with Batteries Battery low time Tempo rimanente di autonomia stimata per il preavviso di fine scarica 3 min Automatic battery test Intervallo ...

Page 42: ...NNETTORE RS232 CONNETTORE USB PIN NOME TIPO SEGNALE PIN SEGNALE 1 IN 1 VBUS 2 TX OUT TX linea seriale 2 D 3 RX IN RX linea seriale 3 D 4 4 GND 5 GND POWER 6 OUT 7 8 15V POWER Alimentazione isolata 15V 5 80mA max 9 WKATX OUT Risveglia alimentatore ATX COMMUNICATION SLOT l UPS è fornito di due slot di espansione per schede di comunicazione accessorie che consentono all apparecchiatura di dialogare u...

Page 43: ...e a funzionare da inverter Se il ponticello viene rimosso in mancanza di rete l UPS riprende il funzionamento da batteria 4 5 12 BATTERY LOW OUTPUT 1 Segnala che le batterie sono a fine scarica quando il contatto 5 12 è chiuso 1 6 13 14 BATTERY WORKING OUTPUT 2 Segnala che l UPS sta funzionando da batteria quando il contatto 6 14 è chiuso 1 9 10 LOCK OUTPUT 3 Quando il contatto è chiuso segnala ch...

Page 44: ...nserimento di un carico distorcente Suono C La segnalazione viene fatta quando l UPS passa in funzionamento da batteria prima della segnalazione di fine scarica suono D È possibile tacitare la segnalazione vedi paragrafo Display grafico Suono D La segnalazione viene effettuata in funzionamento da batteria quando si raggiunge la soglia di allarme di fine scarica È possibile tacitare la segnalazione...

Page 45: ...l PC tramite il cavo seriale in dotazione oppure collegare la porta USB dell UPS ad una porta USB del PC utilizzando un cavo standard USB Scaricare il software dal sito web www ups technet com selezionando il sistema operativo desiderato Seguire le istruzioni del programma di installazione Per informazioni più dettagliate sull installazione ed utilizzo consultare il manuale del software scaricabil...

Page 46: ...ancanza di tale collegamento può danneggiare l UPS e o il carico Collegare la rete ai morsetti come indicato nel paragrafo Installazione IL SEZIONATORE DIETRO LA PORTA SWIN È APERTO Chiudere il sezionatore MANCANZA DELLA TENSIONE DI RETE BLACKOUT Verificare la presenza della tensione di rete elettrica Eventualmente eseguire l accensione da batteria per alimentare il carico INTERVENTO DELLA PROTEZI...

Page 47: ...PIÙ DEI SEGUENTI CODICI F09 F10 MALFUNZIONAMENTO NELLO STADIO DI INGRESSO DELL UPS Azionare il bypass manuale SWMB spegnere e poi riaccendere l UPS Escludere il bypass manuale Se il problema permane contattare il centro assistenza più vicino LA FASE 1 PRESENTA UNA TENSIONE MOLTO MINORE DELLE ALTRE DUE FASI Aprire SWIN effettuare l accensione da batteria attendere la fine della sequenza e chiudere ...

Page 48: ...IMANE IN ATTESA CHE LA TENSIONE DI BATTERIA SUPERI LA SOGLIA IMPOSTATA Attendere la ricarica delle batterie o forzare in modo manuale l accensione andando nel menù ACCENSIONE IL DISPLAY VISUALIZZA UNO O PIÙ DEI SEGUENTI CODICI F06 F07 F08 TELERUTTORE D INGRESSO BLOCCATO Azionare il bypass manuale SWMB spegnere l UPS aprire SWIN e contattare il centro di assistenza più vicino Attenzione una volta a...

Page 49: ...TE SUPERIORE A 40 C SORGENTI DI CALORE IN PROSSIMITÀ DELL UPS FERITOIE DI AERAZIONE OSTRUITE O TROPPO VICINE ALLE PARETI MALFUNZIONAMENTO DEL SENSORE DI TEMPERATURA O DEL SISTEMA DI RAFFREDDAMENTO DEL CARICABATTERIE Rimuovere la causa della sovratemperatura Inserire il bypass manuale SWMB senza spegnere l UPS e attendere che la temperatura del carica batterie diminuisca Escludere il bypass manuale...

Page 50: ... per accensione S10 UPS in blocco carico non alimentato S11 UPS in blocco carico su bypass S12 Stadio BOOST o caricabatterie in blocco carico non alimentato S13 Convertitore di frequenza carico alimentato da inverter COMMAND indica la presenza di un comando attivo CODICE DESCRIZIONE C01 Comando remoto di spegnimento C02 Comando remoto carico su bypass C03 Comando remoto di accensione C04 Test batt...

Page 51: ... uscita Fase1 A20 Picco di corrente elevato su uscita Fase2 A21 Picco di corrente elevato su uscita Fase3 A22 Carico su Fase1 della soglia utente impostata A23 Carico su Fase2 della soglia utente impostata A24 Carico su Fase3 della soglia utente impostata A25 Sezionatore d uscita aperto A26 Batterie ramo positivo assenti o fusibili di batteria aperti A27 Batterie ramo negativo assenti o fusibili d...

Page 52: ...Fase2 inverter deformata F16 Sinusoide Fase3 inverter deformata F17 Anomalia stadio Inverter F19 Sovratensione batterie positive F20 Sovratensione batterie negative F21 Sottotensione batterie positive F22 Sottotensione batterie negative F23 Sovraccarico in uscita F26 Teleruttore d uscita Fase1 bloccato non apre F27 Teleruttore d uscita Fase2 bloccato non apre F28 Teleruttore d uscita Fase3 bloccat...

Page 53: ...ottotensione inverter Fase3 L20 Tensione continua in uscita inverter o Sinusoide inverter deformata Fase1 L21 Tensione continua in uscita inverter o Sinusoide inverter deformata Fase2 L22 Tensione continua in uscita inverter o Sinusoide inverter deformata Fase3 L23 Sovraccarico su uscita Fase1 L24 Sovraccarico su uscita Fase2 L25 Sovraccarico su uscita Fase3 L26 Cortocircuito su uscita Fase1 L27 C...

Page 54: ...nale 4 50 60Hz Corrente nominale di uscita 87A 116A 145A Potenza apparente nominale in uscita 60kVA 80kVA 100kVA Potenza attiva nominale in uscita 54kW 72kW 90kW Fattore di potenza in uscita 0 9 Corrente di cortocircuito 1 5 x In per t 500ms Precisione della tensione in uscita riferita a tensione uscita 400Vac 1 Stabilità statica 5 0 5 Stabilità dinamica 3 carico resistivo 6 Distorsione armonica t...

Page 55: ... d ingresso di 380V e batterie in carica con 10A 2 100 load THDv 1 3 Per mantenere la tensione di uscita entro il campo di precisione indicato può rendersi necessaria una ricalibrazione dopo un lungo periodo di esercizio 4 Se la frequenza di rete è entro 5 del valore selezionato l UPS è sincronizzato con la rete Se la frequenza è fuori tolleranza o in funzionamento da batteria la frequenza è quell...

Page 56: ...developed by the company in compliance with applicable standards Hazardous materials such as CFCs HCFCs or asbestos have not been used in this product Packaging is composed of RECYCLABLE MATERIALS Dispose of all material in compliance with applicable standards in the country in which the product is used Refer to the following table to identify materials DESCRIPTION MATERIAL Pallet Wood FOR Package...

Page 57: ... CABLES SECTION 71 ARRANGEMENT OF THE CABLES AND INSERTION OF THE FERRITE TOROIDS 71 PRELIMINARY OPERATIONS FOR CONNECTION 72 CONNECTIONS TO GM 360 380 PRO MODELS WITH STANDARD BYPASS 73 CONNECTIONS TO GM 360 380 PRO MODELS WITH SEPARATE BYPASS 74 CONNECTIONS TO GM 3100 PRO MODEL WITH STANDARD BYPASS 75 CONNECTIONS TO GM 3100 PRO MODEL WITH SEPARATE BYPASS 76 ELECTRICAL SYSTEM CONNECTION DIAGRAMS ...

Page 58: ... 88 GRAPHIC DISPLAY 89 DISPLAY MENU 91 OPERATING MODE 92 MANUAL BYPASS SWMB 92 REDUNDANT AUXILIARY POWER ADAPTER FOR AUTOMATIC BYPASS 93 POWER WALK IN 93 DERATING OF POWER FOR 200 208V NEUTRAL PHASE LOADS 93 UPS CONFIGURATION 94 COMMUNICATION PORTS 96 RS232 AND USB CONNECTORS 96 COMMUNICATION SLOT 96 AS400 PORT 97 ACOUSTIC SIGNAL BUZZER 98 SOFTWARE 99 MONITORING AND CONTROL SOFTWARE 99 CONFIGURATI...

Page 59: ...as enabled us to achieve high performance such as ZERO IMPACT SOURCE ensures low input distortion power factor close to one and maximum compatibility with the generator BATTERY CARE SYSTEM allows custom handling of batteries for different topologies and continuous monitoring of the same thus increasing efficiency and duration SMART INVERTER provides extraordinary efficiency even at low load rates ...

Page 60: ...60 FRONT UPS VIEWS Control panel with graphic display Wheels for UPS handling Front door with lock Parking brakes Ventilation grille ...

Page 61: ...ort USB communication port RS232 communication port UPS Parallel Board housing optional From left to right SWIN Input switch SWBYP Separate bypass switch optional SWMB Manual bypass switch SWOUT Output switch QN Switch for service personnel use only Slot for communication accessory boards Terminal cover panel ...

Page 62: ...2 L3 Power connections SEPARATE BYPASS PHASES optional OUTPUT L1 L2 L3 Power connections OUTPUT PHASES N Power connections N BATTERY N INPUT N BYPASS N OUTPUT PE Power connections GROUND A1 A2 Connection for external synchronization signal A3 A4 Connection for remote auxiliary maintenance bypass A5 A6 Connection for remote auxiliary output switch EXT BATT TEMP Connection for external battery tempe...

Page 63: ...onnections SEPARATE BYPASS PHASES optional OUTPUT L1 L2 L3 Power connections OUTPUT PHASES N Power connections N BATTERY N INPUT N BYPASS N OUTPUT PE Power connections GROUND A1 A2 Connection for external synchronization signal A3 A4 Connection for remote auxiliary maintenance bypass A5 A6 Connection for remote auxiliary output switch EXT BATT TEMP Connection for external battery temperature probe...

Page 64: ...64 UPS REAR VIEW EnergyShare Aux Output sockets 10A max and relative protection optional Power board fans MultiCOM 382 contacts board accessory housing Battery charger fan 4 1 3 2 ...

Page 65: ...g battery operation with early low battery or imminent shutdown warning Flashing in standby programmed restart function active and mains absent Load on bypass LED On steady load powered from bypass line Standby alarm LED On steady alarm present Flashing standby mode Replace batteries LED On steady replace batteries Flashing batteries overloaded alarm ECO mode LED On steady ECO mode configuration a...

Page 66: ...e UPS series with Separate Bypass allows a separate connection between the input line and the bypass line The UPS output will be synchronized to the bypass line in such a way that there will not be any incorrect switching between push pull voltages in the event of automatic bypass intervention or manual bypass SWMB closing ...

Page 67: ...l h 8910 B T U h 3 65 kW 3140 kcal h 12460 B T U h 4 75 kW 4074 kcal h 16170 B T U h Power loss at nominal distorting load pf 0 7 and with charged batteries 1 2 41 kW 2070 kcal h 8220 B T U h 3 12 kW 2680 kcal h 10640 B T U h 4 12 kW 3540 kcal h 14060 B T U h Installation site fan flow rate for heat removal 2 1400mc h 2000 mc h 2600mc h Current dispersed to ground 3 300 mA Degree of protection IP2...

Page 68: ...he room temperature with the UPS in operation is maintained between 0 and 40 C The UPS is able to operate at a temperature between 0 and 40 C The recommended operating temperature for the UPS and the batteries is between 20 and 25 C The actual operating life of the batteries is 5 years on average at an operating temperature of 20 C If the operating temperature reaches 30 C the operating life is ha...

Page 69: ... door Remove the 2 brackets fastening the UPS to the pallet unscrewing the type A and B screws The previously removed brackets can also to be used as slides Fasten the slides to the pallet with the use of type A screws taking care to align the two wheels If necessary unblock the front wheel brakes Ensure that the door is fully closed ATTENTION it is advisable to bring the UPS down by pushing from ...

Page 70: ... least enough free space in front of the equipment to allow for start stop operations and maintenance 1 5 m the upper part should be at least 50cm from the ceiling to allow for maintenance operations the rear of the UPS must be placed at least 30 cm from the wall for proper air flow blown from air vents no objects should rest on the upper part of the UPS After positioning block the device by means...

Page 71: ...ection of the cables that can be inserted in the terminal board is equal to 95 mm2 flexible and rigid cables GM 3100 PRO the maximum cross section of the cables to insert into the terminals is 95 mm for the PHASES and 150 mm for the batteries flexible and rigid cables ARRANGEMENT OF THE CABLES AND INSERTION OF THE FERRITE TOROIDS It is recommended to wire the power cables routing them from the bac...

Page 72: ...re that there are no dangerous voltages The first connection should be that of the protective conductor ground cable to be connected to the PE marked screw The UPS should work with ground system connection The input Neutral must always be connected ATTENTION a three phase four wire distribution system is required The standard UPS version must be connected to a 3 Phase Neutral PE ground protection ...

Page 73: ...und cable to the PE marked screw connect the input output and battery cables to the terminal board observing the positions and polarities indicated in the figure below Connect N BATT N INPUT and N OUTPUT cables to the neutral bar Note PE M6 screw N M8 screw Once installation operations have been completed and connections verified see paragraph First start up and initial settings restore the termin...

Page 74: ...ery cables to the terminal board observing the positions and polarities indicated in the figure below Connect N BATT N INPUT and N OUTPUT cables to the neutral bar Note PE M6 screw N M8 screw The input and bypass Neutral must always be connected The input and bypass lines must be connected to the same potential as of the Neutral Once installation operations have been completed and connections veri...

Page 75: ...d cable to the PE marked screw connect the input output and battery cables to the terminal board observing the positions and polarities indicated in the figure below Connect N BATT N INPUT and N OUTPUT cables to the neutral bar Note PE M6 screw N M8 screw Once installation operations have been completed and connections verified see paragraph First start up and initial settings restore the terminal...

Page 76: ...y cables to the terminal board observing the positions and polarities indicated in the figure below Connect N BATT N INPUT and N OUTPUT cables to the neutral bar Note PE M6 screw N M8 screw The input and bypass Neutral must always be connected The input and bypass lines must be connected to the same potential as of the Neutral Once installation operations have been completed and connections verifi...

Page 77: ...77 ELECTRICAL SYSTEM CONNECTION DIAGRAMS UPS without neutral connectivity variation UPS with galvanic input insulation UPS with galvanic output insulation ...

Page 78: ...PS without neutral connectivity variation and with separate bypass input UPS with galvanic input insulation and with separate bypass input UPS with galvanic output insulation and with separate bypass input ...

Page 79: ... they will have to be connected to the same potential If the two power supplies are different you must use an isolation transformer on one of the inputs UPS without neutral connectivity variation and with separate bypass input connected on an independent power line UPS with separate bypass input connected on an independent power line and with galvanic input insulation UPS with separate bypass inpu...

Page 80: ...of load as indicated in the following table Automatic external AC protections Mod UPS Network input Separate bypass input optional 60kVA 100A 100A 80kVA 125A 125A 100kVA 160A 160A In the case of non linear loads properly oversize neutral line N after on site assessment If the protection device upstream to the UPS interrupts the neutral conductor all phase conductors must also be interrupted at the...

Page 81: ...insert more differential switches in the output possibly coordinated with those present in the input The differential switch set upstream must have the following characteristics suitable differential current for the sum of UPS load it is advisable to keep an adequate margin to prevent inopportune interventions 300mA recommended type B delay higher than or equal to 0 1s The load dispersion current ...

Page 82: ...connection After installation enable this option by means of the configuration software AUXILIARY CONTACTS Terminals for connecting auxiliary contacts of the remote maintenance and remote output bypass switches are available in the UPS connection zone These are identified respectively by the words SERVICE BYPASS and AUX SWOUT For installation refer to paragraphs UPS connections view and Remote mai...

Page 83: ...an be viewed and any alarms detected For details related to use and connections refer to the appropriate manual AUXILIARY SOCKETS OPTIONAL ENERGYSHARE Programmable output socket optional which allows automatic disconnection of the load applied to it under certain operating conditions Events that determine automatic disconnection of the EnergyShare socket can be selected by the user through the con...

Page 84: ...ailure to perform this connection can cause power cut off to the load and UPS damage Use switches and power cables suitable for UPS currents Use a double insulation cable with a 1mm2 section for connecting SERVICE BYPASS and AUX SWOUT terminals to relative REMOTE MAINTENANCE BYPASS 3 and OUTPUT 2 switch auxiliary contacts Verify compatibility between the Remote maintenance bypass and neutral conne...

Page 85: ...itions The following is a block diagram of the UPS which describes the individual components that it is composed of UPS block diagram IMPORTANT Our UPS have been designed and built for long term duration even in the most demanding operating conditions Please remember however that these are electrical power devices and as such they require periodic inspections In addition some components inevitably...

Page 86: ...ed in the closed position Closing the external UPS battery line switch fuses After having checked proper connection polarity close the external UPS battery line switch fuses Attention any connection made not in compliance with instructions stated in paragraph Electrical connections may have damaged the battery fuses and other protections in this case call for assistance to avoid further damage to ...

Page 87: ...y capacity ATTENTION you must configure the UPS to set the correct values of total nominal capacity of the battery This operation must be performed by means of the configuration software reserved for Service personnel only From the main menu press to enter into the start menu When asked to confirm select YES press to confirm and wait a few seconds Verify that the UPS is set to status with the inve...

Page 88: ... UPS will switch on and the display will turn on Press to access the start menu When asked to confirm select YES and press again to confirm All the LEDs around the display will light up for about 1 sec and the buzzer will begin to emit a beep every 7 sec The start sequence is completed when the UPS is set to battery operation status Note if the sequence described above is not performed within 1 mi...

Page 89: ...verter Output Line Battery Charge Automatic Static Bypass The diagram shows the status of the three power logical modules PFC Converter Inverter Automatic Static Bypass Each module can take on one of the following status types Module Off Module on in normal operating mode Module alarm or block The following symbols show the power flow to and from the batteries uncharged charged and the status of i...

Page 90: ...TATUS ERRORS FAULTS UPS operation status display area The first row is always active and constantly displays UPS status in real time The second is activated only in the presence of a UPS error and or fault and shows the type of detected error fault A code corresponding to the event in progress is shown to the right of each row KEYS FUNCTION Area divided into four boxes each relative to the underly...

Page 91: ...91 DISPLAY MENU ...

Page 92: ...f this tolerance the UPS desynchronizes bringing itself to the nominal frequency and bypass can no longer be used free running mode MANUAL BYPASS SWMB ATTENTION Contact a service centre should any malfunctions be detected UPS maintenance can only be performed by skilled personnel who have been trained by the manufacturer ATTENTION dangerous voltages even with the input bypass output and battery op...

Page 93: ...igured via configuration software When this mode is enabled once the mains power is restored after a period of autonomy the UPS begins absorbing from it again progressively so as not to threaten due to the peak for any generator group that may be installed upstream The duration of the transition can be set from 0 to 125 seconds The default value is 10 seconds when this function is active During th...

Page 94: ... t 2 sec and English will automatically be reset Function modification can be blocked by means of the configuration software Configurations which can be modified by means of configuration software available at service centres are listed in the following table FUNCTION DESCRIPTION DEFAULT Operating mode Selects one of five different operating modes ON LINE Output voltage Selects the rated output vo...

Page 95: ...64V Eco mode sensibility Selects the intervention sensitivity during operation in ECO mode Normal Eco mode min max threshold Selects the accepted voltage range for operation in ECO mode Low 200V High 253V UPS without battery Operating mode without batteries for converters or voltage stabilizers Operating with Batteries Battery low time Estimated autonomy time remaining for battery low warning 3 mi...

Page 96: ...ECTORS RS232 CONNECTOR USB CONNECTOR PIN NAME TYPE SIGNALS PIN SIGNALS 1 IN 1 VBUS 2 TX OUT TX serial line 2 D 3 RX IN RX serial line 3 D 4 4 GND 5 GND POWER 6 OUT 7 8 15V POWER Isolated power 15V 5 80mA max 9 WKATX OUT ATX power adapter activator COMMUNICATION SLOT The UPS is supplied with two expansion slots for optional communication cards that allow device dialogue using the main communication...

Page 97: ...ence of power the UPS will begin operation via the inverter If the jumper is removed without power the UPS will begin operation via batteries 4 5 12 BATTERY LOW OUTPUT 1 Signals that batteries are low when contact 5 12 is closed 1 6 13 14 BATTERY WORKING OUTPUT 2 Signals that the UPS is operating via batteries when contact 6 14 is closed 1 9 10 LOCK OUTPUT 3 Signals that the UPS is locked when the...

Page 98: ...urges due to the insertion of a distorted current Sound C This signal is emitted when the UPS switches to battery operation before No Battery is signalled sound D It is possible to silence signals see Graphic display paragraph Sound D This signal is emitted when battery operation reaches No Battery alarm threshold It is possible to silence signals see Graphic display paragraph Sound E This signal ...

Page 99: ...port of the PC via the serial cable provided or connect the USB port of the UPS to a USB port of the PC using a standard USB cable Download the software from www ups technet com selecting the desired operating system Follow the installation program instructions For more detailed information about installation and use refer to the software manual which can be downloaded from our website www ups tec...

Page 100: ...nnection ATTENTION Failure to make this connection can damage the UPS and or the load Connect the mains to the terminals as indicated in the Installation paragraph THE SWITCH BEHIND THE DOOR SWIN IS OPEN Close the switch NO MAINS VOLTAGE BLACKOUT Verify electrical main voltage presence If necessary switch on via batteries to power the load UPSTREAM PROTECTION INTERVENTION Reset protection Attentio...

Page 101: ...ISPLAY SHOWS ONE OR MORE OF THE FOLLOWING CODES F09 F10 UPS INPUT STAGE MALFUNCTION Activate manual bypass SWMB switch off and re start the UPS Exclude manual bypass Contact the nearest service centre if this problem persists PHASE 1 PRESENTS VOLTAGE MUCH LOWER THAN THE OTHER TWO PHASES Open the SWIN switch on batteries wait for sequence completion and close the SWIN THE DISPLAY SHOWS ONE OR MORE ...

Page 102: ... EXCEED THE SET THRESHOLD Wait until the batteries have recharged or force power on manually via the ON menu THE DISPLAY SHOWS ONE OR MORE OF THE FOLLOWING CODES F06 F07 F08 INPUT CONTACTOR BLOCKED Activate manual bypass SWMB switch off the UPS open the SWIN and contact the nearest service centre Attention once the SWIN is open it will no longer be possible to close it again before Service interve...

Page 103: ... C SOURCES OF HEAT NEAR THE UPS VENTILATION SLITS OBSTRUCTED OR TOO CLOSE TO WALLS TEMPERATURE SENSOR OR BATTERY CHARGER COOLING SYSTEM MALFUNCTION Remove the cause of over temperature Insert manual bypass SWMB without switching off the UPS and wait for battery charger temperature to lower Exclude manual bypass Contact the nearest service centre if this problem persists THE DISPLAY SHOWS ONE OR MO...

Page 104: ...nomy mode on S09 Ready for start up S10 UPS locked load not powered S11 UPS locked load on bypass S12 BOOST stage or battery charger locked load not powered S13 Frequency converter load powered by inverter COMMAND indicates presence of an active command CODE DESCRIPTION C01 Remote power off command C02 Remote load command on bypass C03 Remote power on command C04 Battery test in progress C05 Manua...

Page 105: ... range A19 Elevated current peak on Phase1 output A20 Elevated current peak on Phase2 output A21 Elevated current peak on Phase3 output A22 Load on Phase1 set user threshold A23 Load on Phase2 set user threshold A24 Load on Phase3 set user threshold A25 Output switch open A26 Positive battery branch absent or battery fuses open A27 Negative battery branch absent or battery fuses open A29 System te...

Page 106: ... F15 Phase2 sinusoid inverter deformed F16 Phase3 sinusoid inverter deformed F17 Inverter stage fault F19 Positive battery overvoltage F20 Negative battery overvoltage F21 Positive battery undervoltage F22 Negative battery undervoltage F23 Output overload F26 Phase1 output contactor locked does not open F27 Phase2 output contactor locked does not open F28 Phase3 output contactor locked does not op...

Page 107: ...ndervoltage L20 Continuous voltage on inverter output or Phase1 sinusoid inverter deformed L21 Continuous voltage on inverter output or Phase2 sinusoid inverter deformed L22 Continuous voltage on inverter output or Phase3 sinusoid inverter deformed L23 Phase1 output overload L24 Phase2 output overload L25 Phase3 output overload L26 Phase1 output short circuit L27 Phase2 output short circuit L28 Ph...

Page 108: ...wire Nominal Frequency 4 50 60Hz Output nominal current 87A 116A 145A Nominal apparent power in output 60kVA 80kVA 100kVA Nominal active power in output 54kW 72kW 90kW Output power factor 0 9 Short circuit current 1 5 x In for t 500ms Output voltage precision referred to output voltage 400V AC 1 Static stability 5 0 5 Dynamic stability 3 resistive load 6 Output voltage harmonic distortion with lin...

Page 109: ...0 9 380V input voltage and batteries charging with 10A 2 100 load THDv 1 3 To maintain output voltage within the specified accuracy range recalibration may be necessary after a long period of operation 4 If network frequency is within 5 of the selected value the UPS is synchronized with the network If frequency is out of the range of tolerance or in battery operation the frequency is the one selec...

Page 110: ...mweltmanagementsystems zugrunde die vom Hersteller in Übereinstimmung mit den geltenden Gesetzesvorschriften festgelegt wurden Gefahrenstoffe wie CFC HCFC oder Asbest sind nicht enthalten Die Verpackung besteht aus vollkommen WIEDERVERWERTBAREN MATERIALIEN Die einzelnen Verpackungsbestandteile müssen in Übereinstimmung mit den geltenden Gesetzesvorschriften des jeweiligen Einsatzlandes des Geräts ...

Page 111: ...BINDUNGSKABEL 125 ANORDNUNG DER VERBINDUNGSKABEL UND EINSETZEN DER FERRITRINGKERNE 125 VORABMASSNAHMEN VOR DEM AUSFÜHREN DER ANSCHLÜSSE 126 ANSCHLÜSSE AN DER GM 360 380 PRO BAUREIHE OHNE SEPARATEM BYPASS 127 ANSCHLÜSSE AN DER GM 360 380 PRO BAUREIHE MIT SEPARATEM BYPASS 128 ANSCHLÜSSE AN DER GM 3100 PRO BAUREIHE OHNE SEPARATEM BYPASS 129 ANSCHLÜSSE AN DER GM 3100 PRO BAUREIHE MIT SEPARATEM BYPASS ...

Page 112: ...2 GRAPHISCHES DISPLAY 143 DISPLAYMENÜS 145 BETRIEBSMODUS 146 MANUELLER BYPASS SWMB 146 ZUSÄTZLICHES VORSCHALTGERÄT FÜR AUTOMATISCHEN BYPASS 147 POWER WALK IN 147 LEISTUNGSROSSELUNG FÜR LASTEN 200 208V PHASE NEUTRALLEITER 147 USV KONFIGURATION 148 KOMMUNIKATIONSANSCHLÜSSE 150 RS232 UND USB STECKVERBINDER 150 COMMUNICATION SLOT 150 AS400 ANSCHLUSS 151 SIGNALTON BUZZER 152 SOFTWARE 153 ÜBERWACHUNGS U...

Page 113: ...rleistet eine geringe Verzerrung des Eingangsstroms einen Leistungsfaktor von beinahe 1 und maximale Kompatibilität mit dem Stromaggregat BATTERY CARE SYSTEM Ermöglicht eine nutzerspezifische Steuerung der Batterien für die unterschiedlichen Typologien und eine durchgehende Überwachung wodurch Leistungsfähigkeit und Lebensdauer der Batterien gesteigert werden können SMART INVERTER Außergewöhnliche...

Page 114: ...114 VORDERANSICHTEN DER USV Bedienpult mit graphischem Display Transporträder der USV Vorderklappe mit Schloss Feststellbremse Belüftungsgitter ...

Page 115: ...lle USB Schnittstelle RS232 Zusätzliches USV Kartenfach optional Von links nach rechts Eingangs Trennschalter SWIN Separater Bypass Trennschalter optional SWBYP Manuelle Bypass Trennschalter SWMB Ausgangs Trennschalter SWOUT Trennschalter nur für Wartungsfachpersonal QN Fach für zusätzliche Kommunikationskarten Klemmen Schutzabdeckung ...

Page 116: ... Separater Bypass optional OUTPUT L1 L2 L3 Leistungsanschlüsse USV Ausgang N Leistungsanschlüsse Neutralleiter N Batterie N Eingang N Bypass optional N Ausgang PE Leistungsanschlüsse ERDUNG A1 A2 Anschluss für externes Synchronisierungssignal A3 A4 Anschluss für zusätzliche Wartungs Bypass Fernsteuerung A5 A6 Anschluss für zusätzliche Ausgangs Trennschalter per Fernbedienung EXT BATT TEMP Anschlus...

Page 117: ... optional OUTPUT L1 L2 L3 Leistungsanschlüsse USV Ausgang N Leistungsanschlüsse Neutralleiter N Batterie N Eingang N Bypass optional N Ausgang PE Leistungsanschlüsse ERDUNG A1 A2 Anschluss für externes Synchronisierungssignal A3 A4 Anschluss für zusätzliche Wartungs Bypass Fernsteuerung A5 A6 Anschluss für zusätzliche Ausgangs Trennschalter per Fernbedienung EXT BATT TEMP Anschluss für Temperaturs...

Page 118: ...8 RÜCKANSICHT DER USV Buchsen EnergyShare Aux Output 10A max und entsprechende Sicherung Option Gebläse der Leistungsplatinen Zusatzfach Kontaktplatine MultiCOM 382 Gebläse des Batterieladegeräts 4 1 3 2 ...

Page 119: ...trieb mit Voralarm wegen mangelhaftem Ladestatus der Batterie Shutdown steht kurz bevor Blinkt im Stand by Programmierte Einschaltfunktion aktiv Netzversorgung nicht vorhanden LED Last auf Bypass Leuchtet Lastversorgung über Bypass LED Standby Alarm Leuchtet Vorhandener Alarm Blinkt Standby LED Batteriewechsel Leuchtet Batteriewechsel erforderlich Blinkt Überlastalarm Batterie LED ECO Modus Leucht...

Page 120: ... der USV Serie mit getrenntem Bypass kann man Eingangsleitung und Bypass Leitung trennen Der USV Ausgang wird mit der Bypass Leitung gleichgeschaltet so dass es bei einem automatischen Einschreiten des Bypasses oder bei einem manuellen Schließen der Bypass Leitung SWMB zu keinen falschen Wandlungen zwischen den Gegentaktspannungen kommen kann ...

Page 121: ...d voller Batterieleistung 1 2 61 kW 2245 kcal h 8910 B T U h 3 65 kW 3140 kcal h 12460 B T U h 4 75 kW 4074 kcal h 16170 B T U h Umgewandelte Leistung bei verzerrender Nennlast pf 0 7 und voller Batterieleistung 1 2 41 kW 2070 kcal h 8220 B T U h 3 12 kW 2680 kcal h 10640 B T U h 4 12 kW 3540 kcal h 14060 B T U h Kühlgebläseleistung am Installationsort 2 1400m h 2000 m h 2600mc h Stromverlust an d...

Page 122: ...relative Luftfeuchtigkeit ohne Kondensatbildung darf max 90 betragen Sicherstellen dass die Raumtemperatur bei Betrieb der USV zwischen 0 und 40 C beträgt Die USV ist zum Betrieb bei einer Raumtemperatur zwischen 0 und 40 C vorgesehen Die optimale Betriebstemperatur der Batterien in der USV liegt zwischen 20 C und 25 C Beträgt die durchschnittliche Lebensdauer der Batterien bei einer Raumtemperatu...

Page 123: ...iden Haltebügel mit denen die USV an der Transportpalette befestigt ist entfernen dazu die Schrauben Typ A und B entfernen Die zuvor abmontierten Haltebügel dienen gleichzeitig als Rampen Die beiden Rampen mit den Schrauben Typ A an der Transportpalette in Übereinstimmung mit dem Radstand der Transporträder anbringen Die Bremsen der Vorderräder ggf entriegeln Sicherstellen dass die Klappe gut vers...

Page 124: ...ung des Geräts Ein und Ausschalten und für etwaige Wartungsmaßnahmen lassen 1 5 m Der obere Teil muss für etwaige Wartungsmaßnahmen mindestens 50cm Abstand zur Decke aufweisen Seitlich muss die USV für eine ausreichende Umwälzung der Kühlluft mindestens 30 cm Abstand zur Wand aufweisen Auf der Oberseite keine Gegenstände ablegen Nach dem Aufstellen das Gerät in seiner Aufstellposition verriegeln d...

Page 125: ...der an der Klemmleiste angeschlossen werden kann beträgt 95 mm Schlauch und Hartkabel GM 3100 PRO Der maximale Querschnitt der Kabel der in die Klemmen eingesetzt werden kann beträgt 95 mm 2 für die PHASEN und 150 mm 2 für die Batterien Schläuche und Rohre ANORDNUNG DER VERBINDUNGSKABEL UND EINSETZEN DER FERRITRINGKERNE Es wird empfohlen die Leistungskabel wie folgt zu verlegen von der Rückseite d...

Page 126: ...ment nachprüfen dass keine gefährlichen Stromspannungen vorhanden sind Als Erstes muss der Schutzleiter Erdleiter an die mit PR gekennzeichnete Klemme angeschlossen werden Die USV darf keinesfalls ohne eine effiziente Erdung betrieben werden Der Eingangs Neutralleiter muss stets verbunden sein ACHTUNG Es ist ein vierpoliges Dreiphasensystem erforderlich Die Standardausführung der USV muss an eine ...

Page 127: ...chließen Eingangs Ausgangs Bypass und Batteriekabel an der Klemmleiste anschließen dabei in Anbetracht der nachstehenden Abbildung auf ihre korrekte Position und Polung achten Anschluß der Neutralleiter von Batterie Eingang und Ausgang an der Neutralleiterschiene Hinweis PE M6 N M8 Schraube Nach vollendeter Installation und Überprüfung der korrekten Anschlüsse siehe Abschnitt Erstmaliges Einschalt...

Page 128: ...i in Anbetracht der nachstehenden Abbildung auf ihre korrekte Position und Polung achten Anschluß der Neutralleiter von Batterie Eingang und Ausgang an der Neutralleiterschiene Hinweis PE M6 N M8 Schraube Der Eingangs Neutralleiter und die Bypass Leitung müssen stets verbunden sein Die Eingangs und Bypasslinien müssen stets dasselbe Potential wie der Neutralleiter aufweisen Nach vollendeter Instal...

Page 129: ...ließen Eingangs Ausgangs Bypass und Batteriekabel an der Klemmleiste anschließen dabei in Anbetracht der nachstehenden Abbildung auf ihre korrekte Position und Polung achten Anschluß der Neutralleiter von Batterie Eingang und Ausgang an der Neutralleiterschiene Hinweis PE M6 N M8 Schraube Nach vollendeter Installation und Überprüfung der korrekten Anschlüsse siehe Abschnitt Erstmaliges Einschalten...

Page 130: ... in Anbetracht der nachstehenden Abbildung auf ihre korrekte Position und Polung achten Anschluß der Neutralleiter von Batterie Eingang und Ausgang an der Neutralleiterschiene Hinweis PE M6 N M8 Schraube Der Eingangs Neutralleiter und die Bypass Leitung müssen stets verbunden sein Die Eingangs und Bypasslinien müssen stets dasselbe Potential wie der Neutralleiter aufweisen Nach vollendeter Install...

Page 131: ...131 SCHALTPLÄNE FÜR DEN ANSCHLUSS AN DIE STROMANLAGE USV ohne Lastwechsel des Neutralleiters USV mit galvanisch isoliertem Eingang USV mit galvanisch isoliertem Ausgang ...

Page 132: ...USV ohne Lastwechsel des Neutralleiters und getrenntem Bypass Eingang USV mit galvanisch isoliertem Eingang und getrenntem Bypass Eingang USV mit galvanisch isoliertem Ausgang und getrenntem Bypass Eingang ...

Page 133: ... zusammengelegt und müssen somit dasselbe Potential aufweisen Bei unterschiedlichem Versorgungspotential muss an einem der beiden Eingänge ein Isoliertransformator verwendet werden USV ohne Lastwechsel des Neutralleiters und getrenntem Bypass Eingang USV mit getrennten Bypass Eingang und Anschluss an einer unabhängigen Versorgungsleitung und mit galvanisch isoliertem Eingang USV mit getrennten Byp...

Page 134: ...en Tabelle Externe automatische AC Schutzvorrichtungen Mod UPS Netzeingang Getrennter Bypass Eingang optional 60kVA 100A 100A 80kVA 125A 125A 100kVA 160A 160A Bei nicht linearer Last muss der Neutralleiter N nach Prüfung vor Ort entsprechend überdimensioniert werden Fall die der USV vorgeschaltete Schutzvorrichtung den Neutralleiter trennt so muss sie auch alle Phasenleiter trennen vierpoliger Sch...

Page 135: ...halter anzubringen die gemeinsam mit dem Differentialschalter am Eingang koordiniert werden Der vorgeschaltete Differentialschalter muss folgende Merkmale aufweisen Der Differentialstrom muss der Summe aus USV Last entsprechen Zur Vermeidung eines zu frühen Einschreitens wird empfohlen eine gewisse Toleranzspanne mit einzuberechnen Empfehlung 300mA Typ B Verzögerung mindestens 0 1s Der Leckstrom d...

Page 136: ...hältlich Diese Option muss nach der Installation mit der Konfigurationssoftware freigeschaltet werden HILFSKONTAKTE An der Klemmleiste der USV sind zusätzliche Klemmen zum Anschluss der Hilfskontakte der Trennschalter der Wartungs Bypass Fernsteuerung und der Ausgangs Fernsteuerung vorgesehen Diese sind als SERVICE BYPASS und AUX SWOUT entsprechend gekennzeichnet Zur Installation siehe Darstellung...

Page 137: ...htung kann man die Messungen des Netz des Ausgangs des Batteriestroms usw Überwachen und etwaige Alarmmeldungen bzw Betriebsstörungen erkennen Nähere Informationen zu Gebrauch und Anschluss finden Sie im entsprechenden Handbuch ZUSATZ ANSCHLUSS OPTIONAL ENERGYSHARE Programmierbare Ausgangsbuchse optional mit der bei bestimmten Betriebsbedingungen eine automatische Trennung der an sie angeschlossen...

Page 138: ...uerung angezeigt wird Wird dieser Anschluss nicht ausgeführt kann es zu einer Lastunterbrechung mit entsprechenden Schäden an der USV kommen Trennschalter und Leistungskabel müssen den Stromwerten der USV entsprechen Ein zweifach isoliertes Kabel mit 1 mm Querschnitt zum Anschluss an die Klemmen SERVICE BYPASS und AUX SWOUT an die jeweiligen Kontakte der Trennschalter der WARTUNGS BYPASS FERNSTEUE...

Page 139: ...ungsfähigkeit der Batterie Es folgen eine Darstellung des Blockschemas der USV sowie eine Beschreibung der einzelnen Bestandteile Blockschema der USV WICHTIG Unsere unterbrechungsfreien Stromaggregate wurden so geplant und entwickelt dass sie auch bei besonders intensiver Nutzung eine lange Lebensdauer gewährleisten Es wird jedoch darauf hingewiesen dass es sich um Stromgeräte handelt die einer re...

Page 140: ...lt ist Schließen der Trennschalter Sicherungen der externen Batterieleitung Korrekte Polung der Anschlüsse überprüfen dann die Trennschalter Sicherungen der externen Batterieleitung schließen ACHTUNG Bei nicht korrekter Ausführung der Anschlüsse bzw bei Nicht Übereinstimmung mit den Angaben aus dem Abschnitt Stromanschlüsse kann es zu Schäden an den Sicherungen der Batterie und an den anderen Schu...

Page 141: ...uriert werden um die korrekten Werte der gesamten Nennleistung der Batterie einzustellen Dieser Vorgang erfolgt über die Konfigurationssoftware und ist dem Servicepersonal vorbehalten Vom Hauptmenü aus gelangt man mit der Taste zum Einschaltmenü Bei Anfrage nach Bestätigung JA wählen mit bestätigen und einige Sekunden lang warten Sicherstellen dass die USV auf Betriebsstatus mit Umrichter Lastvers...

Page 142: ...edrückt halten Die USV wird zugeschaltet das Display geht an Mit der Taste weiter zum Einschaltmenü Bei Anfrage nach Bestätigung JA wählen und erneut mit bestätigen Alle Leds am Display leuchten etwa 1 Sekunde lang auf alle 7 Sekunden wird Signalton wird abgegeben Der Einschaltvorgang ist beendet sobald die USV auf Batteriebetrieb schaltet Hinweis Wird der eben beschriebene Vorgang nicht innerhalb...

Page 143: ...Batterieleitung Umrichter Last Ausgangsleitung des Umrichters Batteriewechsel Automatischer statischer Bypass Das Schema zeigt die drei Leitungsmodule PFC Converter Wandler Inverter Umrichter Automatic Static Bypass an Jedes Modul kann sich in einem der folgenden drei Zustände befinden Modul aus Modul an normaler Betrieb Alarm oder Sperre des Moduls Die folgenden Symbole hingegen zeigen den Energi...

Page 144: ...nüs angezeigt USV STATUS FEHLER STÖRUNGENI Bereich in dem der Betriebsstatus der USV angezeigt wird Die erste Zeile ist immer aktiviert und zeigt durchgehend den aktuellen Betriebsstatus der USV an Die zweite Zeile erscheint nur bei einem Fehler bzw einer Störung der USV und zeigt auch die Art und Weise des erhobenen Fehlers Defekts an Rechts neben jeder Zeile wird der entsprechende Code eingeblen...

Page 145: ...145 DISPLAYMENÜS ...

Page 146: ...ie USV nicht synchronisiert schaltet auf Nennfrequenz und der Bypass kann nicht mehr genutzt werden free running mode MANUELLER BYPASS SWMB ACHTUNG Bei auftretenden Betriebsstörungen bitte an den Kundendienst wenden Die Wartung der USV darf ausschließlich von qualifiziertem vom Hersteller geschultem Fachpersonal vorgenommen werden ACHTUNG Im Geräteinneren können gefährliche Spannungen vorhanden se...

Page 147: ...et der über die Konfigurationssoftware aktiviert und konfiguriert wird Ist dieser Modus aktiviert so erfolgt bei Rückkehr der Netzversorgung nach einem Batteriebetrieb die Leistungsaufnahme vom Netz progressiv um durch den Schub ein etwaiges vorgeschaltetes Stromaggregat nicht zu überlasten Diese Übergangszeit kann man zwischen 1 und 125 Sekunden einstellen Die werksseitige Einstellung liegt bei 1...

Page 148: ...h gleichzeitiges Drücken der Tasten F1 und F4 mehr als 2 Sekunden schaltet die Spracheinstellung automatisch auf Englisch Die Bearbeitung dieser Funktion kann mit der Konfigurationssoftware gesperrt werden In der nachstehenden Tabelle sind alle Konfigurationsmöglichkeiten aufgeführt die mit der Konfigurationssoftware bearbeitet werden können FUNCTION DESCRIPTION DEFAULT Operating mode Wählt eine d...

Page 149: ...ierten Spannungsbereiches für Umschaltung auf Bypass Low 180V High 264V Eco mode sensibility Auswahl der Eingriffssensibilität während des ECO Betriebs Normal Eco mode min max threshold Auswahl des Spannungsbereiches für ECO Betrieb Low 200V High 253V UPS without battery Betriebsart ohne Batterie für Frequenzumformer Stabilisierer Operating with Batteries Battery low time Zeit für Alarmsignal Vorw...

Page 150: ...STECKVERBINDER RS232 STECKER USB STECKER PIN NAME TYP SIGNAL PIN SIGNAL 1 IN 1 VBUS 2 TX OUT TX serielle Leitung 2 D 3 RX IN RX serielle Leitung 3 D 4 4 GND 5 GND POWER 6 OUT 7 8 15V POWER Isolierte Versorgung 15V 5 80mA max 9 WKATX OUT Vorschaltgerät ATX COMMUNICATION SLOT Die USV ist mit zwei Erweiterungs Steckplätzen für zusätzliche Schnittstellen Karten ausgestattet die es dem Gerät ermögliche...

Page 151: ...Umrichter Betrieb wieder auf Wird die Überbrückung bei Netzausfall aufgehoben nimmt die USV den Batteriebetrieb wieder auf 4 5 12 BATTERY LOW OUTPUT 1 Zeigt einen geringen Ladestatus der Batterie an wenn Kontakt 5 12 geschlossen ist 1 6 13 14 BATTERY WORKING OUTPUT 2 Zeigt den Batteriebetrieb der USV an wenn Kontakt 6 14 geschlossen ist 1 9 10 LOCK OUTPUT 3 Zeigt eine Blockierung Sperre der USV an...

Page 152: ...Stromschub auszugleichen Ton C Dieser Signalton ertönt wenn die USV vor dem Voralarm für leere Batterie Ton D auf Batteriebetrieb wechselt Der Signalton kann abgestellt werden siehe Abschnitt Graphisches Display Ton D Dieser Signalton ertönt beim Batteriebetrieb wenn die Grenze zum Voralarm für leere Batterie überschritten wurde Der Signalton kann abgestellt werden siehe Abschnitt Graphisches Disp...

Page 153: ...mit dem mitgelieferten seriellen Kabel oder den USB Port des USV mit einem USB Port des PC unter Verwendung eines Standard USB Kabels verbinden Laden Sie von der Webseite www ups technet com die Software für das gewünschte Betriebssystem herunter Folgen Sie den Anleitungen des Installationsprogramms Für genauere Informationen zur Installation und zum Gebrauch lesen Sie im Softwarehandbuch nach das...

Page 154: ... ACHTUNG Ohne diese Verbindung können Schäden an der USV und oder der Last entstehen Alle Klemmanschlüsse wie im Abschnitt Installation beschrieben ausführen TRENNSCHALTER HINTER DER KLAPPE SWIN GEÖFFNET Trennschalter schließen AUSFALL DER NETZVERSORGUNG BLACKOUT Spannungsversorgung des Stromnetzes überprüfen Zur Versorgung der Last ggf auf Batteriebetrieb einschalten VORGSCHALTETE SCHUTZVORRICHTU...

Page 155: ...CODES ANGEZEIGT F09 F10 STÖRUNG DES EINGANGS STATUS DER USV Manuellen Bypass SWMB betätigen USV aus und dann wieder einschalten Manuellen Bypass abschalten Bei anhaltender Störung bitte an das nächste Kundendienstzentrum wenden SPANNUNG AN PHASE 1 DEUTLICH NIEDRIGER ALS AN DEN BEIDEN ANDEREN PHASEN SWIN öffnen auf Batteriebetrieb einschalten Einschaltvorgang abwarten und SWIN wieder schließen AUF ...

Page 156: ...ATTERIESPANNUNG DEN EINGEGEBENEN SCHWELLENWERT ÜBERSTEIGT Das Aufladen der Batterie abwarten oder das Einschalten vom Einschaltmenü aus Einschalten manuell steuern Dazu die Taste ON mindestens 2 Sekunden gedrückt halten AUF DEM DISPLAY WIRD EINER ODER MEHRERE DER FOLGENDEN CODES ANGEZEIGT F06 F07 F08 EINGANGS FERNSCHALTER BLOCKIERT Manuellen Bypass SWMB betätigen USV ausschalten SWIN öffnen und bi...

Page 157: ...BSTAND ZUR WAND ZU GERING STÖRUNG DES TEMPERATURSENSORS ODER DER KÜHLUNG DES BATTERIELADEGERÄTS Ursache der Überhitzung beheben Manuellen Bypass SWMB einstellen ohne die USV auszuschalten und abwarten bis die Temperatur des Ladegeräts sinkt Manuellen Bypass abschalten Bei anhaltender Störung bitte an das nächste Kundendienstzentrum wenden AUF DEM DISPLAY WIRD EINER ODER MEHRERE DER FOLGENDEN CODES...

Page 158: ... Lastversorgung S11 USV blockiert Stromversorgung über Bypass S12 BOOST oder Batterieladegerät blockiert Keine Lastversorgung S13 Frequenzwandler Lastversorgung über Umrichter COMMAND Weist auf eine aktive Fernsteuerung hin CODE BESCHREIBUNG C01 Fernsteuerung zum Ausschalten C02 Fernsteuerung der Stromversorgung über Bypass C03 Fernsteuerung zum Einschalten C04 Batterie Test läuft C05 Manueller By...

Page 159: ...ng Grenzwert überschritten A19 Überschreiten des Spitzenstroms an Ausgang Phase 1 A20 Überschreiten des Spitzenstroms an Ausgang Phase 2 A21 Überschreiten des Spitzenstroms an Ausgang Phase 3 A22 Last an Phase 1 der eingestellte Grenzwert A23 Last an Phase 2 der eingestellte Grenzwert A24 Last an Phase 3 der eingestellte Grenzwert A25 Ausgangs Trennschalter geöffnet A26 Keine Plusbatterien oder Ba...

Page 160: ...g Phase 2 Umrichter F16 Sinusverformung Phase 3 Umrichter F17 Betriebsstörung Umrichter F19 Überspannung Plusbatterien F20 Überspannung Minusbatterien F21 Spannungsmangel Plusbatterien F22 Spannungsmangel Minusbatterien F23 Überlast am Ausgang F26 Ausgangs Fernschalter Phase 1 blockiert öffnet nicht F27 Ausgangs Fernschalter Phase 2 blockiert öffnet nicht F28 Ausgangs Fernschalter Phase 3 blockier...

Page 161: ...ichter Phase 3 L20 Dauerspannung am Umrichter Ausgang oder Sinusverformung am Umrichter Phase 1 L21 Dauerspannung am Umrichter Ausgang oder Sinusverformung am Umrichter Phase 2 L22 Dauerspannung am Umrichter Ausgang oder Sinusverformung am Umrichter Phase 3 L23 Überlast an Ausgang Phase 1 L24 Überlast an Ausgang Phase 2 L25 Überlast an Ausgang Phase 3 L26 Kurzschluss am Ausgang Phase 1 L27 Kurzsch...

Page 162: ...tralleiter 4 polig Nennfrequenz 4 50 60Hz Ausgangs Nennstrom 87A 116A 145A Scheinbare Ausgangs Nennleistung 60kVA 80kVA 100kVA Aktive Ausgangs Nennleistung 54kW 72kW 90kW Ausgangs Leistungsfaktor 0 9 Kurzschlussstrom 1 5 x In bei t 500ms Genauigkeit der Ausgangsspannung bei 400Vac Ausgangsspannung 1 Statische Stabilität 5 0 5 Dynamische Stabilität 3 Widerstandslast 6 Harmonische Verzerrung der Aus...

Page 163: ... Batterie bei 10A 2 100 Last THDv 1 3 Um die Ausgangsspannung innerhalb des angegebenen genauen Frequenzbereichs zu halten kann nach langem Betrieb eine Kalibrierung erforderlich werden 4 Liegt die Netzfrequenz innerhalb von 5 des gewählten Werts ist die USV mit dem Netz synchronisiert Hat die Frequenz den Grenzwert überschritten oder bei Batteriebetrieb ist die Frequenz die gewählte Frequenz 0 01...

Page 164: ...conformément à la réglementation en vigueur Pour la construction de ce produit aucun matériau dangereux tel que CFC HCFC ou amiante n a été utilisé L emballage est conçu en MATIÈRE RECYCLABLE Traiter tous les éléments individuellement en respectant les normes en vigueur dans le pays d utilisation du produit Faire référence au tableau suivant pour l identification des matériaux DESCRIPTION MATERIAU...

Page 165: ...DES CÂBLES DE RACCORDEMENT 179 DISPOSITION DES CÂBLES DE RACCORDEMENT ET INSERTION DES TORES DE FERRITE 179 OPÉRATIONS PRÉLIMINAIRES AUX CONNEXIONS 180 CONNEXION DES MODELES GM 360 380 PRO AVEC BYPASS STANDARD 181 CONNEXION DES MODELES GM 360 380 PRO AVEC BY PASS SÉPARÉ 182 CONNEXION DU MODELE GM 3100 PRO AVEC BYPASS STANDARD 183 CONNEXION DU MODELE GM 3100 PRO AVEC BY PASS SÉPARÉ 184 SCHÉMAS DE C...

Page 166: ...RAPHIQUE 197 MENU ÉCRAN 199 MODES DE FONCTIONNEMENT 200 BY PASS MANUEL SWMB 200 ALIMENTATION AUXILIAIRE REDONDANTE POUR BY PASS AUTOMATIQUE 201 POWER WALK IN 201 DÉCLASSEMENT DE LA PUISSANCE POUR LES CHARGES DE 200 208V PHASE NEUTRE 201 CONFIGURATION UPS 202 PORTS DE COMMUNICATION 204 CONNECTEURS RS232 E USB 204 COMMUNICATION SLOT 204 PORT AS400 205 AVERTISSEUR SONORE BUZZER 206 LOGICIEL 207 LOGIC...

Page 167: ...ndre des prestations élevées telles que ZERO IMPACT SOURCE garantit une basse distorsion d entrée un facteur de puissance proche de un et une compatibilité maximale avec le groupe électrogène BATTERY CARE SYSTEM permet une gestion personnalisée des batteries pour différentes typologies d emploi ainsi que le monitorage en continu de ces batteries tout en augmentant ainsi l efficacité et la durée du...

Page 168: ...168 VUES DE FACE UPS Panneau de contrôle avec écran graphique Roues de déplacement de l UPS Porte frontale avec serrure Freins de blocage Grille d aération ...

Page 169: ...SB Port communication RS232 Logement Carte Parallèle UPS en option De gauche à droite Sectionneur d entrée SWIN Sectionneur de by pass séparé en option SWBYP Sectionneur de by pass manuel SWMB Sectionneur de sortie SWOUT Sectionneur à usage exclusif du personnel de service QN Slot pour cartes accessoires de communication Panneau de protection des bornes ...

Page 170: ...ns de puissance BY PASS SÉPARÉ en option OUTPUT L1 L2 L3 Connexions de puissance SORTIE N Connexion de puissance N BATTERIES N ENTRÉE N BY PASS N SORTIE PE Connexions de puissance TERRE A1 A2 Connexion pour signal de synchronisme externe A3 A4 Connexion pour auxiliaire by pass d entretien à distance A5 A6 Connexion pour auxiliaire sectionneur de sortie à distance EXT BATT TEMP Connexion pour sonde...

Page 171: ...ce BY PASS SÉPARÉ en option OUTPUT L1 L2 L3 Connexions de puissance SORTIE N Connexion de puissance N BATTERIES N ENTRÉE N BY PASS N SORTIE PE Connexions de puissance TERRE A1 A2 Connexion pour signal de synchronisme externe A3 A4 Connexion pour auxiliaire by pass d entretien à distance A5 A6 Connexion pour auxiliaire sectionneur de sortie à distance EXT BATT TEMP Connexion pour sonde de températu...

Page 172: ... DE DOS UPS Prises EnergyShare Aux Output 10A max et protection correspondante en option Ventilation cartes de puissance Logement accessoire Carte contacts MultiCOM 382 Ventilation chargeur de batterie 4 1 3 2 ...

Page 173: ...nement avec batterie avec pré alarme de fin de charge ou extinction shutdown imminente Clignotante en Stand by fonction de redémarrage programmé activée et absence de réseau LED charge sur bypass Allumée fixe charge alimentée avec ligne bypass LED stand by alarme Allumée fixe présence alarme Clignotante état de Stand by LED batteries à remplacer Allumée fixe batteries à remplacer Clignotante alarm...

Page 174: ...d UPS avec By pass Séparé permet un raccordement distinct entre la ligne d entrée et la ligne de by pass La sortie de l UPS sera synchronisée à la ligne de by pass de manière à ce qu en cas d intervention automatique du by pass ou de fermeture manuelle du by pass SWMB il n y ait aucune commutation incorrecte entre les tensions en contre phase ...

Page 175: ...245 kcal h 8910 B T U h 3 65 kW 3140 kcal h 12460 B T U h 4 75 kW 4074 kcal h 16170 B T U h Puissance dissipée à charge nominale de distorsion pf 0 7 et avec batteries chargées 1 2 41 kW 2070 kcal h 8220 B T U h 3 12 kW 2680 kcal h 10640 B T U h 4 12 kW 3540 kcal h 14060 B T U h Local d installation portée ventilateurs pour aspiration chaleur 2 1400m 3 h 2000 m 3 h 2600mc h Courant dispersé vers l...

Page 176: ...tive ne doit pas dépasser 90 sans condensation Vérifier que la température ambiante avec UPS en service soit maintenue entre 0 et 40 C L UPS est capable de fonctionner à une température ambiante comprise entre 0 et 40 C La température conseillée de fonctionnement de l UPS et des batteries est comprise entre 20 et 25 C Si la durée de vie des batteries est en moyenne de 5 ans à une température de fo...

Page 177: ...ent l UPS à la palette en dévissant les vis de type A et B Les plaques retirées précédemment servent aussi de plateformes de transfert Fixer les plaques à la palette en utilisant les vis de type A en faisant attention de bien les aligner avec les roues de l UPS Si nécessaire débloquer les freins des roues antérieures S assurer que la porte soit bien fermée ATTENTION nous conseillons de faire desce...

Page 178: ...tir un espace libre suffisant qui permette d effectuer correctement les opérations de démarrage extinction et les éventuelles opérations d entretien 1 5 m La partie supérieure doit être à au moins 50 cm du plafond de manière à permettre les opérations d entretien La partie postérieure de l UPS doit être placée à au moins 30 cm de la cloison pour permettre une évacuation correcte de l air soufflé d...

Page 179: ...câbles que l on peut insérer au bornier est égale à 95 mm 2 câbles flexibles et rigides GM 3100 PRO la section maximale des câbles que l on peut insérer dans les bornes est de 95 mm 2 pour les PHASES et 150 mm 2 pour les batteries câbles flexibles et rigides DISPOSITION DES CÂBLES DE RACCORDEMENT ET INSERTION DES TORES DE FERRITE On conseille de câbler les câbles de puissance en les acheminant par...

Page 180: ...ltimètre qu aucune tension dangereuse ne soit présente La première connexion à effectuer est celle du conducteur de protection câble de terre à raccorder à la vis siglée PE L UPS doit fonctionner avec le raccordement à l installation de terre Le Neutre d entrée doit toujours être branché ATTENTION un système de distribution triphasé à 4 fils est requis La version standard de l UPS doit être raccor...

Page 181: ...n câble de terre à la vis siglée PE Raccorder les câbles d entrée de sortie et de batterie au bornier en respectant les positions et les polarités indiquées dans la figure suivante Connecter N BATT N ENTREE et N SORTIE sur la barre de neutre Note PE Vis M6 N Vis M8 Une fois les opérations d installation terminées vérifier les connexion voir paragraphe Premier allumage et configurations initiales r...

Page 182: ...et de batterie au bornier en respectant les positions et les polarités indiquées dans la figure suivante Connecter N BATT N ENTREE et N SORTIE sur la barre de neutre Note PE Vis M6 N Vis M8 Le Neutre d entrée et de by pass doivent toujours être raccordés Les lignes d entrée et de by pass doivent être référées au même potentiel de Neutre Une fois les opérations d installation terminées vérifier les...

Page 183: ...câble de terre à la vis siglée PE Raccorder les câbles d entrée de sortie et de batterie au bornier en respectant les positions et les polarités indiquées dans la figure suivante Connecter N BATT N ENTREE et N SORTIE sur la barre de neutre Note PE Vis M6 N Vis M8 Une fois les opérations d installation terminées vérifier les connexion voir paragraphe Premier allumage et configurations initiales rét...

Page 184: ...tie et de batterie au bornier en respectant les positions et les polarités indiquées dans la figure suivante Connecter N BATT N ENTREE et N SORTIE sur la barre de neutre Note PE Vis M6 N Vis M8 Le Neutre d entrée et de by pass doivent toujours être raccordés Les lignes d entrée et de by pass doivent être référées au même potentiel de Neutre Une fois les opérations d installation terminées vérifier...

Page 185: ...185 SCHEMAS DE CONNEXION A L INSTALLATION ELECTRIQUE UPS sans variation de régime de neutre UPS avec isolation galvanique en entrée UPS avec isolation galvanique en sortie ...

Page 186: ... UPS sans variation de régime de neutre et avec entrée by pass séparée UPS avec isolation galvanique en entrée et avec by pass séparé UPS avec isolation galvanique en sortie et avec entrée by pass séparée ...

Page 187: ...la ils devront se référer au même potentiel Si les deux alimentations sont différentes il est nécessaire d utiliser un transformateur d isolement sur une des entrées UPS sans variation de régime de neutre et avec entrée by pass séparée connectée sur ligne d alimentation indépendante UPS avec entrée de by pass séparée connectée sur ligne d alimentation indépendante et avec isolation galvanique en e...

Page 188: ...vant Protections AC externes automatiques Mod UPS Entrée réseau Entrée by pass séparé en option 60kVA 100A 100A 80kVA 125A 125A 100kVA 160A 160A Dans le cas de charge non linéaire surdimensionner de manière appropriée la ligne de neutre N après avoir contrôlé et évalué le type d équipement Si le dispositif de protection en amont de l UPS interrompt le conducteur de neutre il doit interrompre en mê...

Page 189: ...rentiels supplémentaires si possible coordonnés aux interrupteurs d entrée L interrupteur différentiel situé en amont devra avoir les caractéristiques suivantes Courant différentiel adapté à la somme de UPS charge l on conseille de garder une marge appropriée pour éviter toutes interventions intempestives 300mA conseillé Type B Retard supérieur ou égal à 0 1s Le courant de dispersion de la charge ...

Page 190: ...externe Après l installation effectuer l activation de l option à l aide du logiciel de configuration CONTACTS AUXILIAIRES Dans la zone des connexions UPS des bornes sont disponibles pour raccorder les contacts auxiliaires des sectionneurs by pass d entretien à distance et sortie à distance Elles sont respectivement identifiées par les inscriptions SERVICE BY PASS et AUX SWOUT Pour l installation ...

Page 191: ... batterie etc et de relever les éventuelles alarmes Pour tout détail relatif à l utilisation et aux branchements se reporter au manuel respectif PRISES AUXILIAIRES EN OPTION ENERGYSHARE Prise de sortie en option programmable qui permet dans des conditions de fonctionnement définies de déconnecter automatiquement la charge qui s y applique Les évènements qui déterminent le détachement automatique d...

Page 192: ...tion de la charge et un endommagement consécutif de l UPS Utiliser des sectionneurs et de câbles de puissance appropriée aux courant de l UPS Utiliser un câble double isolement de section de 1mm 2 pour le raccordement des bornes SERVICE BY PASS et AUX SWOUT aux contacts auxiliaires relatifs des sectionneurs BY PASS D ENTRETIEN À DISTANCE 3 et SORTIE 2 Vérifier la compatibilité entre le By pass d e...

Page 193: ... en blocs de l UPS ainsi que la description des parties individuelles qui le composent Diagramme de l UPS par blocs IMPORTANT nos groupes de continuité sont conçus et réalisés pour une longue durée même dans des conditions de services plus rigoureuses Nous vous rappelons toutefois qu il s agit d équipements électriques de puissance et qu ils ont besoin de contrôles périodiques Par ailleurs certain...

Page 194: ...osition fermée Fermeture sectionneur fusibles de la ligne de batterie externe à l UPS Après avoir vérifié la polarité correcte des connexions fermer le sectionneur fusibles de la ligne de batterie externe à l UPS ATTENTION si un raccordement non conforme à ce qui est reporté dans le paragraphe branchements électriques a été effectué les fusibles de batterie et d autres protections pourraient être ...

Page 195: ...er les valeurs correctes de la capacité nominale globale de batterie Cette opération doit être effectuée à l aide du logiciel de configuration dédié et réservé au personnel de Service A partir du menu principal appuyer sur la touche pour entrer dans le menu d allumage A la demande de confirmation sélectionner OUI appuyer sur pour confirmer et attendre quelques secondes Vérifier que l UPS se mette ...

Page 196: ... Appuyer sur le bouton pour entrer dans le menu d allumage A la demande de confirmation sélectionner OUI et appuyer de nouveau sur le bouton pour confirmer Toutes les leds autour de l écran s allument pendant 1 sec environ et l avertisseur sonore commence à émettre un bip toutes les 7 secondes La séquence d allumage se termine lorsque l UPS se met en état de fonctionnement par batterie Note si la ...

Page 197: ...verseur Load Chargement Inverter Output Line Entrée sortie convertisseur Battery Charge Charge batterie Automatic Static Bypass By pass statique automatique Le schéma montre l état des trois modules logiques de puissance PFC Converter Inverter Automatic Static Bypass Chaque module peut présenter l un des états suivants Module éteint Module allumé en fonctionnement normal Module en alarme ou en blo...

Page 198: ...e l état de fonctionnement de l UPS La première ligne est toujours active et affiche constamment l état de l UPS au moment de la consultation La seconde ligne s active uniquement en présence d une éventuelle erreur et ou panne de l UPS et montre le type d erreur panne rencontrée A droite les lignes affichent respectivement le code correspondant à l évènement en cours FONCTION DES TOUCHES Zone divi...

Page 199: ...199 MENU ECRAN ...

Page 200: ...n se positionnant à la fréquence nominale et le by pass n est plus utilisable free running mode BY PASS MANUEL SWMB ATTENTION si des dysfonctionnements se présentent contacter le centre d assistance L entretien de l UPS peut être effectué uniquement par un personnel qualifié et autorisé par le fabricant ATTENTION il peut y avoir une tension dangereuse à l intérieur de l équipement même avec les se...

Page 201: ... logiciel de configuration Lorsque le mode est actif au retour du réseau après une période d autonomie l UPS continue de l absorber de manière progressive pour ne pas mettre en difficulté à cause des pics un éventuel groupe électrogène installé en amont La durée transitoire peut être configurée de 1 à 125 secondes La valeur de défaut est de 10 secondes lorsque la fonction est activée Durant la pér...

Page 202: ...se est automatiquement reconfigurée La modification de la fonction peut être bloquée à l aide du logiciel de configuration Dans le tableau suivant se trouve la liste des configurations qui peuvent être modifiées grâce au logiciel de configuration fourni aux centres d assistance FUNCTION DESCRIPTION DEFAULT Operating mode Sélection du mode de fonctionnement de l ASI ON LINE Output voltage Sélection...

Page 203: ... tolerances la commutation sur Bypass est autorisée Low 180V High 264V Eco mode sensibility Sélection de la sensibilité en mode Eco Normal Eco mode min max threshold Sélection de la tolerance de tension acceptée pour le mode ECO Low 200V High 253V UPS without battery Mode de fonctionnement sans batteries Convertisseur de fréquence ou stabilisateur de tension Operating with Batteries Battery low ti...

Page 204: ...NECTEUR RS232 CONNECTEUR USB PIN NOM TYPE SIGNAL PIN SIGNAL 1 IN 1 VBUS 2 TX OUT TX ligne sérielle 2 D 3 RX IN RX ligne sérielle 3 D 4 4 GND 5 GND POWER 6 OUT 7 8 15V POWER Alimentation isolée 15V 5 80mA max 9 WKATX OUT Réveil alimentation ATX COMMUNICATION SLOT L UPS est fourni avec deux slots d expansion pour cartes de communication accessoires qui permettent à l équipement de dialoguer en utili...

Page 205: ...t en présence du réseau l UPS reprend un fonctionnement par convertisseur Si le pont est retiré en l absence de réseau l UPS reprend un fonctionnement par batterie 4 5 12 BATTERY LOW OUTPUT 1 Signale que les batteries arrivent à épuisement lorsque le contact 5 12 est fermé 1 6 13 14 BATTERY WORKING OUTPUT 2 Signale que l UPS fonctionne par batteries lorsque le contact 6 14 est fermé 1 9 10 LOCK OU...

Page 206: ... à l insertion d une charge de distorsion Son C Le signalement se présente lorsque l UPS passe en fonctionnement par batterie avant le signalement de fin de charge son D Il est possible d éteindre le signal voir paragraphe Ecran graphique Son D Le signalement se présente en fonctionnement par batterie lorsque l on atteint le seuil de fin de charge Il est possible d éteindre le signal voir paragrap...

Page 207: ...du câble série fourni ou bien raccorder le port USB de l onduleur à un port USB du PC à l aide d un câble standard USB Télécharger le logiciel depuis le site internet www ups technet com en sélectionnant le système d exploitation souhaité Suivre les instructions du programme d installation Pour de plus amples informations détaillées sur l installation et l utilisation consulter le manuel du logici...

Page 208: ...ON Si ce raccordement manque cela risque d endommager l UPS et ou la charge Raccorder le réseau aux bornes comme il est indiqué au paragraphe Installation LE SECTIONNEUR DERRIÈRE LE PORT SWIN EST OUVERT Fermer le sectionneur TENSION DE RÉSEAU MANQUANTE OU COUPÉE BLACKOUT Vérifier la présence de la tension de réseau électrique Eventuellement effectuer l allumage par batterie pour alimenter la charg...

Page 209: ...TS F09 F10 DYSFONCTIONNEMENT DE L ÉTAT D ENTRÉE DE L UPS Actionner le by pass manuel SWMB éteindre et ensuite rallumer l UPS Exclure le by pass manuel Si le problème persiste appeler le centre d assistance le plus proche LA PHASE 1 PRÉSENTE UNE TENSION TRÈS INFÉRIEURE AUX DEUX AUTRES PHASES Ouvrir SWIN effectuer l allumage par batterie attendre la fin de la séquence et fermer SWIN L ÉCRAN INDIQUE ...

Page 210: ...E EN ATTENTE QUE LA TENSION DE BATTERIE DÉPASSE LE SEUIL CONFIGURÉ Attendre la recharge des batteries ou forcer manuellement l allumage en allant dans le menu ALLUMAGE L ÉCRAN INDIQUE UN OU PLUSIEURS DES CODES SUIVANTS F06 F07 F08 TÉLÉRUPTEUR D ENTRÉE BLOQUÉ Actionner le by pass manuel SWMB éteindre l UPS ouvrir SWIN et contacter le centre d assistance le plus proche Attention une fois le SWIN ouv...

Page 211: ...MITÉ DE L UPS FENTES D AÉRATION OBSTRUÉES OU TROP PROCHES DES CLOISONS DYSFONCTIONNEMENT DU CAPTEUR DE TEMPÉRATURE OU DU SYSTÈME DE REFROIDISSEMENT DU CHARGEUR DE BATTERIE Résoudre la cause de la surtempérature Insérer le by pass manuel SWMB sans éteindre l UPS et attendre que la température du chargeur de batterie diminue Exclure le by pass manuel Si le problème persiste appeler le centre d assis...

Page 212: ...age charge non alimentée S11 UPS en blocage charge sur by pass S12 Stade BOOST ou chargeur de batterie en blocage charge non alimentée S13 Convertisseur de fréquence charge alimentée par convertisseur COMMAND indique la présence d une commande active CODE DESCRIPTION C01 Commande à distance d extinction C02 Commande à distance charge sur by pass C03 Commande à distance d allumage C04 Test batterie...

Page 213: ...Phase 1 A20 Pic de courant élevé sur sortie Phase 2 A21 Pic de courant élevé sur sortie Phase 3 A22 Charge sur Phase1 au seuil utilisateur configuré A23 Charge sur Phase 2 au seuil utilisateur configuré A24 Charge sur Phase 3 au seuil utilisateur configuré A25 Sectionneur de sortie ouvert A26 Batteries côté positif absentes ou fusibles de batterie ouverts A27 Batteries côté négatif absentes ou fus...

Page 214: ...déformée F16 Sinusoïde Phase 3 convertisseur déformée F17 Anomalie stade convertisseur F19 Surtension batteries positives F20 Surtension batteries négatives F21 Sous tension batteries positives F22 Sous tension batteries négatives F23 Surcharge en sortie F26 Télérupteur de sortie Phase1 bloqué n ouvre pas F27 Télérupteur de sortie Phase 2 bloqué n ouvre pas F28 Télérupteur de sortie Phase 3 bloqué...

Page 215: ...ase 3 L20 Tension continue en sortie convertisseur ou Sinusoïde convertisseur déformée Phase 1 L21 Tension continue en sortie convertisseur ou Sinusoïde convertisseur déformée Phase 2 L22 Tension continue en sortie convertisseur ou Sinusoïde convertisseur déformée Phase 3 L23 Surcharge sur sortie Phase 1 L24 Surcharge sur sortie Phase 2 L25 Surcharge sur sortie Phase 3 L26 Court circuit sur sortie...

Page 216: ...50 60Hz Courant nominal de sortie 87A 116A 145A Puissance apparente nominale en sortie 60kVA 80kVA 100kVA Puissance active nominale en sortie 54kW 72kW 90kW Facteur de puissance en sortie 0 9 Courant de court circuit 1 5 x In pendant t 500ms Précision de la tension en sortie référée à la tension sortie 400Vac 1 Stabilité statique 5 0 5 Stabilité dynamique 3 charge résistive 6 Distorsion Harmonique...

Page 217: ... batteries en charge avec 10A 2 100 load THDv 1 3 Pour maintenir la tension de sortie dans le champ de précision indiqué il peut être nécessaire de recalibrer après une longue période d exercice 4 Si la fréquence de réseau est incluse dans les 5 de la valeur sélectionnée l UPS est synchronisé avec le réseau Si la fréquence est hors tolérance ou en fonctionnement par batterie la fréquence est celle...

Page 218: ...tal desarrollado por la empresa de acuerdo con la normativa vigente En este producto no se utilizan materiales peligrosos como CFC HCFC o amianto El embalaje está realizado con MATERIAL RECICLABLE Eliminar cada material según las normativas vigentes en el país de uso del producto Remitirse a la tabla siguiente para identificar los materiales DESCRIPCIÓN MATERIAL Pallet Madera FOR Caja de embalaje ...

Page 219: ...N DE LOS CABLES DE CONEXIÓN 233 DISPOSICIÓN DE LOS CABLES DE CONEXIÓN E INTRODUCCIÓN DE LAS FERRITAS TOROIDALES 233 OPERACIONES PREVIAS A LAS CONEXIONES 234 CONEXIONES DEL MODELO GM 360 380 PRO CON BYPASS ESTÁNDAR 235 CONEXIONES DEL MODELO GM 360 380 PRO CON BYPASS SEPARADO 236 CONEXIONES DEL MODELO GM 3100 PRO CON BYPASS ESTÁNDAR 237 CONEXIONES DEL MODELO GM 3100 PRO CON BYPASS SEPARADO 238 ESQUE...

Page 220: ... MENÚ PANTALLA 253 MODALIDAD DE FUNCIONAMIENTO 254 BYPASS MANUAL SWMB 254 ALIMENTADOR AUXILIAR REDUNDANTE PARA BYPASS AUTOMÁTICO 255 POWER WALK IN 255 DESCLASAMENTO DE LA POTENCIA PARA CARGAS 200 208V FASE NEUTRO 255 CONFIGURACIÓN DEL UPS 256 PUERTOS DE COMUNICACIÓN 258 CONECTORES RS232 Y USB 258 COMMUNICATION SLOT 258 PUERTO AS400 259 SEÑALADOR ACÚSTICO ZUMBADOR 260 SOFTWARE 261 SOFTWARE DE MONIT...

Page 221: ...n han permitido alcanzar elevadas prestaciones como ZERO IMPACT SOURCE garantiza una baja distorsión de ingreso factor de potencia próximo a uno y de máxima compatibilidad con el grupo electrógeno BATTERY CARE SYSTEM permite una gestión personalizada de las baterías para los diferentes tipos y la monitorización continua de las mismas aumentando de este modo su eficacia y duración SMART INVERTER ga...

Page 222: ...222 VISTA ANTERIOR DEL UPS Panel de control con pantalla gráfica Ruedas para la movimentación del UPS Puerta frontal con cerradura Frenos de estacionamiento Rejilla de ventilación ...

Page 223: ...ción USB Puerto de comunicación RS232 Alojamiento Tarjeta Paralelo UPS opcional De izquierda a derecha Seccionador de ingreso SWIN Seccionador de bypass separado opcional SWBYP Seccionador de bypass manual SWMB Seccionador de salida SWOUT Seccionador de uso exclusivo del personal del service QN Slot para tarjetas accesorias de comunicación Panel cubre bornes ...

Page 224: ...nexión de potencia FASES DEL BYPASS SEPARADAS opcional OUTPUT L1 L2 L3 Conexión de potencia FASES DE SALIDA N Conexión de potencia N BATERÍA N ENTRADA N BYPASS N SALIDA PE Conexiones de potencia TIERRA A1 A2 Conexión por señal de sincronismo externo A3 A4 Conexión para bypass auxiliar de mantenimiento remoto A5 A6 Conexión para auxiliar seccionador de salida remota EXT BATT TEMP Conexión por sonda...

Page 225: ...ncia FASES DEL BYPASS SEPARADAS opcional OUTPUT L1 L2 L3 Conexión de potencia FASES DE SALIDA N Conexión de potencia N BATERÍA N ENTRADA N BYPASS N SALIDA PE Conexiones de potencia TIERRA A1 A2 Conexión por señal de sincronismo externo A3 A4 Conexión para bypass auxiliar de mantenimiento remoto A5 A6 Conexión para auxiliar seccionador de salida remota EXT BATT TEMP Conexión por sonda de temperatur...

Page 226: ...RIOR DEL UPS Tomas EnergyShare Aux Output 10A máx y correspondiente protección opcional Ventiladores tarjetas de potencia Alojamiento accesorio Tarjeta de contactos MultiCOM 382 Ventilador cargador de baterías 4 1 3 2 ...

Page 227: ...or batería con alarma previa de final de descarga o shutdown inminente Intermitente en Stand by función de reencendido programada activada y red ausente LED carga en bypass Encendido fijo carga alimentada por la línea bypass LED stand by alarma Encendido fijo alarma presente Intermitente estado de Stand by LED baterías a sustituir Encendido fijo baterías a sustituir Intermitente alarma de las bate...

Page 228: ... La serie de UPS con Bypass Separado permite una conexión diferente entre la línea de ingreso y la línea de bypass La salida del UPS estará sincronizada a la línea de bypass de modo que en caso de intervención del bypass automático o de cierre manual del bypass SWMB no hayan conmutaciones incorrectas entre tensiones en contra fase ...

Page 229: ... 2245 kcal h 8910 B T U h 3 65 kW 3140 kcal h 12460 B T U h 4 75 kW 4074 kcal h 16170 B T U h Potencia disipada con carga nominal deformada pf 0 7 y con baterías cargadas 1 2 41 kW 2070 kcal h 8220 B T U h 3 12 kW 2680 kcal h 10640 B T U h 4 12 kW 3540 kcal h 14060 B T U h Local de instalación capacidad de ventiladores para transmitir calor 2 1400mc h 2000 mc h 2600mc h Corriente dispersa hacia la...

Page 230: ...sin condensación verificar que la temperatura ambiente con el ups en funcionamiento se mantenga entre los 0 y 40ºC El UPS es capaz de funcionar con una temperatura ambiente comprendida entre los 0 y 40ºC La temperatura aconsejada de funcionamiento del UPS y de las baterías está comprendida entre 20 y 25ºC Si en efecto la vida operativa de las baterías es en promedio de 5 años con una temperatura d...

Page 231: ...S Retirar los 2 estribos que fijan el UPS al pallet desatornillando los tornillos del tipo A y B Los estribos extraídos anteriormente sirven además como patines Fijar los patines al pallet utilizando los tornillos de tipo A prestando atención de alinearlos respecto a las ruedas Si es necesario desbloquear los frenos de las ruedas delanteras Asegurarse que la puerta esté bien cerrada ATENCIÓN se re...

Page 232: ... suficiente como para permitir realizar las operaciones de arranque apagado y las operaciones de mantenimiento 1 5 mt la parte superior tiene que estar a una distancia de al menos 50cm del techo de manera de permitir realizar las operaciones de mantenimiento la parte posterior del UPS tiene que estar colocada a al menos 30 cm de la pared para un correcto flujo de aire soplada por los ventiladores ...

Page 233: ...cirse en la cajas de conexiones es igual a 95 mm2 cables flexibles y rígidos GM 3100 PRO la sección máxima de los cables que se puede introducir en los terminales es de 95mm2 para las FASES y 150mm2 para las baterías cables flexibles y rígidos DISPOSICIÓN DE LOS CABLES DE CONEXIÓN E INTRODUCCIÓN DE LAS FERRITAS TOROIDALES Se recomienda conectar los cables de potencia instalándolos desde la parte p...

Page 234: ...lti metro que no se encuentren presentes tensiones peligrosas La primera conexión que debe realizarse es la del conductor de protección cable de tierra a conectar al tornillo con las siglas PE El UPS debe funcionar conectado a una instalación en tierra El Neutro de ingreso tiene que estar siempre conectado ATENCIÓN se requiere un sistema de distribución trifase con 4 cables La versión estándar del...

Page 235: ...rnillo con las siglas PE conectar los cables de ingreso de salida y de batería a la caja de conexiones respetando las posiciones y la polaridad que se indican en la figura inferior Conectar los cables N BATERÍA N ENTRADA y N SALIDA a la barra de neutro Nota PE tornillo M6 N tornillo M8 Una vez finalizadas las operaciones de instalación y verificadas las conexiones ver apartado Primer encendido y c...

Page 236: ...ía a la caja de conexiones respetando las posiciones y la polaridad que se indican en la figura inferior Conectar los cables N BATERÍA N ENTRADA y N SALIDA a la barra de neutro Nota PE tornillo M6 N tornillo M8 El Neutro de ingreso y de bypass tienen que estar siempre conectados Las líneas de ingreso y de bypass tiene que referirse al mismo potencial de Neutro Una vez finalizadas las operaciones d...

Page 237: ...illo con las siglas PE conectar los cables de ingreso de salida y de batería a la caja de conexiones respetando las posiciones y la polaridad que se indican en la figura inferior Conectar los cables N BATERÍA N ENTRADA y N SALIDA a la barra de neutro Nota PE tornillo M6 N tornillo M8 Una vez finalizadas las operaciones de instalación y verificadas las conexiones ver apartado Primer encendido y con...

Page 238: ...tería a la caja de conexiones respetando las posiciones y la polaridad que se indican en la figura inferior Conectar los cables N BATERÍA N ENTRADA y N SALIDA a la barra de neutro Nota PE tornillo M6 N tornillo M8 El Neutro de ingreso y de bypass tienen que estar siempre conectados Las líneas de ingreso y de bypass tiene que referirse al mismo potencial de Neutro Una vez finalizadas las operacione...

Page 239: ...239 ESQUEMAS DE CONEXIÓN AL SISTEMA ELÉCTRICO UPS sin variación de régimen de neutro UPS con aislamiento galvánico de ingreso UPS con aislamiento galvánico de salida ...

Page 240: ...S sin variación de régimen de neutro y con ingreso bypass separado UPS con aislamiento galvánico en ingreso y con ingreso bypass separado UPS con aislamiento galvánico en salida y con ingreso bypass separado ...

Page 241: ...n referirse al mismo potencial En el momento que las dos alimentaciones fueran diferentes es necesario utilizar un transformador de aislamiento sobre uno de los ingresos UPS sin variación de régimen de neutro y con ingreso bypass separado conectado sobre una línea de alimentación independiente UPS con ingreso de bypass separado conectado sobre una línea de alimentación independiente y con aislamie...

Page 242: ...la parte inferior Protecciones AC externas automáticas Mod UPS Ingreso red Ingreso Bypass separado opcional 60kVA 100A 100A 80kVA 125A 125A 100kVA 160A 160A En caso de carga no lineal sobredimensionar adecuadamente la línea de neutro N previa valoración en el lugar Si el dispositivo de protección situado sobre el UPS interrumpe el conductor de neutro debe también interrumpir al mismo tiempo a todo...

Page 243: ...nte coordinados con aquellos presentes en el ingreso El interruptor diferencial situado en la parte superior deberá tener las siguientes características corriente diferencial adecuada a la suma de UPS carga se recomienda tener un margen adecuado para evitar intervenciones intempestivas 300mA recomendado tipo B retraso mayor o igual a 0 1s La corriente de dispersión de la carga se suma a la del UPS...

Page 244: ...n realizar la habilitación de la opción a través del software de configuración CONTACTOS AUXILIARES En la zona de conexiones UPS se encuentran disponibles bornes para conectar los contactos auxiliares de los seccionadores bypass de salida y mantenimiento remoto Estos se identifican por las insignias SERVICE BYPASS y AUX SWOUT respectivamente Para la instalación hacer referencia a los apartados Vis...

Page 245: ...medidas eléctricas de red salida batería etc y detectar las alarmas Para obtener detalles sobre su uso y conexiones remitirse al correspondiente manual TOMAS AUXILIARES OPCIONAL ENERGYSHARE Toma de salida opcional programable que permite en determinadas condiciones de funcionamiento la desconexión automática de la carga a esta aplicada Los eventos que determinan el corte automático de las tomas de...

Page 246: ...r la interrupción de la alimentación a la carga y dañar el UPS Utilizar seccionadores y cables con una potencia adecuados a las corrientes del UPS Utilizar un cavo con doble aislamiento de sección 1mm2 para conectar los bornes SERVICE BYPASS y AUX SWOUT a los correspondientes contactos auxiliares de los seccionadores BYPASS DE MANTENIMIENTO REMOTO 3 y SALIDA 2 Verificar la compatibilidad entre el ...

Page 247: ...quema a bloques del UPS y son descritas individualmente las partes que lo componen Diagrama a bloques del UPS IMPORTANTE Nuestros grupos de continuidad han sido concebidos y realizados para obtener una larga duración incluso en las condiciones de servicio más severas Si recuerda se trata de aparatos eléctricos de potencia y como tal requieren la realización de controles periódicos Además algunos c...

Page 248: ...rada Cierre del seccionador fusibles de la línea de batería externa al UPS Después de haber verificado la polaridad correcta de las conexiones cerrar el seccionador fusibles de la línea de batería externa al UPS ATENCIÓN si se ha realizado una conexión que no cumple con las indicaciones descritas en el apartado Conexiones eléctricas los fusibles de la batería y otras protecciones podrían dañarse e...

Page 249: ...io configurar el UPS para probar los valores correctos de la capacidad nominal total de la batería Tal operación tiene que ser realizada a través del software de configuración específico y reservado al personal del Service Desde el menú principal pulsar la tecla para entrar en el menú de encendido Al solicitarse la confirmación seleccionar SI pulsar para confirmar y esperar algunos segundos Verifi...

Page 250: ...óx 5 seg El UPS se activa y se enciende la pantalla Pulsar el pulsante para entrar en el menú de encendido En la solicitud de confirmación seleccionar SI y pulsar nuevamente el pulsante para confirmar Se encienden todos los led alrededor de la pantalla durante apróx 1 seg y el zumbador inicia a emitir un beep cada 7 seg La secuencia de encendido finaliza cuando el UPS entra en estado de funcionami...

Page 251: ...e Inverter Load Inverter Output Line Battery Charge Automatic Static Bypass El esquema muestra el estado de los tres módulos lógicos de potencia PFC Converter Inverter Automatic Static Bypass Cada módulo puede asumir uno de los siguientes estados Módulo apagado Módulo encendido en funcionamiento normal Módulo en estado de alarma o de bloqueo Los siguientes símbolos representan el flujo de energía ...

Page 252: ... visualización del estado de funcionamiento del UPS La primera línea se encuentra siempre activa y visualiza de manera constante el estado del UPS en aquel instante La segunda se activa solamente en presencia de un error y o problema del UPS y muestra el tipo de error problema hallado A la derecha cada línea visualiza el código correspondiente con el evento en curso FUNCIÓN DE LAS TECLAS Zona divi...

Page 253: ...253 MENÚ PANTALLA ...

Page 254: ...frecuencia nominal y el bypass no es más utilizable free running mode BYPASS MANUAL SWMB ATENCIÓN en caso que se presenten malfuncionamientos ponerse en contacto con el servicio de asistencia técnica El mantenimiento del UPS puede ser realizado únicamente por personal cualificado y formado por el fabricante ATENCIÓN en el interior del aparato existe presencia de tensión peligrosa incluso con los s...

Page 255: ...uede activarse y configurarse a través del software de configuración Cuando la modalidad está activada al retorno de red después de un periodo de autonomía el UPS retorna a absorber por la misma en modo progresivo para no meter en crisis a causa de la inserción un grupo electrógeno instalado sobre la parte superior La duración del transitorio puede configurarse de 1 a 125 segundos El valor por def...

Page 256: ...máticamente el inglés La modificación de la función puede ser bloqueada a través del software de configuración En la siguiente tabla aparece una lista con las configuraciones que pueden ser modificadas a través del software de configuración entregado con el equipo en los centros de asistencia técnica FUNCTION DESCRIPTION DEFAULT Operating mode Selecciona uno de los cinco modos de funcionamiento di...

Page 257: ...igh 264V Eco mode sensibility Selecciona la sensibilidad para activar el modo de funcionamiento ECO Normal Eco mode min max threshold Selecciona el rango de tensión aceptable para el funcionamiento ECO Low 200V High 253V UPS without battery Modo de funcionamiento sin baterías como convertidor o estabilizador Operating with Batteries Battery low time Tiempo estimado de autonomía para la alarma de b...

Page 258: ...RS232 Y USB CONECTOR RS232 CONECTOR USB PIN NOMBRE TIPO SEÑAL PIN SEÑAL 1 IN 1 VBUS 2 TX OUT TX línea serial 2 D 3 RX IN RX línea serial 3 D 4 4 GND 5 GND POW ER 6 OUT 7 8 15V POW ER Alimentación aislada 15V 5 80mA máx 9 WKATX OUT Avisa al alimentador ATX COMMUNICATION SLOT El UPS dispone de dos slot de expansión para tarjetas de comunicación adicionales que permiten al aparato dialogar utilizando...

Page 259: ...e el inverter Si se extrae el puente en falta de red el UPS retoma el funcionamiento a través de la batería 4 5 12 BATTERY LOW OUTPUT 1 Señala que las baterías se están por descargar cuando el contacto 5 12 está cerrado 1 6 13 14 BATTERY WORKING OUTPUT 2 Señala que el UPS está funcionando desde la batería cuando el contacto 6 14 está cerrado 1 9 10 LOCK OUTPUT 3 Cuando el contacto está cerrado señ...

Page 260: ... de una carga deformada Sonido C La señalación es realizada cuando el UPS pasa a funcionar por la primera batería de la señalación de fin de descarga sonido D Es posible silenciar la señalación ver apartado Pantalla gráfica Sonido D La señalación es realizada en funcionamiento por la batería cuando se alcanza el umbral de alarma de fin de descarga Es posible silenciar la señalación ver apartado Pa...

Page 261: ...able de serie suministrado o conectar la puerta USB del UPS a una puerta USB del PC utilizando un cable estándar USB Descargar el software desde el sitio Web www ups technet com seleccionando el sistema operativo deseado Seguir las instrucciones del programa de instalación Para informaciones más detalladas sobre la instalación y uso consultar el manual del software que se puede descargar desde nue...

Page 262: ...uede dañar el UPS y o a la carga Conectar la red a los bornes tal y como se indica en el apartado Instalación EL SECCIONADOR DETRÁS DEL PUERTO SWIN ESTÁ ABIERTO Cerrar el seccionador FALTA DE LA TENSIÓN DE RED BLACKOUT Verificar la presencia de la tensión de red eléctrica Realizar el encendido desde la batería para alimentar la carga INTERVENCIÓN DE LA PROTECCIÓN SUPERIOR Restablecer la protección...

Page 263: ...O DE INGRESO DEL UPS Accionar el bypass manual SWMB apagar y a continuación volver a encender el UPS Excluir el bypass manual Si el problema permanece ponerse en contacto con el centro de asistencia técnica más cercano LA FASE 1 PRESENTA UNA TENSIÓN MUCHO MENOR QUE LAS OTRAS DOS FASES Abrir SWIN encenderlo desde la batería esperar hasta el final de la secuencia y cerrar el SWIN LA PANTALLA VISUALI...

Page 264: ...AS EL UPS ESTÁ EN ESPERA QUE LA TENSIÓN DE LA BATERÍA SUPERE EL UMBRAL CONFIGURADO Esperar a que las baterías se recarguen o realizar el encendido manual yendo al menú ENCENDIDO LA PANTALLA VISUALIZA UNO O MÁS DE LOS SIGUIENTES CÓDIGOS F06 F07 F08 TELERRUPTOR DE INGRESO BLOQUEADO Accionar el bypass manual SWMB apagar el UPS abrir el SWIN y ponerse en contacto con el centro de asistencia técnica má...

Page 265: ...BSTRUIDOS O MUY CERCANOS A LAS PAREDES MALFUNCIONAMIENTO DEL SENSOR DE TEMPERATURA O DEL SISTEMA DE ENFRIAMIENTO DEL CARGADOR DE BATERÍAS Retirar la causa de exceso de temperatura Introducir el bypass manual SWMB sin apagar el UPS y esperar a que la temperatura del cargador de baterías disminuya Excluir el bypass manual Si el problema permanece ponerse en contacto con el centro de asistencia técni...

Page 266: ... Listo para encendido S10 UPS bloqueado carga no alimentada S11 UPS bloqueado carga en bypass S12 Estadio BOOST o cargador de baterías bloqueado carga no alimentada S13 Convertidor de frecuencia carga alimentada por el inverter COMMAND indica la presencia de un mando activado CÓDIGO DESCRIPCIÓN C01 Mando a distancia de apagado C02 Mando remoto carga sobre bypass C03 Mando a distancia de encendido ...

Page 267: ...bre salida Fase1 A20 Pico de corriente elevado sobre salida Fase2 A21 Pico de corriente elevado sobre salida Fase3 A22 Carga sobre Fase1 del umbral usuario configurado A23 Carga sobre Fase2 del umbral usuario configurado A24 Carga sobre Fase3 del umbral usuario configurado A25 Seccionador de salida abierto A26 Baterías polo positivo ausente o fusibles de las baterías abiertos A27 Baterías polo neg...

Page 268: ...soide Fase2 inverter deformada F16 Sinusoide Fase3 inverter deformada F17 Anomalía estadio Inverter F19 Sobretensión baterías positivas F20 Sobretensión baterías negativas F21 Subtensión baterías positivas F22 Subtensión baterías negativas F23 Sobrecarga en salida F26 Telerruptor de salida Fase 1 bloqueado no abre F27 Telerruptor de salida Fase 2 bloqueado no abre F28 Telerruptor de salida Fase 3 ...

Page 269: ...Fase3 L20 Tensión continua en salida inverter o Sinusoide inverter deformada Fase1 L21 Tensión continua en salida inverter o Sinusoide inverter deformada Fase2 L22 Tensión continua en salida inverter o Sinusoide inverter deformada Fase3 L23 Sobrecarga sobre salida Fase1 L24 Sobrecarga sobre salida Fase2 L25 Sobrecarga sobre salida Fase3 L26 Cortocircuito sobre salida Fase1 L27 Cortocircuito sobre ...

Page 270: ...es Frecuencia Nominal 4 50 60Hz Corriente nominal de salida 87A 116A 145A Potencia aparente nominal de salida 60kVA 80kVA 100kVA Potencia activa nominal de salida 54kW 72kW 90kW Factor de potencia de salida 0 9 Corriente de cortocircuito 1 5 x In por t 500ms Precisión de la tensión de salida referida a tensión de salida 400Vac 1 Estabilidad estática 5 0 5 Estabilidad dinámica 3 carga resistiva 6 D...

Page 271: ...eso de 380V y baterías en carga con 10A 2 100 load THDv 1 3 Para mantener la tensión de salida dentro del campo de precisión indicado puede hacerse necesario realizar una calibración después de un largo periodo de ejercicio 4 Si la frecuencia de red se encuentra dentro del 5 del valor seleccionado el UPS se sincroniza con la red Si la frecuencia se encuentra fuera de tolerancia o funcionamiento de...

Page 272: ......

Page 273: ......

Page 274: ......

Page 275: ...0MNMSTK60NP5LUD ...

Reviews: