Assembly Instructions Cont.
11
ASSEMBLY INSTRUCTIONS
Step 1
. Graco Adaptors come already as-
sembled and attached to the Infant Cruizer.
No additional assembly is required.
For all other adaptors, you will need a Phillips
screwdriver to attach the two adaptors to the
Infant Cruizer. Screws should drive through
the adaptor and into the base of the Infant
Cruizer fairly easily.
Select the adaptors from the Infant Cruizer
parts that match your infant seat car seat.
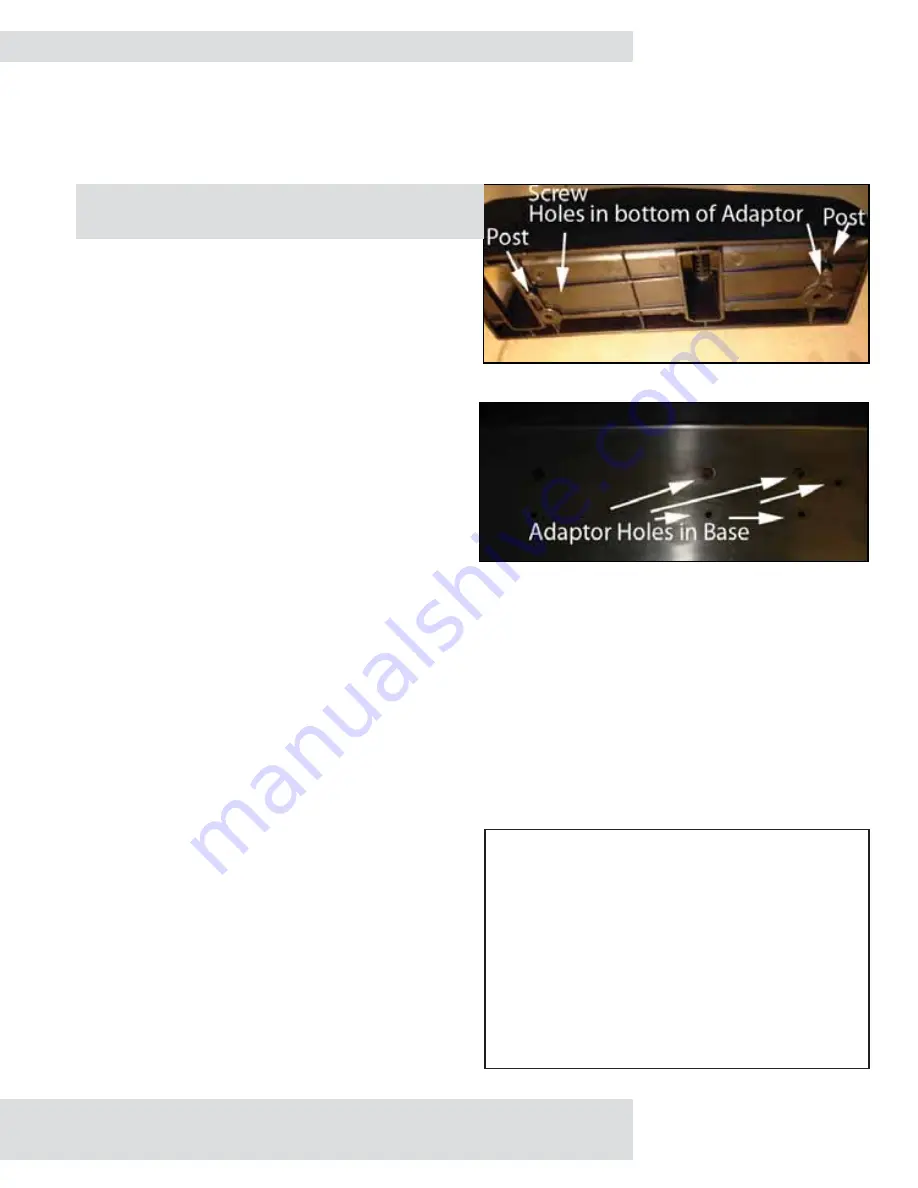
Example: Bottom of Peg Perego Adaptor
shown in Picture 3.
NOTE:
All car seat adaptors will have a two
adaptors (left side and right side) except the
Graco.
Step 2.
Align the locator "posts" on the bot-
tom of the adaptors, as shown in
Picture 6
,
with Locator/Adaptor holes on the base of the
Infant Cruizer. As shown in
Picture 4.
Screw
openings in the adaptors should align with
screw holes in base of the Infant Cruizer. Use
screws provided to secure the adaptors.
NOTE
: The Adaptors attach to the top side
on the base of the Infant Cruizer. The locator
posts on the bottom of the adaptors will slip
into place on the base of the Infant Cruizer.
This is how you know they are in the correct
place on the Infant Cruizer base before attach-
ing.
Make sure after attaching the adaptors with
the screws to the Infant Cruiser that they are
secure.
WHEELS
Before fi rst use, and periodically thereafter,
test wheels by pulling on them. Failure to se-
cure wheels may result in injury to your child.
To remove wheels: Push in the "push button"
in the center of wheel and pull off.
TIRES
The tires provided are the new long lasting,
composite "airless" tires. They provide a
smooth ride like pneumatic wheels, but they
will never go fl at.
Picture 3
Picture 4
INFANT CAR SEAT ADAPTORS


