background image

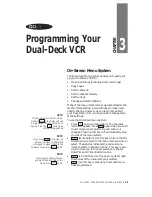
CHAPTER 3 - PROGRAMMING YOUR DUAL-DECK VCR


35

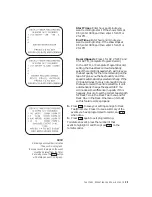
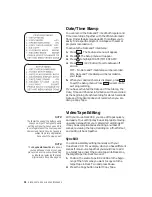
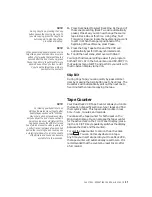
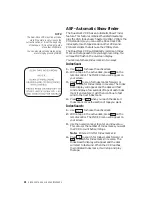
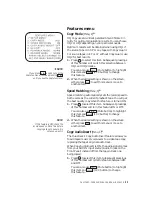
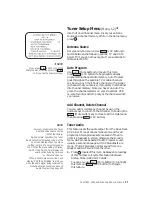
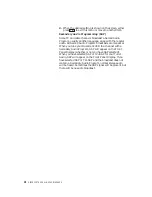
Sequential Record • Your Dual-Deck VCR will
record on a tape in Deck One, then automatically
activate Deck Two to begin recording when the tape
in Deck One is finished. When finished each tape will
automatically rewind and stop. 1-2 will appear on the
Front Panel Display.

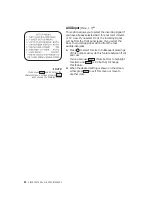
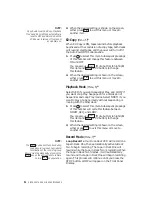
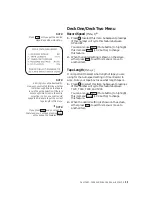
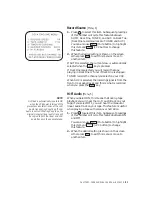
Normal Record • Your Dual-Deck VCR will begin
recording a tape in whichever Deck you activate by
pressing the REC button.

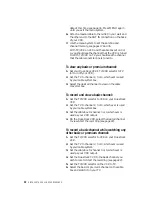
1. Press 

7

 to select this item. Subsequent pressings

of this number will cycle this feature between
NORM, SEQ, and LOOP.

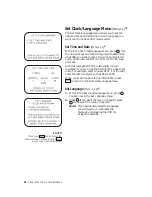
You can also use 

SELECT

 (Mute button) to highlight

this item and 

CHANGE

 (LCV button) to change

this feature.

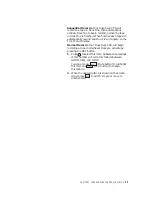
2. When the desired setting is shown on the screen,

either press 

MENU

 to exit this menu or move to

another item.

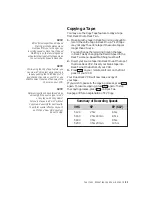
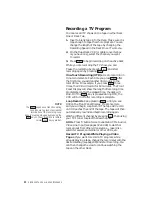
Summary of Contents for 4-Head Hi-Fi

Page 1: ...U S E R U S E R S S G U I D E G U I D E Dual Deck Video Cassette Recorder Recorder VHS VHS 4 Head Hi Fi to 4 Head Hi Fi Featuring Space Saving Stacked Deck Design...

Page 2: ......

Page 3: ...VENTILATION Slots and openings in the cabinet are provided for ventilation to ensure reliable operation of the video unit and to protect it from overheating These openings must not be blocked or cover...

Page 4: ...ll outlet and disconnect the antenna or cable system This will prevent damage to the video unit due to lightning and power line surges 15 POWER LINES An outside antenna system should not be located in...

Page 5: ...onnections 51 Connecting Other Video Equipment 52 Appendix A Care of Your Dual Deck VCR 55 B Glossary 59 C Help Commonly Asked Questions 63 C Troubleshooting Charts No Menu is Visible 67 Poor Video Qu...

Page 6: ...ra servicio ATTENTION Pour viter les incendis risque de chocs ou interf rences f cheuses employer seulement les accessoires recommand s Pour viter les chocs lectriques ne pas employer cette prise pola...

Page 7: ...deck speeds for optimum duplication results Using Go Video Dual Deck VCRs your video copies will be indistinguishable from the originals No matter how many copies you make each new tape will be crisp...

Page 8: ...camcorders satellite receivers 32 51 53 Edit video tapes easily with features such as Sync Edit Syncro Start and Copy Audio Insert 26 33 Use Skip Edit to quickly by pass commercials with the Touch of...

Page 9: ...u can record that TV show WHILE you watch a video tape Make Copies Directly from a Variety of Sources You can make exceptional recordings from a variety of accessories such as laser disc players satel...

Page 10: ...rs record mode an index mark is placed on the tape Use the VHS Index Scan and Search System VISS to quickly locate these index marks during playback or while editing Com bined with the Time Date Stamp...

Page 11: ...ly switch back and forth from one tape to another Your Dual Deck VCR supports both loop and sequen tial modes Loop mode allows you to start a tape in either deck and when it finishes a tape in the oth...

Page 12: ...If you press the Power button while it is blinking you will cancel Auto Power Off Auto Power On Power turns on when a tape is inserted into either deck The TV VCR indicator switches to VCR Auto Stop Y...

Page 13: ...enna signal goes through the VCR your TV must be tuned to channel 3 or 4 CHUP Press to increase channel numbers to go to the next higher channel stored in channel memory CHDN Press to decrease channel...

Page 14: ...e 2 STOP EJECT Press to stop the tape in the active deck Press again to eject a stopped tape RECORD Press to start recording onto a tape in the active Deck Press to continue recording after a Pause Pr...

Page 15: ...am It will blink if there is a timer error Record Indicator This indicator will be on during Record OTR and Timer Record Power Indicator This indicator will blink when VCR is in the auto power off mod...

Page 16: ...ed for each deck If you are playing a tape the tape speed is the speed at which the tape was recorded Tapes can be played in three speeds SP EP and LP Tapes can be recorded in SP and EP ATR Auto Track...

Page 17: ...ce an Index Mark on the tape An Index Mark is also automatically placed on a tape every time you begin recording from stop LCV Last Channel Viewed If you have a certain channel you want to come back t...

Page 18: ...Down to change to the next higher and next lower channel These keys will only stop at the channels you have programmed into Channel Memory in the Tuner Setup menu DECKSELECT Press to select which dec...

Page 19: ...t 60 seconds of your copy tape Press twice to easily remove commercials when copying TV shows Press up to 5 times to edit out 5 minutes TRK Press to manually adjust the tracking while playing a tape T...

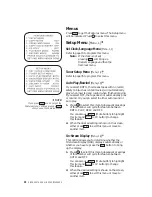
Page 20: ...f you don t want the On Screen Display to come on automatically you can set the DISPLAY MODE in the SETUP MENU to OFF The On Screen Display has three basic parts Date Time This indicator displays the...

Page 21: ...on the prompt will automatically go to the next item If you don t need to change the information for a particular item press SELECT Mute button to move to the next item You will enter the following it...

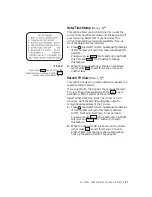
Page 22: ...Enter only the last two digits For exam ple 9 6 for 1996 6 If you need to go back and change anything press SELECT Mute button repeatedly until you get to that item 7 When you have set the time and da...

Page 23: ...ear 3 Press 2 The Tuner Setup menu will appear 4 Set the ANTENNA SOURCE Press CHANGE to cycle between TV and CATV cable When the desired option is on the screen go to step 5 5 Press SELECT Mute button...

Page 24: ...playback function is not limited to simply playing tapes Watch a tape while recording another tape you can record a program on Deck Two and watch a tape play on Deck One simply by starting the record...

Page 25: ...d SLOW will appear on the Front Panel Display While in Slow Motion playback each time you press SLOW play slows down a little and each time you press SLOW play speeds up a little These are also the 8...

Page 26: ...V button to cycle between SEQ LOOP and NORM 4 When the desired choice is on the screen press MENU twice to exit the menu system Tracking Occasionally when you play a tape that was recorded on a differ...

Page 27: ...press COPY again To stop the copying process press STOP on Deck Two See page 33 for an explanation of EZ Copy NOTE EP is 3 times longer than SP Speed Matching in the Features menu must be off for you...

Page 28: ...deck will stop Or if the POWER key is pressed during OTR the VCR will turn off after recording is complete Loop Record Keep pressing RECORD until you see 9 30 on the Front Panel Display Press once mor...

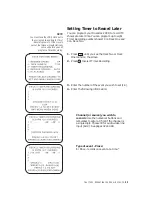
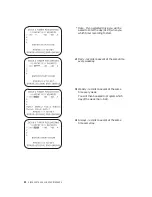
Page 29: ...clock is not set that menu will automatically come up before you can program a Timer Recording 1 Press MENU until you see the Deck Two or Deck One menu on the screen 2 Press 3 to select Timer Recordi...

Page 30: ...er the day 01 31 when you which timer recording to start 2 Daily records one event at the same time every weekday 3 Weekly records one event at the same time every week You will then be asked to progr...

Page 31: ...y If the VCR determines there is not enough time on the tape to record the entire selection it will automatically change the speed to EP You will notice some difference in quality if this happens Be s...

Page 32: ...th your Dual Deck VCR you can edit tapes quickly and easily Your editing may be as simple as removing unwanted scenes from your camcorder recordings Or it may be as complicated as shooting a number of...

Page 33: ...o see the tape counter for the active deck on the Front Panel Display press ing the CLK CTR key repeatedly switches the display between the clock and the counter To reset the tape counter to zero on t...

Page 34: ...th a tape in the active deck press INDEX on the remote control The INDEX menu will appear on your screen 3 Press FF to scan for Index marks forward or REW to scan for Index marks in reverse The Index...

Page 35: ...our changes Pressing this key will automatically step you out of the menu system SELECT Mute button Use this key while in the On Screen menu to move to the menu item you wish to select The asterisk in...

Page 36: ...bsequent pressings of this number will cycle this feature between BOTH PLAY REW and OFF You can also use SELECT Mute button to highlight this item and CHANGE LCV button to change this feature 2 When t...

Page 37: ...ou to send audio video signals to a separate second monitor If you select Auto the signal is the same as the main TV view The picture selected with the VIEW key is available to both monitors at the sa...

Page 38: ...If you select Front the incoming signal will be from the front panel jacks If you select the Rear the incoming signal will be from the rear audio video jacks 1 Press 7 to select this item Subsequent...

Page 39: ...turned ON 1 Press 3 to select this item Subsequent pressings of this number will turn this feature ON or OFF You can also use SELECT Mute button to highlight this item and CHANGE LCV button to change...

Page 40: ...ress 6 to select this item Subsequent pressings of this number will cycle this feature between NORM SEQ and LOOP You can also use SELECT Mute button to highlight this item and CHANGE LCV button to cha...

Page 41: ...ear on the Front Panel Display Normal Record Your Dual Deck VCR will begin recording a tape in whichever Deck you activate by pressing the REC button 1 Press 7 to select this item Subsequent pressings...

Page 42: ...so remember to enter a 0 as the first digit for a one digit entry For example enter January as 01 For the year enter the last two digits such as 95 for 1995 When you are through entering information...

Page 43: ...This feature sets the audio output from the Dual Deck VCR tuner Mono produces monaural sound for all programs Stereo produces stereo sound if the pro gram is broadcast in stereo otherwise the sound i...

Page 44: ...Audio Program broadcasts are monaural When you tune your Dual Deck VCR to a channel with a Secondary Audio Program SAP will appear on the Front Panel Display whether or not you have SAP selected When...

Page 45: ...2 to select this item Subsequent pressings of this number will cycle this feature between T120 T160 T180 and T200 You can also use SELECT Mute button to highlight this item and CHANGE LCV button to ch...

Page 46: ...ntry For example enter January as 01 For the other fields enter the number of the desired choice as listed on the menu screen Press MENU to exit timer record programming and save your information Pres...

Page 47: ...jacks and this is what is recorded when you press the RECORD key Hi Fi Audio Menu 5 When you Select ON this means that during tape playback you will hear the Hi Fi audio track on your tape if you sel...

Page 48: ...42 DISCOVER THE DUAL DECK DIFFERENCE...

Page 49: ...nd tuner TV will pick up This is why you select your TV channels using your VCR remote control The signal is coming to the VCR which tunes in the channel you select and sends that channel to the TV Th...

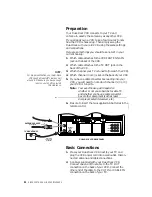
Page 50: ...how the VCR is hooked up Then simply swap the Dual Deck with your old VCR using the same settings and connections Here are some things you should take note of in your current hookup 1 Which cable att...

Page 51: ...o purchase an adapter available at your local electronics store 4 Make sure the switch on the back of the VCR is set to 3 5 Turn on the power for your VCR and your TV 6 Turn your TV to channel 3 7 Pre...

Page 52: ...to CATV then program channel memory See page 17 3 Press the numeric button or use the Channel Up Down button to select the channel you want to view or record To record one channel and view another 1 B...

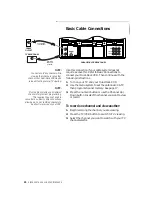
Page 53: ...ext to your TV and plug the VCR power cord into a wall outlet Disconnect all antenna and cable connections 2 A cable is supplied with your Dual Deck VCR Connect one end of this cable to the TV OUT con...

Page 54: ...s the MENU key on your remote You should see a menu Set the language and clock at this time see page 30 Press MENU again until you exit the menu system 10 Use your cable converter box to select a chan...

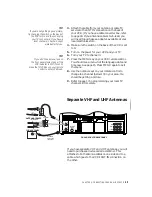
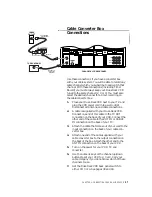
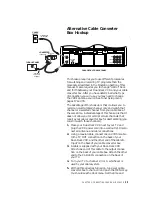
Page 55: ...l only and watch that channel or a selected channel from your cable box at the same time A disadvantage of this hookup is that it does not allow you to record premium channels that require your cable...

Page 56: ...elect the desired channel to view on the cable converter box To record and view a basic channel 1 Set the TV VCR selector to VCR on your Dual Deck VCR 2 Set the TV to channel 2 3 or 4 which ever is us...

Page 57: ...signal from the RF modulator The direct VIDEO and AUDIO OUT connections give you better quality than the RF modulator connection in the same way that a face to face conversation is clearer than a con...

Page 58: ...era or camcorder or a satellite receiver to your Dual Deck VCR using the VIDEO and AUDIO IN connections on the Dual Deck VCR front panel To watch the input from this other video equipment set the chan...

Page 59: ...with MTS Stereo Sound through your stereo speakers Or if you have a stereo TV with separate audio input jacks you can connect the Dual Deck VCR audio output to your TV and enjoy stereo sound 1 Connec...

Page 60: ...your IBM or compatible PC personal computer This requires an optional hardware interface and software package which is available directly from Go Video Complete connection and operating instructions a...

Page 61: ...al Deck VCR Cleaning the Dual Deck VCR Cabinet Dust the surface using a soft cloth Use the dusting attachment of your vacuum occasionally to remove dust from the ventilation holes on the side Cleaning...

Page 62: ...s With heavy rental tape use you should consider scheduling an annual professional video head cleaning and replacement of the Dual Deck s Automatic Head Cleaner at your local authorized Go Video servi...

Page 63: ...ble parts inside Servicing of your Dual Deck VCR should be done by an authorized service center For service information see the Customer Service and Warranty section of this guide on page 71 Energy Co...

Page 64: ...58 DISCOVER THE DUAL DECK DIFFERENCE...

Page 65: ...when copying a tape AUTO A preset automatic feature CATV Cable television channel assignments CH MEMORY During Auto Programming in the Tuner Setup menu the VCR selects the channels it can tune in to a...

Page 66: ...d on a tape every time you begin recording from stop or sync edit LCV Last Channel Viewed If you have a certain channel you want to come back to easily enter it using the numerical keys Then you can l...

Page 67: ...this tab off to prohibit recording If you later wish to record on that tape you can put a small piece of tape over the opening REW Press this button on the remote control while the active deck is stop...

Page 68: ...erent channels which you have available The Dual Deck VCR has a 181 channel tuner See pages 17 and 35 for a detailed explanation TV VCR Press to switch control of the picture between the TV and the VC...

Page 69: ...e tuning on your TV Or try changing the output channel of the VCR if set to 3 change to 4 and if set to 4 change to 3 Then make sure your TV is set to the same channel If the picture is bad while watc...

Page 70: ...e sure you are aiming the remote control directly at the VCR Make sure there are no obstacles between the remote control and the VCR so the beam is not obstructed Also the signal from the remote can b...

Page 71: ...not clear the error unplug the VCR from the wall outlet and inspect both tape slots for foreign objects or jammed or crooked tapes If this does not help consult a service center My VCR doesn t work A...

Page 72: ...a normal synchro nized signal it will put a blue screen in its place Double check your antenna connections The Power Indicator is blinking Your Dual Deck VCR is in Auto Power Off mode If you press th...

Page 73: ...n signal Tune to a stronger station Is the menu visible 10 Contact your authorized Go Video Service Center or Go Video Direct at 602 922 0896 NO 11 Using the TV remote activate the AUX or Line Vid in...

Page 74: ...a tape in Deck One Is the video OK NO 6a Using a quality commercial tape head cleaner clean the head Is the picture quality good 7a Contact your authorized Go Video Service Center or Go Video Direct a...

Page 75: ...stem Connect the Video Outputs of the VCR to the Video In on the TV and from the Video Output of the Receiver back to your TV 2 Do you want to listen in Stereo or do you want the best quality video tr...

Page 76: ...70 DISCOVER THE DUAL DECK DIFFERENCE...

Page 77: ...VCR and are not able to find your answer in this manual you are welcome to call our customer support staff at 602 922 0896 or at our E Mail address custsvc govideo com on Monday Friday 8 00 am to 4 00...

Page 78: ...Commercial Industrial or Educational use has the same warranty coverage as stated in this warranty WHAT ARE THE EXCEPTIONS This warranty does not cover 1 Normal maintenance service such as video head...

Page 79: ...seconds HEADS Video Dual azimuth four head Audio 1 stationary head Mono 2 rotating heads Hi Fi Control 1 stationary head Erase 1 full track 1 audio track VIDEO Input 75 ohms unbalanced 1 V P P Output...

Page 80: ...NNA OUTPUT 75 ohm unbalanced F type RF MODULATION Channel 3 or 4 FREQUENCY RESPONSE 20 20 000 Hz Hi Fi POWER REQUIREMENT 120V AC 60 Hz 29 watts CLOCK BACKUP TIME 30 seconds ENVIRONMENT 35 80 relative...

Page 81: ...55 Cleaning Your VCR 55 Clock Setting 15 30 Clock Menu 15 30 Connecting the Dual Deck VCR 42 Connecting Video Equipment 52 Copy Audio Insert 27 33 Copying a Tape 21 Date Setting 15 30 Date Time Stamp...

Page 82: ...Mode 34 35 Record Source 41 Recording Timer 23 Recording from TV 22 Recording Speed 21 Remote Control 11 Reverse Picture Search 8 11 19 Reverse Jet Search 8 11 19 Safety inside front cover i ii Satel...

Page 83: ......
Page 84: ...7835 East McClain Drive Scottsdale Arizona 85260 1732 USA 602 998 3400 E Mail custsvc govideo com F 1128 PRINTED 6 96...

Reviews: