24#CNC#STUDIO#USB#USER#MANUAL#
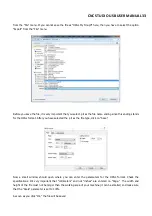
First of all we will configure the X axis in the machine settings. Therefore, enter the following values for the X
axis:
Steps per rotation
: 200
Micro steps 1,2,4,8,16
: 2 ( with 2 we are assuming that your controller card is set to 1/2 – that
is, half-step – be sure to check it!)
Distance per revolution
: 1.5 ( must agree)
Steps for ramp
: 100 ( this is a guideline and can be changed)
Reference switch
: left
Maximum speed mm/s
: 10 ( you can change this value later)
Start/stop speed
: 3
Manual drive fast mm/s
: 10
Manual drive slow mm/s
: 5
Homing search mm/s
: 3
Homing clear mm/s
: 1
Homing clear mm
: 1
Steps for backlash compensation
- 0 ( must be determined later)
Axis traverse path mm
- 190 ( only for the X axis of the Hobby A4 )
The X axis is configured. Now you can test the axis by clicking on the control arrows in the “Test signals”
section of the “Settings” window. If the machine should move in the opposite direction of the arrow, you will
have to invert the “Direction X” signal by ticking the “Invert” box next to “Direction X.” Once the X axis moves
in the direction you want, the Y axis can be configured.
When configuring the Y axis, the same parameters are entered as for the X axis. Only the position of the
reference switch changes as well as the traverse paths. Therefore, enter the following values for the Y axis:
Steps per rotation
- 200
Micro steps 1,2,4,8,16
- 2
Spindle pitch
– 1.5
Steps for ramp
- 100
Reference switch
- rear
Maximum speed mm/s
- 10
Start/stop speed
- 3
Manual drive fast mm/s
- 10
Manual drive slow mm/s
- 5
Homing search mm/s
- 3
Homing clear mm/s
- 1
Homing clear mm
- 1
Steps for backlash compensation
- 0
Axis traverse path mi
- 280 ( only for the Y axis of the Hobby A4 )
Test the direction of travel of the Y axis and invert the "Direction Y" signal if necessary.


