background image

5

Printed in China.

2 PACK DRONES & FLAG DRONE RACER SET

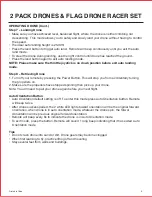
10


FEET

10


FEET

10 FEET

5 FEET

10 FEET

OPERATING DRONE
Step 1 – Pre-Flight Checklist
•  Read all warnings and instructions
•  Install remote batteries, page 2 .
•  Charge batteries, page 3.
•  Make sure that drone and remote are powered 

off.

Step 2 – Choosing a location
•  Drone is designed to be flown/driven indoors 

and outdoors

•  Always make sure you have enough space to 

fly drone

•  Always follow warnings, page 1.

Step 3 – Starting Drone
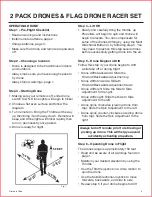
1. Making sure your remote is off, slide drone 

switch to ON. Drone lights will begin to flicker

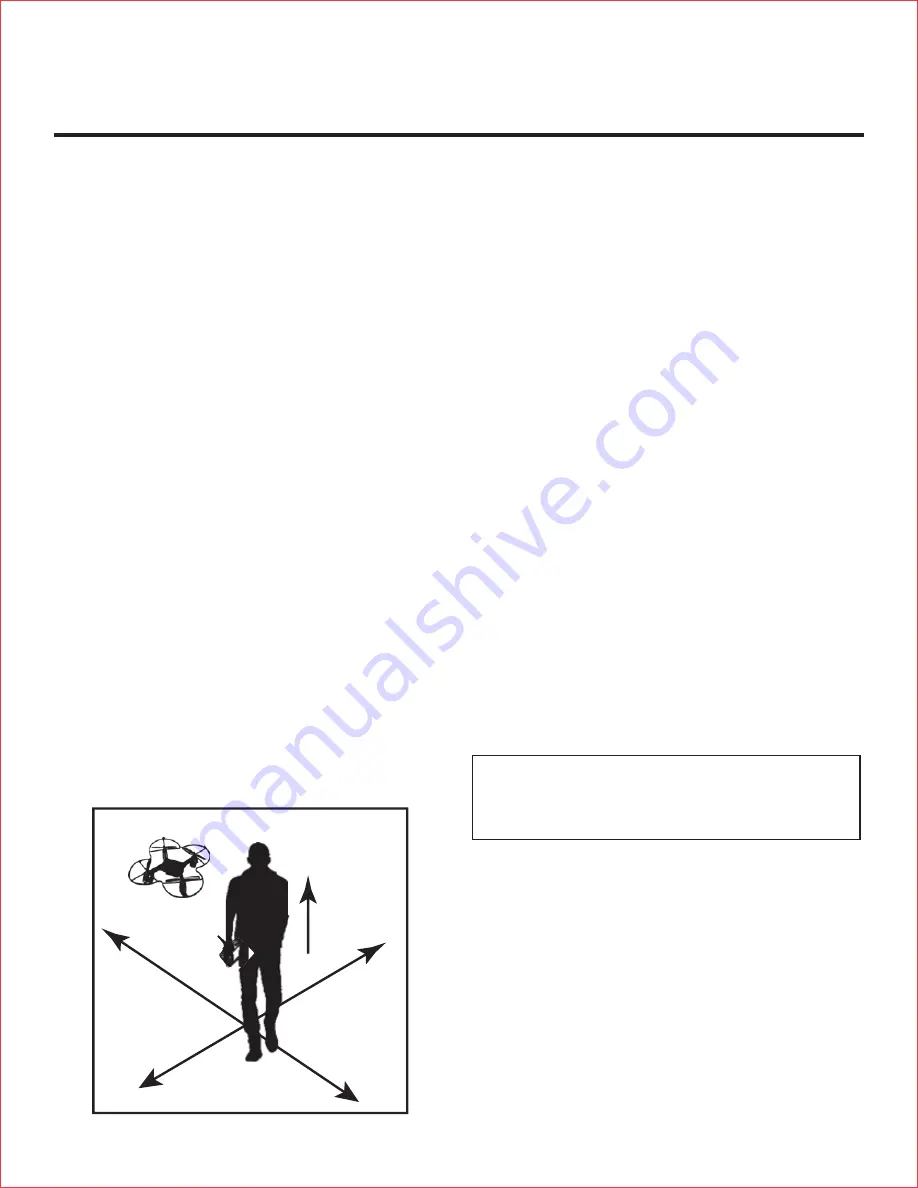
2. Choose a flat even surface and follow the 

diagram 

3. Turn remote on. Bring the Throttle all the way 

up then bring it all the way down.  Remote will 

beep and drone lights will flicker rapidly then 

turn on permanently once paired.

4. Drone is ready for flight.

Fig. 1

Step 4 – Lift Off

1. Slowly and carefully bring the throttle  up.

    Propellers will begin to spin and drone will 

begin to elevate. You can compensate for 

some of the drones drifting by using the Multi 

Directional Button or by following step 5. You 

may need to practice this step several times 

before successfully getting drone into the air.

Step 5 – Drone Begins to Drift
Follow this step if your drone begins to drift 

while take off or during flight

•  Drone drifts backwards: Slide the 

Forward/Backwards Adjustment up

•  Drone drifts forwards: Slide th 

Forward/Backwards Adjustment down

•  Drone drifts left: Slide the Side to Side 

Adjustment to the right.

•  Drone drifts right: Slide the Side to Side 

Adjustment to the left.

•  Drone spins clockwise (viewing drone from 

top): Slide the Spin Adjustment to the left

•  Drone spins counter-clockwise (viewing drone 

from top): Slide the Spin Adjustment to the 

right.

Always turn off remote prior to retrieving or 

picking up drone. This will help you avoid 

accidently activating propellers.

Step 6 – Operating Drone in Flight
The drones range is approximately 150 feet

•  Read and be aware of all warnings found on 

page 1.

•  Maintain your desired elevation by using the 

Throttle

•  Use the Throttle joystick in a circle motion to 

spin the drone

•  Use the Multi Directional Joystick to move 

forwards, backwards, and side to side

•  Review step 5 if your drone begins to drift

Summary of Contents for JG2017B24GT

Page 1: ...dicator light will turn off once fully charged Install batteries in remote 2 PAIR YOUR DRONE Before each flight pair the remote with the drone 1 Turn your drone on and place on a flat level surface 2 Turn on the remote on and move the left joystick up then down 3 The beep will indicate successful pairing 4 Repeat steps 1 and 2 if necessary 3 DIRECTIONAL LIGHTS White lights indicate the front of th...

Page 2: ...ty These lightweight drones will provide hours of fun SPECIFICATIONS Drone Battery 350 mAh Li po Remote Controller Battery 6 x 1 5V AA Charging Time 100 minutes Maximum Recommended Altitude 150 ft TABLE OF CONTENTS General Warnings Page 1 Contents Remote Battery Installation Battery Warnings Page 2 Charging LiPo Battery and Replacing Propellers Page 3 Remote Overview Page 4 Operating Drone Page 5 ...

Page 3: ... Reorient or relocate the receiving antenna Increase the separation between the equipment and receiver Connect the equipment into an outlet on a circuit different from that to which the receiver is connected Consult the dealer or an experienced radio TV technician for help This device complies with Part 15 of the FCC Rules Operation is subject to the following two conditions 1 this device may not ...

Page 4: ...tery is punctured damaged or misused Never expose battery to extreme temperatures or moisture Do not subject battery to strong impacts Always keep battery away from flammable materials Only use manufacturer specified batter ies charger s and or adapters if applicable Battery is not serviceable Let battery cool to room temperature before charging While charging never leave battery unattended Recycl...

Page 5: ...rone 5 Insert screw into top of Propeller NOTE Blade 1 turns counter clockwise and Blade 2 turns clockwise Connect the Charge Cable to the Drone CHARGING BATTERY Note The Battery Charger will light up when it is charging the battery and turn off when the battery is fully charged Charge time is approximately 100 minutes 1 Turn off the drone before charging 2 Connect the Battery Charger Cable to the...

Page 6: ... left right controls spin Forward Backwards Adjustment Slide up to adjust forward and slide down to adjust backwards Multi Directional Joystick Side to Side Adjustment Slide left to adjust to the left and slide right to adjust to the right Speed control ON OFF Remote switch AUTO LAND AUTO TAKEOFF AUTO ORIENTATION DIRECTION TRIM ON OFF 60 100 Auto takeoff Auto land ...

Page 7: ...ing by using the Multi Directional Button or by following step 5 You may need to practice this step several times before successfully getting drone into the air Step 5 Drone Begins to Drift Follow this step if your drone begins to drift while take off or during flight Drone drifts backwards Slide the Forward Backwards Adjustment up Drone drifts forwards Slide th Forward Backwards Adjustment down D...

Page 8: ...ton This will stop you from accidentally turning the propellers on 2 Make sure the propellers have stopped spinning then pick up your drone Note You will need to pair your drone again before your next flight Auto Orientation Button Auto Orientation default setting is off To enter this mode press Auto Orientation button Remote will beep twice After drone success paired the 2 white LED lights toward...

Page 9: ...7 Printed in China 2 PACK DRONES FLAG DRONE RACER SET OBSTACLE COURSE SETUP ...

Reviews: