


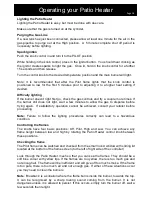


Lighting the Patio Heater
Lighting the Patio Heater is easy, but must be done with due care.
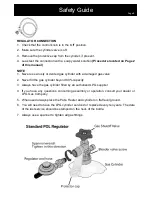
Make sure that the gas is turned on at the cylinder.
Purging the Gas Line
If a new tank has just been connected, please allow at least one minute for the air in the
gas pipeline to purge out at the High position. A 5 minute complete shut off period is
necessary before lighting.
Spark Ignition
Push the knob control in and turn it to the PILOT position.
While holding in the knob control, press in the ignitor button. You should hear clicking as
the ignitor creates sparks to light the gas. Once lit, hold in the knob control for a further
15 seconds and then release.
Turn the control knob to the desired temperature position and the main burner will light.
Note: It is recommended that after the Pilot flame lights that the knob control is
positioned to low for the first 5 minutes prior to adjusting it to a higher heat setting if
desired.
Difficulty lighting
If the burner
doesn’t light first go, check the gas controls and try a couple more times. If
the burner still does not light, wait a few minutes to allow the gas to disperse before
trying again. If satisfactory operation cannot be achieved, consult your retailer before
proceeding.
Note:
Failure to follow the lighting procedures correctly can lead to a hazardous
condition.
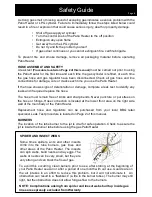
Controlling the flames
The knobs have four basic positions: Off, Pilot, High and Low. You can achieve any
flame height between low and high by rotating the Patio Heater control knob between
these positions.
Checking the flame
The Pilot flame can be watched and checked from the small round window with sliding lid
located at the bottom of the flame screen (to the left of right side of the controller).
Look through the Patio Heater mesh so that you can see the flames. They should be a
soft blue colour with yellow tips. If the flames are too yellow, there is too much gas and
not enough air. The flame will be inefficient and will give off too much smoke. If the flame
is too pale, there is too much air and not enough gas. If either of these situations occur
you may need to clean the burners
Note
:
‘Blowback’ is a situation where the flame burns inside the burner, towards the top.
It can be recognised by a sharp roaring sound coming from the burner. It is not
dangerous unless it is allowed to persist. If this occurs, simply turn the burner off, wait a
few seconds then relight.
Operating your Patio Heater
Page 18


