


14
FEATURES OF THE CONSOLE
The treadmill console offers a selection of features
designed to make your workouts more effective. When
you select the manual mode of the console, you can
change the speed and incline of the treadmill with the
touch of a button. As you exercise, the console will
display continuous exercise feedback. You can even
measure your heart rate using the built-in handgrip
heart rate monitor.
The console also features four preset weight-loss
workouts designed to help you to burn calories and
enhance your cardiovascular system while toning and
strengthening your muscles. Note: The weight-loss
workouts require the use of dumbbells. To purchase
additional dumbbells, call the telephone number
on the front cover of this manual.
In addition, the console offers four preset performance
workouts. Each workout controls the speed and incline
of the treadmill as it guides you through an effective
exercise session.
To turn on the power, see page 15. To use the man-
ual mode, see page 15. To use a preset workout, see
page 17. To use the information mode, see page 18.
To use the dumbbells, see page 18.
IMPORTANT: If there is a sheet of plastic on the
face of the console, remove the plastic. To prevent
damage to the walking platform, wear clean ath-
letic shoes while using the treadmill. The first time
the treadmill is used, observe the alignment of the
walking belt, and center the walking belt if neces-
sary (see page 22).
Note: The console can display speed and distance in
either miles or kilometers. To find which unit of mea-
surement is selected, see THE INFORMATION MODE
on page 18. For simplicity, all instructions in this man-
ual refer to miles.
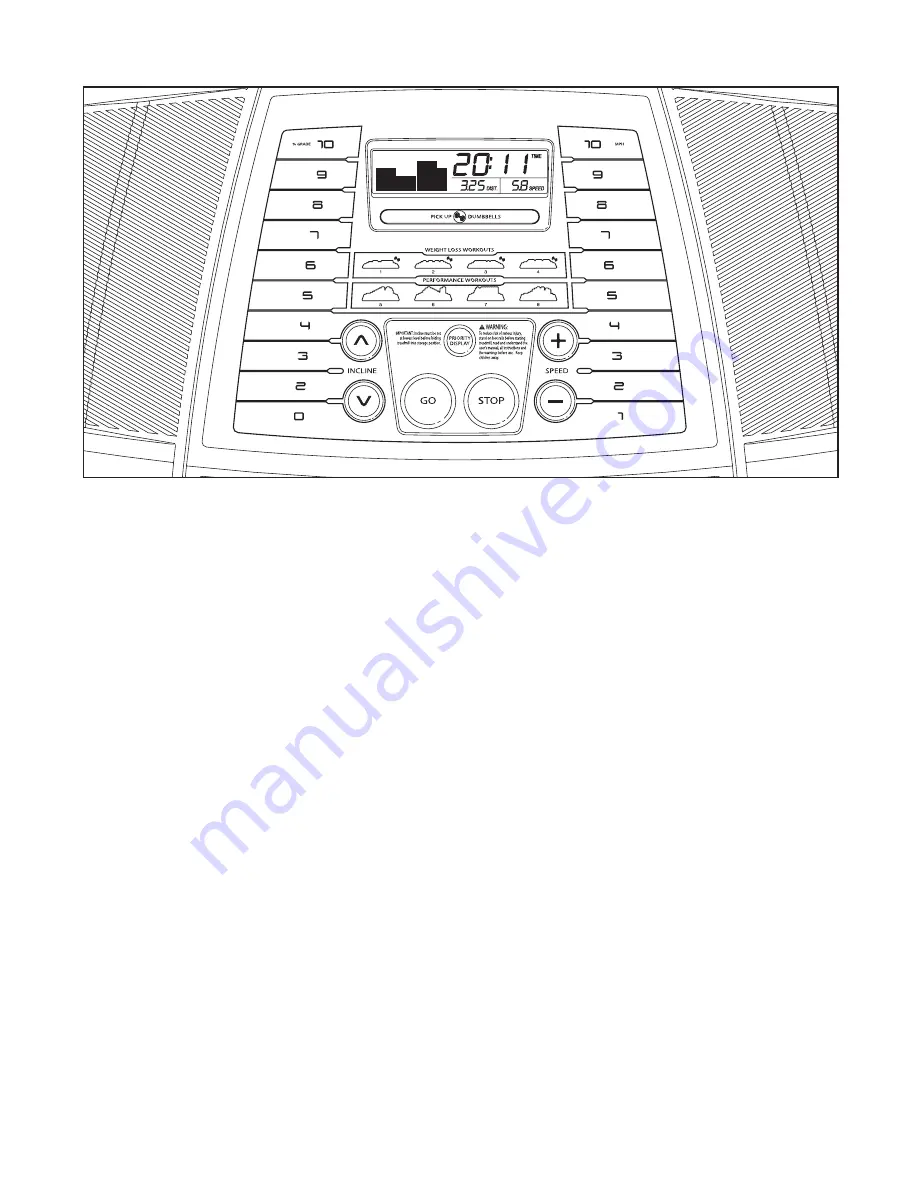
CONSOLE DIAGRAM
ETGG39610
(GGTL39610)


