

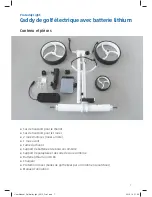
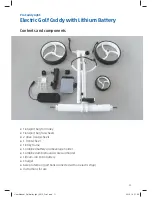


13
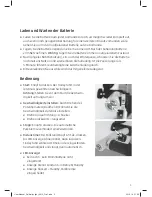
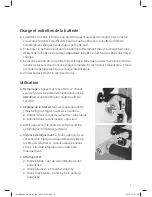
Charging and servicing the battery
■
Charge the battery fully as soon as possible after each round of golf, even if there is
still enough charge left in the battery for further use. Always begin a round of golf
with a fully charged battery.
■
The battery should be stored flat in a warm place. Once the battery is charged,
disconnect it from the power supply.
Important:
Always ensure the battery
is charged before storing it.
■
If the battery has not been used for a long period of time, for example over winter,
connect the battery to the power supply and charge it again. If it is not used for
more than 3 months, recharge it during this period.
■
Only use the charger supplied with the trolley.
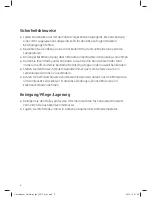
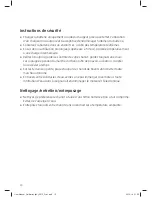
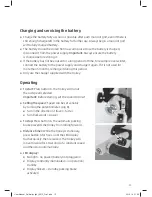
Operating
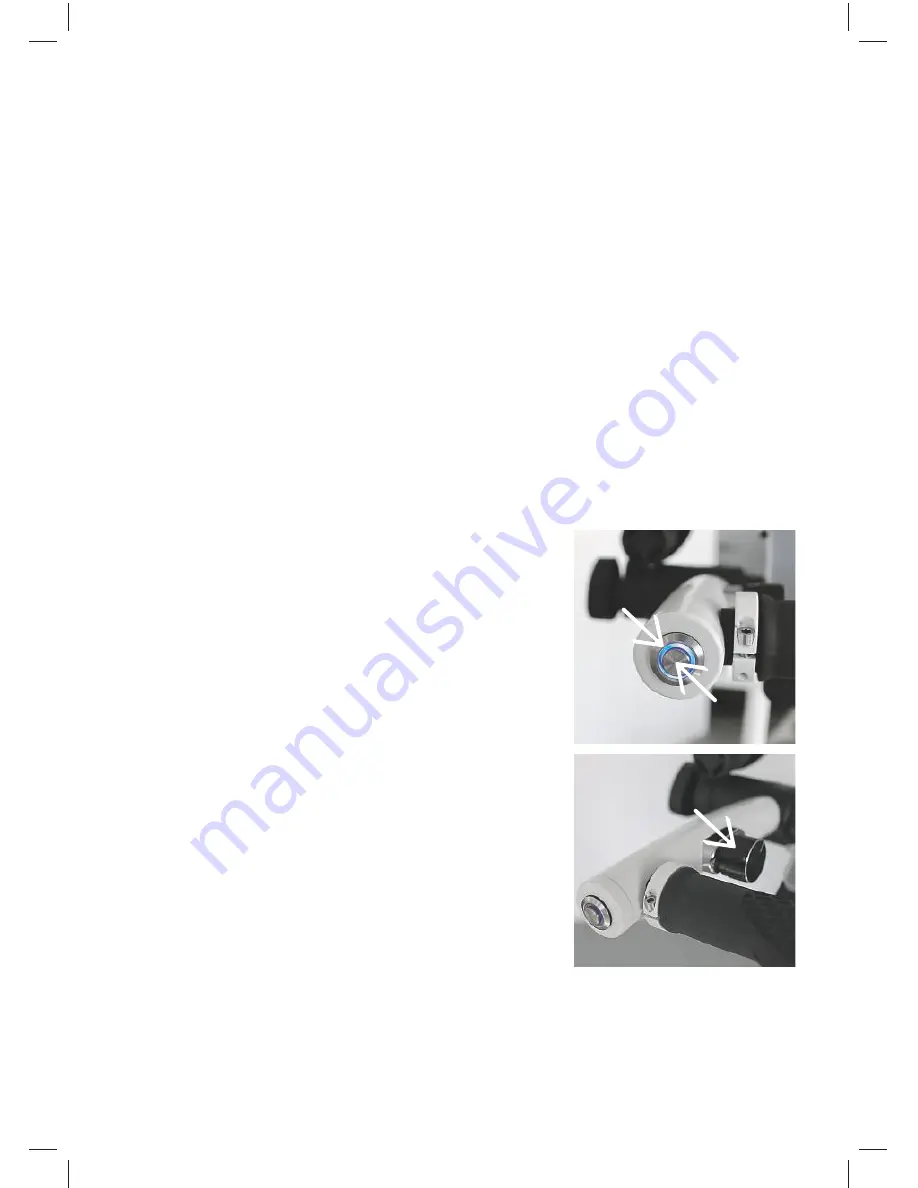
■
To start:
Press button A. The trolley will run at
the last speed selected.
Important:
Before starting, set the speed to slow!
■
Setting the speed:
Speed can be set variably
by turning the potentiometer (cog B).
■
Turn in the direction of travel = faster
■
Turn backwards = slower
■
To stop:
Press button A. The automatic parking
brake prevents the trolley from rolling forward.
■
Distance timer:
While the trolley is stationary,
press button A for 3 sec. until the LED display
flashes quickly, then release it. The trolley will
move forward for 10 seconds at a constant speed
and then stop automatically.
■
LED display:
■
No light = no power/battery not plugged in
■
Display constantly illuminated = in operation/
standby
■
Display flickers = standby, parking brake
activated
LED
A
B
User Manual_Golftrolley light_2015_Print.indd 13
23.12.14 21:58


