9
Output Selection and Resolution:
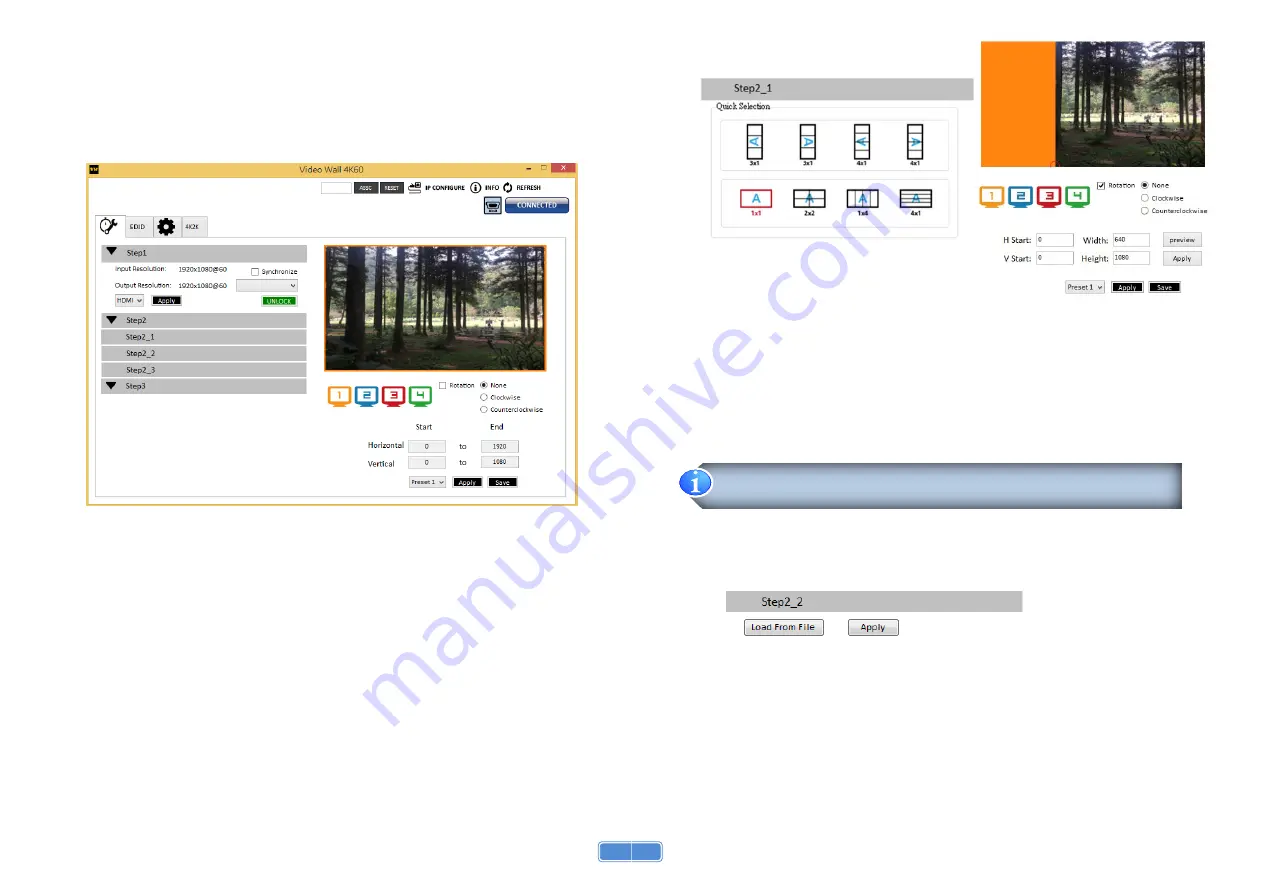
(1) Step 1: check input resolution and choose output resolution
Set the output resolution. You can choose the design display icon to select the output port and
setup resolution. When setting the different resolution, the coordinate of output will also be
changed. In this part, you also can select input source (HDMI or DisplayPort) or lock/unlock the
device.
*Note that when you select the
Synchronize
function, all windows needs to set up in the same
resolution, otherwise the output will be abnormal.
*If you lock the device, only factory reset function can work.
(2) Step 2: output setting
In here, it has three modes can set up the output TV resolution, position, size and split screen.
The details of different mode are described in step 2-1, 2-2 and 2-3.
*Note that when you want to change another mode, you need to back to the step 2 to change.
Quick
Selection
From
file
Custom
define
10
(3) Step 2-1: quick selection
If you choose the Quick Selection mode in step 2, this window will automatically pop up. In this
mode, you can select default screen split and rotate screen (rotate screen only at 1080p
resolution).
3x1: This mode will divide the screen into 3 parts and rotate the figure. The remaining part
shows the full screen.
4x1: The mode will divide the screen into 4 parts and rotate the figure.
When select the 3x1 or 4x1 mode, the picture in the right part of control interface will show a red
circle. You can slide this white circle to resize the output screen. In addition, you also can input
the number to adjust the coordinate.
(4) Step 2-2: configuration from file
You can load and read configuration from the existing file on your PC/laptop.
4k2k60 (YUV 4:4:4) only can be displayed as an 2x2 layout (1080p60 for each output)


