31
1
2
2.
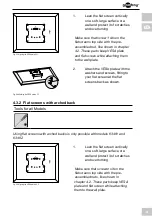
Set the flat screen vertically.
3.
Tighten the upper and lower nuts
clockwise onto the screws 1 and 2,
until they fit firmly.
Fig. 28: Fastening the flat screen
4.5 Adjusting the flat screen
Risk of injury by moving product parts
>>
>>
Do not hold limbs between shear parts
during use.
Mind the mobility of the product during
use. This may move away from the wall or
towards it and swivel sideways.
Risk of material damage by inappropria-
te ambient conditions
>> Keep enough space around product and to
the whole system to ensure proper ventilati-
on and mobility.
Tab. 23:Adjusting the flat screen
4.5.1 Adjusting the swivel arm
Tools
Allen key
6 mm
C
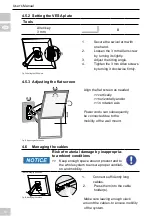
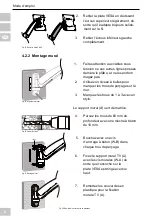
With the 6 mm Allen screw you can adjust the spring tension of the swivel arm.
A heavy flat screen requires a tighter adjustment than a slight.
1.
Secure the swivel arm with
one hand.
Variant 1
Turn the 6 mm Allen screw
counterclockwise
to
(+)
to
increase the spring preload,
eg. when the flat screen is
Fig. 29: Adjusting the swivel arm
constantly moving down itself.
Variant 2
Turn the 6 mm Allen screw clockwise to decrease the spring preload, eg.
when the flat screen is constantly moving up itself.

