background image

11

3. 

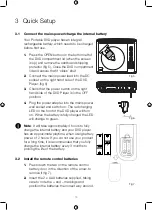
Replace the battery cover, making sure that it ‘clicks’ shut.

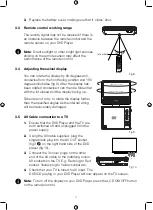
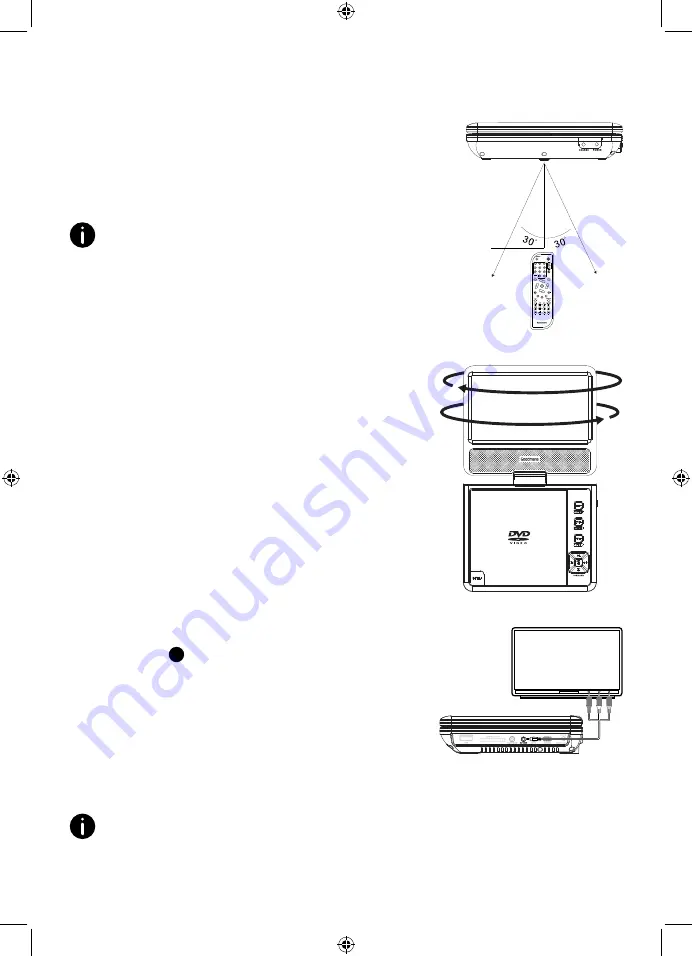
3.3  Remote control working range

The remote signal may not be received if there is 
an obstacle between the remote control and the 
remote sensor on your DVD Player. 

Note

: Direct sunlight or other bright light sources 

shining on the remote sensor may affect the 
performance of the remote control.

3.4  Adjusting the swivel display

You can rotate the display by 90 degrees anti-
clockwise from the front facing position and 180 
degrees clockwise (fig 9). After the display has 
been rotated clockwise it can then be folded flat 
with the lid closed and the display facing up. 

Take care not to try to rotate the display further 
than the specified angles as the internal wiring 
will be irrecoverably damaged. 

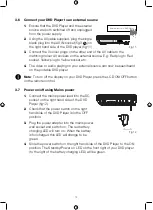
3.5  AV Cable connection to a TV 

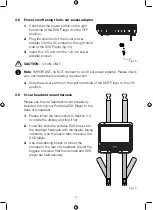
1. 

Ensure that the DVD Player and the TV are 
both switched off and unplugged from the 
power supply.

2. 

Using the AV cable supplied, plug the 
single black plug into the AV OUT socket 
(fig 3 

P

) on the right hand side of the DVD 

player (fig 10).

3. 

Connect the 3 colour plugs on the other 
end of the AV cable to the matching colour 
AV sockets on the TV. E.g: Red plug to Red 
socket, Yellow plug to Yellow socket etc.

4. 

Check that your TV is tuned to AV input. The 
DVD/CD playing in your DVD Player will now appear on the TV screen. 

Note

: To turn off the display on your DVD Player, press the LCD ON/OFF button 

on the remote control. 

Fig 8.  

16 Feet (5M)

180 degrees clockwise

90 degrees anti-clockwise

Fig 9.  

Fig 10.  

Summary of Contents for 355878

Page 1: ...7 PORTABLE DVD PLAYER USER MANUAL MODEL 355878...

Page 2: ...e 11 3 4 Adjusting the swivel display 11 3 5 AV Cable connection to a TV 11 3 6 Connect your DVD Player to an external source 12 3 7 Power on off using Mains power 12 3 9 In car headrest mount harness...

Page 3: ...18 6 2 TV system 19 6 3 Power Resume 19 6 4 Screensaver 19 6 5 TV Type 19 6 6 Password 20 6 7 Rating 20 6 8 Default 20 6 9 Language options 20 6 10 TFT display 21 6 11 Digital Setup 21 7 Technical Inf...

Page 4: ...oes and this one is no exception We hope you enjoy your new portable DVD Player 2 Your Portable DVD Player 2 1 In the Box Carefully remove your DVD Player from the packaging Inside the box you will fi...

Page 5: ...and DVD modes VOLUME SETUP button Press to increase the volume in steps Press and hold to enter exit the SYSTEM SETUP menu VOLUME STOP button Press to decrease the volume in steps Press and hold to S...

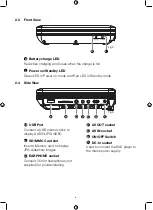
Page 6: ...K L 2 4 Side View Fig 3 USB Port Connect a USB memory stick to display AUDIO JPG VIDEO SD MMC Card slot Insert a Memory card to display JPG slideshow images EARPHONE socket Connect 3 5mm headphones n...

Page 7: ...7 2 5 Remote Control Fig 4 1 2 3 4 5 6 7 8 9 10 11 12 13 14 15 16 17 18 19 20 21 22 23 24 25 26 27 28 29...

Page 8: ...with multi angle options press repeatedly to select your required viewing angle ZOOM button During a movie or image display press repeatedly to zoom in or zoom out PROGRAM button Press to enter exit p...

Page 9: ...on and numeric buttons to select then press the OK button to start playing from that point When playing a CD press the GOTO button once the Track and Time selection menu will be displayed Use the dire...

Page 10: ...t and switch on The red charging LED on the front of the DVD player will turn on When the battery is fully charged the LED will change to green Note It will take approximately 4 hours to fully charge...

Page 11: ...to try to rotate the display further than the specified angles as the internal wiring will be irrecoverably damaged 3 5 AV Cable connection to a TV 1 Ensure that the DVD Player and the TV are both sw...

Page 12: ...ble DVD player Note To turn off the display on your DVD Player press the LCD ON OFF button on the remote control 3 7 Power on off using Mains power 1 Connect the mains power lead into the DC socket on...

Page 13: ...a connection 4 Slide the power switch on the right hand side of the DVD Player to the ON position 3 9 In car headrest mount harness Please use the car headrest mount accessory included to hold your Po...

Page 14: ...Player in Standby mode check that the switch on the right hand side of the DVD Player is in the ON position Press the POWER button on the DVD Remote control to turn the product on The LED on the front...

Page 15: ...volume Volume On the remote control press and release to decrease the volume in steps Press and hold to progressively decrease the volume 4 4 Mute Press the Mute button to turn off the sound Press th...

Page 16: ...n to activate the Zoom feature Repeatedly press the ZOOM button to cycle through and display the available options 2 When you are in Zoom mode you can use the up down left and right buttons to scroll...

Page 17: ...r using the numeric keypad 2 For chapter or track number 10 press the 0 10 button For chapters or tracks higher than 10 such as track 24 press the 10 button twice and then the 4 button 5 9 DVD USB SD...

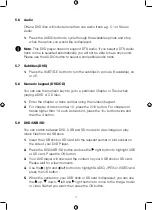
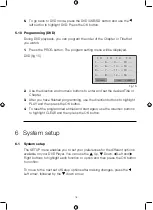
Page 18: ...ction buttons to highlight PLAY and then press the OK button 4 To reset the programmed entries and start again use the direction buttons to highlight CLEAR and then press the OK button 6 System setup...

Page 19: ...ume There are two options available ON or OFF If you set the Resume feature to ON and you play a disc that you have played before the disc will start from the place it was last stopped 6 4 Screensaver...

Page 20: ...ymbol If the lock symbol is shown enter the default password of 0000 or the new password you have set and press OK 2 Scroll down and highlight RATING Use the Right arrow to move to the Rating options...

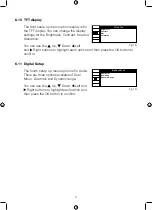
Page 21: ...ghlight each option and then press the OK button to confirm 6 11 Digital Setup The fourth setup up menu option is for Audio There are three options available of Dual Mono Downmix and Dynamic range You...

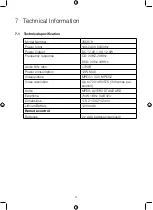
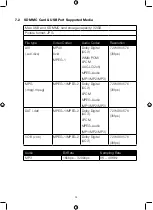
Page 22: ...Frequency response CD 20HZ 20KHz DVD 20Hz 44KHz Audio S N ratio 70dB Power consumption 12W MAX Video picture MPEG1 V2 0 MPEG2 Video resolution Up to 720 480 576 30 frames per second Audio MPEG LAYER2...

Page 23: ...EG 1 Dolby Digital AC3 WMA PCM LPCM AAC LC 2ch MPEG Audio MP1 MP2 MP3 720 480 576 30fps MPG mpg mpeg MPEG 1 MPEG 2 Dolby Digital AC3 LPCM MPEG Audio MP1 MP2 MP3 720 480 576 30fps DAT dat MPEG 1 MPEG 2...

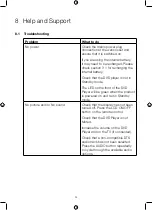
Page 24: ...ayer is not in Standby mode The LED on the front of the DVD Player will be green when the product is powered on and red in Standby mode No picture and or No sound Check that the display has not been t...

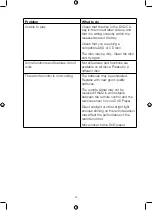
Page 25: ...features do not work Not all features and functions are available on all discs Please try a different disc The remote control is not working The batteries may be exhausted Replace with new good quali...

Page 26: ...indicates that when it is to be disposed of it must be treated as Waste Electrical Electronic Equipment WEEE Any WEEE marked waste products must not be mixed with general household waste but kept sep...

Page 27: ...This page is intentionally blank...

Page 28: ......

Reviews: