background image

3

REMOTE CONTROL

1

2

3

4

5

6

7
8

9

10
11
12
13
14

15

16

17

18

19

1.

SETUP button

2.

INFO. button

3.

PAUSE/UP button

4.

MENU button

5.

F.BWD/LEFT button

6.

PLAY/SEL. button

7.

PREVIOUS button

8.

STOP/DOWN button

9.

NUMERICAL buttons

10.

SUBTITLE button

11.

LCD button

12.

ANGLE button

13.

TITLE button

14.

AUDIO button

15.

F.FWD/RIGHT button

16.

NEXT button

17.

A-B REPEAT button

18.

REPEAT(1-ALL) button

19.

MUTE button

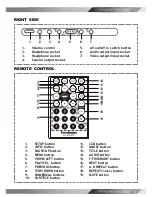
RIGHT SIDE

1.

Volume control

5.

AV out/AV in switch button

2.

Headphone socket

6.

Audio output/input socket

3.

Headphone socket

7.

Video output/input socket

4.

Coaxial output socket

1

2

3

4

5

6

7

Summary of Contents for GDVD100W2

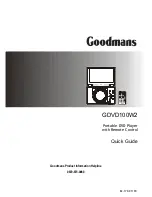
Page 1: ...82 179 01190 Goodmans Product Information Helpline 0870 873 0080 GDVD100W2 Portable DVD Player with Remote Control Quick Guide...

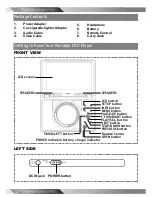
Page 2: ...RIGHT button PLAY SEL button NEXT button STOP DOWN button Remote Sensor PREVIOUS button F BWD LEFT button POWER indicator Battery charge indicator OPEN button 1 Power Adapter 2 Car cigarette lighter...

Page 3: ...button 9 NUMERICAL buttons 10 SUBTITLE button 11 LCD button 12 ANGLE button 13 TITLE button 14 AUDIO button 15 F FWD RIGHT button 16 NEXT button 17 A B REPEAT button 18 REPEAT 1 ALL button 19 MUTE bu...

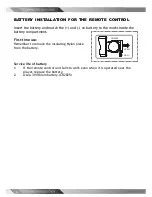
Page 4: ...the marks inside the battery compartment First time use Remember to remove the insulating Mylon piece from the battery Service life of battery 1 If the remote control unit fails to work even when it i...

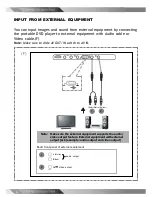
Page 5: ...it with earphones or connect it to external equipment B If you want to enjoy better listening and viewing quality you can connect the portable DVD player to external equipment such as a TV or an ampl...

Page 6: ...6 B White Red Yellow 1 2 Note Make sure the external equipment supports the audio video input feature TV Video input 2 Audio input White L R Red 1 Back front panel of external equipment...

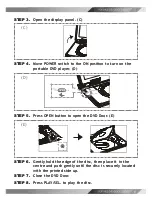
Page 7: ...n the portable DVD player D STEP 5 Press OPEN button to open the DVD Door E STEP 6 Gently hold the edge of the disc then place it in the centre and push gently until the disc is securely located with...

Page 8: ...h Audio cable or Video cable F Note Make sure to slide AV OUT IN switch to AV IN Note Make sure the external equipment supports the audio video output feature External equipment with external output j...

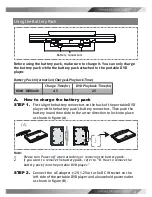
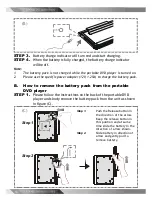
Page 9: ...tery in and then slide to the arrow direction to lock into place as shown in figure A Note 1 Please turn Power off when attaching or removing the battery pack 2 If you want to remove the battery pack...

Page 10: ...the battery pack B How to remove the battery pack from the portable DVD player STEP 1 Please follow the instructions on the back of the portable DVD player and slowly remove the battery pack from the...

Reviews: