6
1-1
Getting Started
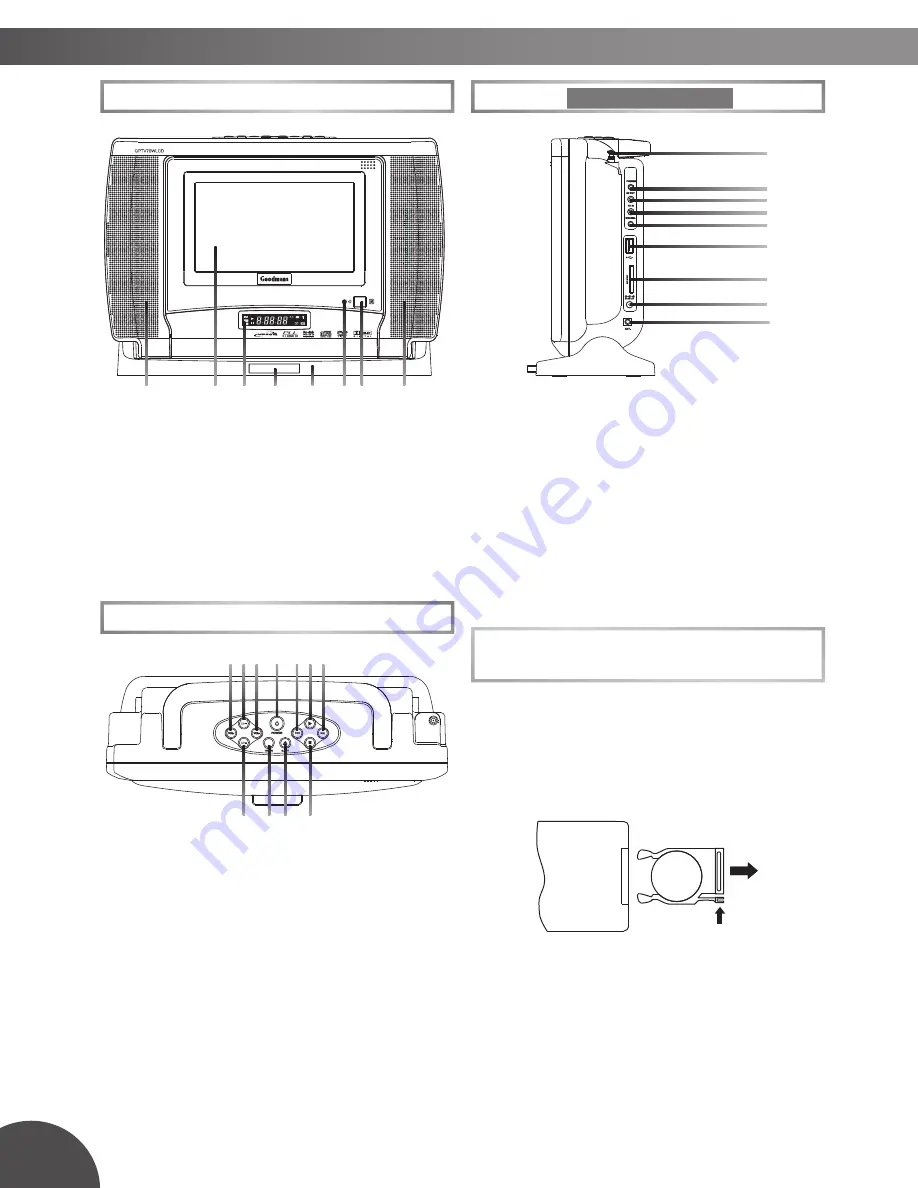
Front View
Front View
Front View
CD
MP3
MHZ
KHZ RDS
D
1.
LCD Screen
2.
Speakers
3.
Power Indicator
4.
Remote Sensor
5.
LED Display
6.
Remote Control Frame
7.
Base
1.
2.
3. 4. 5.6.7.
8. 9.10. 11.
1.
VOLUME(-) Button
2.
C) Button
3.
) Button
4.
POWER Button
5.
PREVIOUS Button
6.
PLAY Button
7.
NEXT Button
8.
CHANNEL(-) Button
9.
TV/DVD Button
10.
EJECT Button
11.
STOP Button
Top View
Top View
Top View
1.
2.
3.
4.
5.
6.
7.
8.
9.
1.
ANTENNA
2.
PHONES Socket
3.
AV OUT Socket
4.
AV IN Socket
5.
COAXIAL Output Socket
6.
USB Socket
7.
MMC/SD Card Slot
8.
DC IN Socket
9.
AERIAL IN (Ant.) Socket
+
CR2025
OPEN
PUSH
Right Side View
Right Side View
Battery Installation for the
Remote Control
Insert the battery and match the (+) and (-)
on battery to the marks inside the battery
compartment. Remove the insulating mylar
strip from the battery compartment before
the remote is used for the fi rst time.
Service life of battery:
1.
The battery normally lasts for about
one year although this depends on
how often and for what operations the
remote control is used.
2.
Use a 3V lithium battery. (No. CR2025
or equivalent)
REAR OF
REMOTE
CONTROL
3. 4.
7.
6.
5.
2.
2.
1.


